


3-36
Time Guardian Series
–
Setup Wizard
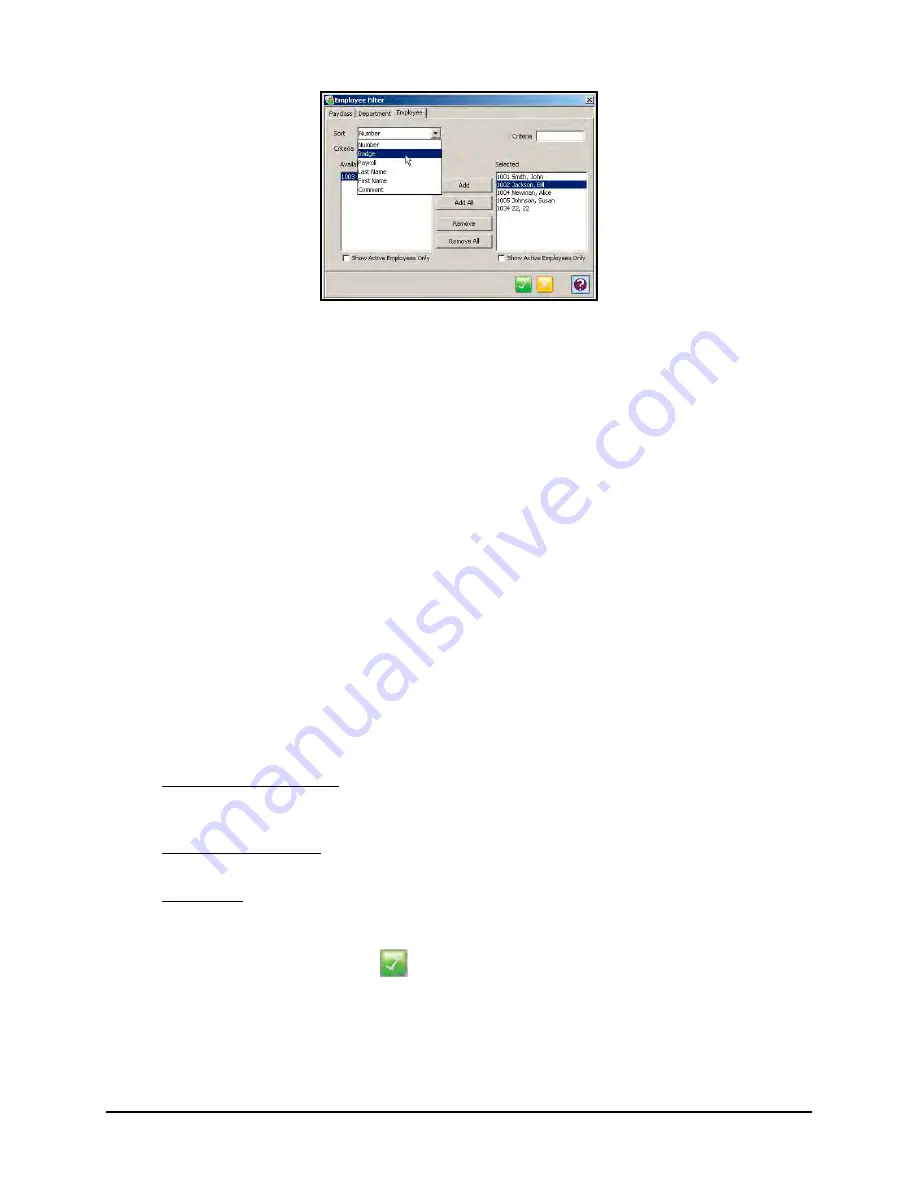
By default, all employees are selected. You can filter out employees by selecting:
•
To add an employee to the list, highlight the desired employee in the Available list and
click on the
Add
button. To add all employees to the list, click on the
Add All
button.
•
To remove an employee from the list, highlight the desired employee in the Selected list
and click on the
Remove
button. To remove all selected employees, click on the
Remove All
button.
•
Select the desired sort criteria from the dropdown list. Both the Available and Selected
lists of employees can be sorted by typing in the “Criteria” fields above each list.
•
Click on the Pay Class tab to utilize available Pay Classes as a filter for employee
reports and follow the same preceding procedure.
•
Click on a Department tab to utilize available departments as a filter for employee
reports and follow the same preceding procedure.
From Setup Wizard in
Step7: Employee Setup
, check the box to
Sync Employee(s) with
QuickBooks
and select the method of synchronization from the dropdown choices of; Import
from QuickBooks, Export to QuickBooks, or Both ways [bi-directional].
The synchronization will be performed depending on what was selected for the method of
synchronization in the
Wizard Employee Setup
for how to
Sync Employee(s) with
QuickBooks
with the choices of;
•
Import from QuickBooks – QuickBooks acts as the master. Suggested for scenario
where you already have the QuickBooks as the payroll software and the Time &
Attendance software is being added.
•
Export to QuickBooks - Suggested for scenario where you already have the Time &
Attendance software and QuickBooks is being added as the payroll software.
•
Both ways – Employee information will bi-directional transfer, but QuickBooks remains
as the master. If employee is changed in the Time & Attendance software, the employee
change must be updated in QuickBooks to maintain good synchronization.
When you have finished, click on the
button to save your settings.
Note:
This function can also be done with Global Apply command from the main employee list.
Create a new Employee and you will be required to enter a Name, etc. Click on the necessary
tabs to complete the entry of employee information. See the following paragraphs for
description. Also, see the Employee Administration chapter.
Summary of Contents for Time Guardian Series
Page 1: ...Time Guardian Series Installation and User Guide...
Page 3: ......
Page 4: ......
Page 8: ...iv Time Guardian Series Table of Contents Table of Contents This page intentionally left blank...
Page 14: ...1 6 Time Guardian Series Introduction This page intentionally left blank...
Page 90: ...4 8 Time Guardian Series How To Use This page intentionally left blank...
Page 124: ...6 18 Time Guardian Series Timecard Administration This page intentionally left blank...
Page 278: ...14 12 Time Guardian Series Advanced Rounding Module This page intentionally left blank...
Page 294: ...15 16 Time Guardian Series Advanced Labor Rate Module Example Showing...
Page 295: ...Time Guardian Series Advanced Labor Rate Module 15 17 Example Showing...
Page 296: ...15 18 Time Guardian Series Advanced Labor Rate Module Example Showing...
Page 297: ...Time Guardian Series Advanced Labor Rate Module 15 19 Example Showing...
Page 298: ...15 20 Time Guardian Series Advanced Labor Rate Module Example Showing...
Page 310: ...16 12 Time Guardian Series Access Control Module This page intentionally left blank...
Page 413: ......
Page 414: ...AMX 406700 Rev6 Copyright 2011 Amano Cincinnati Inc 6 11 www amano com time...


