3-50
Time Guardian Series
–
Setup Wizard
Before a Location can be created, a Bell Schedule and Terminal Validation must be set.
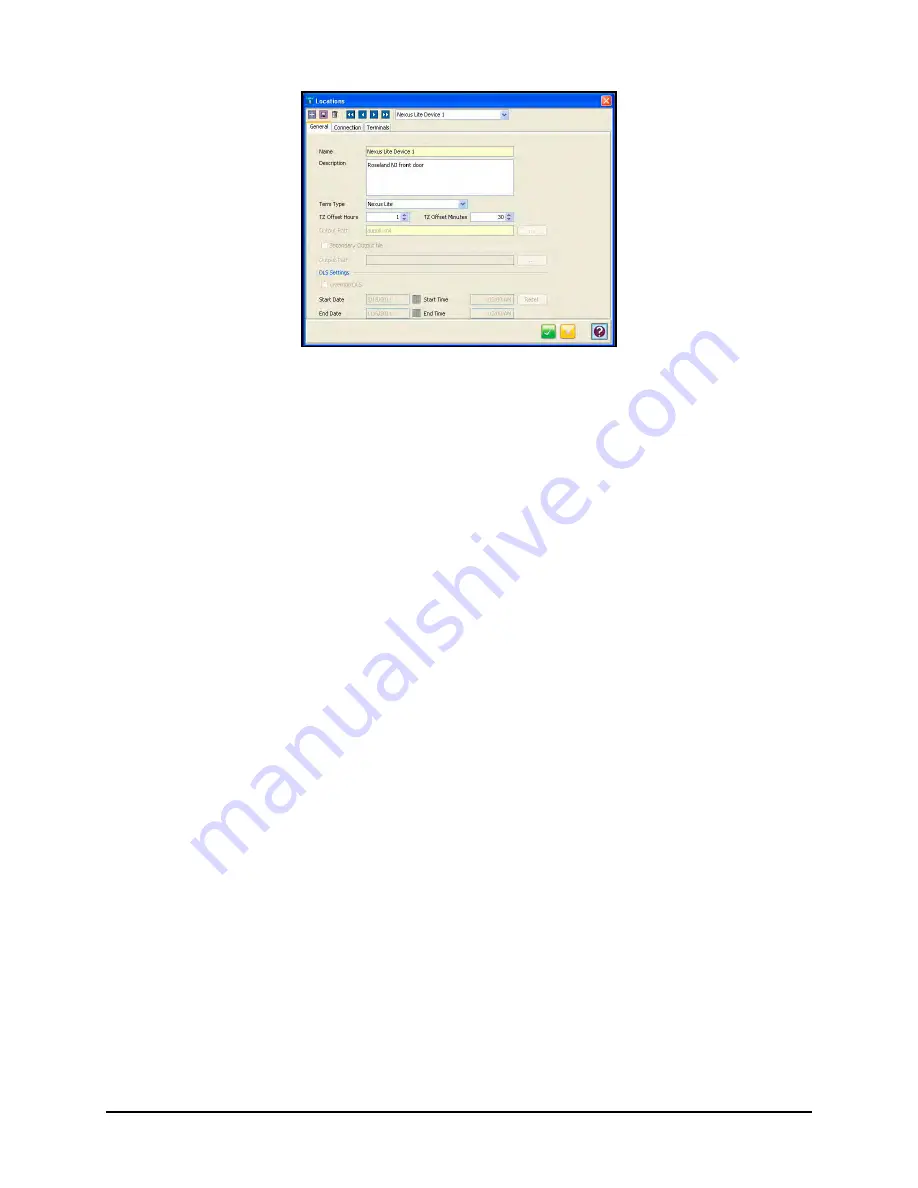
You must create a Location to communicate with your terminals. A Location enables the Time &
Attendance software to distinguish and interact with the desired terminal(s). Only one terminal
type can be used per Location. If you have more than one terminal type, you must have multiple
Locations.
The window will open on the
General Tab
with a Location Name. It is recommended to use the
default names for an MTX-15, FPT-40, or Nexus Lite terminal.
Note:
Three default terminal locations have been setup and they are called “
MTX-15 Default
”,
“
FPT-40 Default
” and “
Nexus Lite Default
”. Direct connection (serial) for either terminal
does not require any additional setup, while Ethernet does require the IP Address for
each terminal.
To create a new Location:
1. Create a new Location and you will be required to enter a unique
Name
[yellow required
field] that will be used to describe the area or site where a terminal or group of terminals is
located.
2. In the
Description
field, enter in a brief description of the Location.
3. In the
Term Type
field; select the type of terminal you are using at this location. The choices
are MTX-5, MTX-10, MTX-15, MTX-20, FPT-40, HandPunch 1000, 2000, 3000, 4000, or
Nexus Lite.
4. In the
TZ
(Time Zone)
Offset
field, select the time zone difference in Hours and Minutes (if
applicable) between the physical location of your PC and the terminals.
5. In the
Output Path
field, enter the path of the output XML file. If necessary, press the
Browse button to navigate to the location of the XML output file.
6. If necessary, check the “Secondary Output File” box, and In the Output Path field, enter the
path of the secondary output file. Press the Browse button to navigate to the location of the
secondary output file.
7. For
DLS
(Daylight Savings Time )
Settings
, enter the following:
•
Start Date
: The date that the DLS period will begin.
•
Start Time
: The time of the day of the Start Date that the DLS period will begin.
•
End Date
: The date that the DLS period will end.
Summary of Contents for Time Guardian Series
Page 1: ...Time Guardian Series Installation and User Guide...
Page 3: ......
Page 4: ......
Page 8: ...iv Time Guardian Series Table of Contents Table of Contents This page intentionally left blank...
Page 14: ...1 6 Time Guardian Series Introduction This page intentionally left blank...
Page 90: ...4 8 Time Guardian Series How To Use This page intentionally left blank...
Page 124: ...6 18 Time Guardian Series Timecard Administration This page intentionally left blank...
Page 278: ...14 12 Time Guardian Series Advanced Rounding Module This page intentionally left blank...
Page 294: ...15 16 Time Guardian Series Advanced Labor Rate Module Example Showing...
Page 295: ...Time Guardian Series Advanced Labor Rate Module 15 17 Example Showing...
Page 296: ...15 18 Time Guardian Series Advanced Labor Rate Module Example Showing...
Page 297: ...Time Guardian Series Advanced Labor Rate Module 15 19 Example Showing...
Page 298: ...15 20 Time Guardian Series Advanced Labor Rate Module Example Showing...
Page 310: ...16 12 Time Guardian Series Access Control Module This page intentionally left blank...
Page 413: ......
Page 414: ...AMX 406700 Rev6 Copyright 2011 Amano Cincinnati Inc 6 11 www amano com time...


