XS3800-28 User’s Guide
47
• Type: SFP+/DAC connection interface
WARNING! To avoid possible eye injury, do not look into an operating
fiber optic module’s connectors.
HANDLING! All transceivers are static sensitive. To prevent damage from
electrostatic discharge (ESD), it is recommended you attach an ESD
preventive wrist strap to your wrist and to a bare metal surface when
you install or remove a transceiver.
STORAGE! All modules are dust sensitive. When not in use, always keep
the dust plug on. Avoid getting dust and other contaminant into the
optical bores, as the optics do not work correctly when obstructed with
dust.
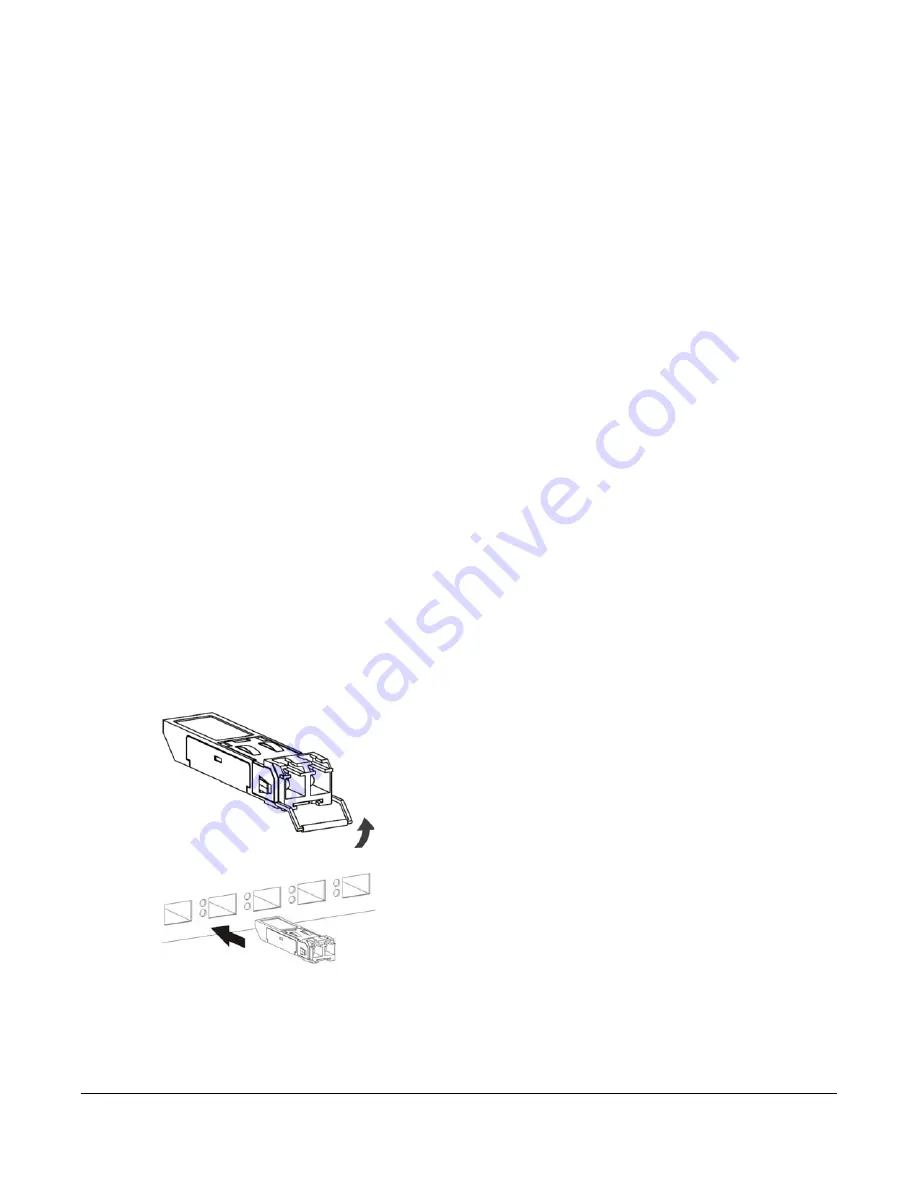
3.1.2.1 Transceiver Installation
Use the following steps to install a transceiver.
1
Attach an ESD preventive wrist strap to your wrist and to a bare metal surface.
2
Align the transceiver in front of the slot opening.
3
Make sure the latch is in the lock position (latch styles vary), then insert the transceiver into the slot with
the exposed section of PCB board facing down.
4
Press the transceiver firmly until it clicks into place.
5
The Switch automatically detects the installed transceiver. Check the LEDs to verify that it is functioning
properly.
6
Remove the dust plugs from the transceiver and cables (dust plug styles vary).
7
Identify the signal transmission direction of the
fi
ber optic cables and the transceiver. Insert the
fi
ber
optic cable into the transceiver.
Figure 13
Latch in the Lock Position
Figure 14
Transceiver Installation Example
Содержание XS3800-28
Страница 29: ...29 PART I User s Guide...
Страница 54: ...54 PART II Technical Reference...
Страница 88: ...Chapter 4 Web Configurator XS3800 28 User s Guide 88 Figure 51 Online Web Help...
Страница 123: ...Chapter 13 Neighbor XS3800 28 User s Guide 123 Figure 77 MONITOR Neighbor Neighbor Details Standalone Mode...
Страница 139: ...Chapter 17 System Information XS3800 28 User s Guide 139 Figure 90 MONITOR System Information Standalone Mode...
Страница 148: ...Chapter 20 Cloud Management XS3800 28 User s Guide 148 Figure 94 SYSTEM Cloud Management...
Страница 221: ...Chapter 33 Green Ethernet XS3800 28 User s Guide 221 Figure 149 PORT Green Ethernet Standalone Mode...
Страница 263: ...Chapter 36 OAM XS3800 28 User s Guide 263 Figure 182 PORT OAM OAM Status OAM Details...
Страница 334: ...Chapter 44 Multicast XS3800 28 User s Guide 334 Figure 248 MVR Group Configuration Example View...
Страница 406: ...Chapter 54 Spanning Tree Protocol XS3800 28 User s Guide 406 Figure 302 MSTP and Legacy RSTP Network Example...
Страница 420: ...Chapter 57 VLAN XS3800 28 User s Guide 420 Figure 315 SWITHCING VLAN VLAN Setup Static VLAN Add Edit Standalone Mode...
Страница 439: ...Chapter 57 VLAN XS3800 28 User s Guide 439 Figure 336 SWITCHING VLAN Port Based VLAN Setup Port Isolation...
Страница 540: ...Chapter 72 VRRP XS3800 28 User s Guide 540 Figure 434 VRRP Example 2 VRRP Status on Switch B...
Страница 581: ...Chapter 77 Policy Rule XS3800 28 User s Guide 581 Figure 456 Policy Example...
Страница 658: ...Chapter 86 Port Security XS3800 28 User s Guide 658 Figure 521 SECURITY Port Security Standalone Mode...
Страница 678: ...Chapter 87 MAINTENANCE XS3800 28 User s Guide 678 Figure 542 MAINTENANCE Configuration Configure Clone Stacking Mode...
Страница 680: ...Chapter 87 MAINTENANCE XS3800 28 User s Guide 680 Figure 543 MAINTENANCE Diagnostic Standalone Mode...
Страница 684: ...Chapter 87 MAINTENANCE XS3800 28 User s Guide 684 Figure 545 MAINTENANCE Firmware Upgrade Standalone Mode...
Страница 747: ...747 PART III Troubleshooting and Appendices...


