


Chapter 6 Tutorials
XS3800-28 User’s Guide
102
Note: You need to set up configurations on a DHCP server and TFTP server first to use auto
configuration.
Setting up a DHCP Server
1
Set up a dynamic IP addresses pool so the DHCP server will assign an IP address to the Switch in that
range.
2
Set up a TFTP server IP address, so the Switch will know where to load the auto configuration file.
3
Set up the filename of the auto configuration file, so the Switch will know which file to load when you
reboot the Switch.
• Enter the filename of an auto configuration file. The Switch will load this auto configuration file
when rebooting with DHCP option 60 disabled.
• If you want to load the auto configuration file with DHCP option 60 enabled and a Vendor Class
Identifier assigned when you reboot the Switch, follow the instruction below. Otherwise, skip this
step.
Enter the filename of an auto configuration file. Set up a Vendor Class Identifier. To have the
Switch load this auto configuration file, two conditions listed above must be met. Please refer to
the following steps to see how to set up a Vendor Class Identifier on the Switch.
Setting up a TFTP Server
1
Select a directory on the TFTP server.
2
Put the configuration files in that directory.
Setting Up the Switch
1
Open the Web Configurator. Go to the
MAINTENANCE
>
Configuration
>
Auto Configuration
screen.
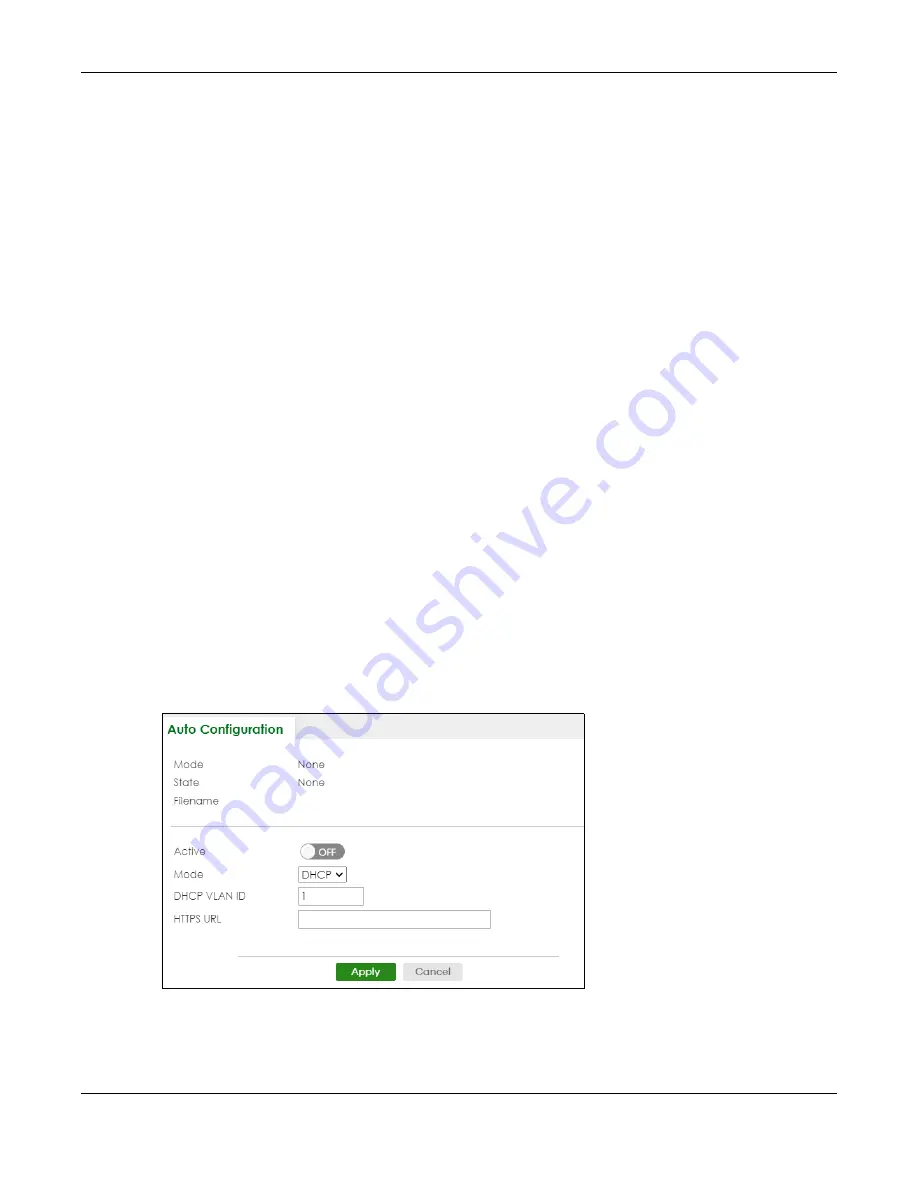
Figure 57
Tutorial: Auto Configuration Screen
2
Enable the switch button in the
Active
field to enable auto configuration. Select
DHCP
in the
Mode
field,
and enter the VLAN ID where the DHCP server belongs to in the
DHCP VLAN ID
field. Click
Apply
to save
your changes.
Содержание XS3800-28
Страница 29: ...29 PART I User s Guide...
Страница 54: ...54 PART II Technical Reference...
Страница 88: ...Chapter 4 Web Configurator XS3800 28 User s Guide 88 Figure 51 Online Web Help...
Страница 123: ...Chapter 13 Neighbor XS3800 28 User s Guide 123 Figure 77 MONITOR Neighbor Neighbor Details Standalone Mode...
Страница 139: ...Chapter 17 System Information XS3800 28 User s Guide 139 Figure 90 MONITOR System Information Standalone Mode...
Страница 148: ...Chapter 20 Cloud Management XS3800 28 User s Guide 148 Figure 94 SYSTEM Cloud Management...
Страница 221: ...Chapter 33 Green Ethernet XS3800 28 User s Guide 221 Figure 149 PORT Green Ethernet Standalone Mode...
Страница 263: ...Chapter 36 OAM XS3800 28 User s Guide 263 Figure 182 PORT OAM OAM Status OAM Details...
Страница 334: ...Chapter 44 Multicast XS3800 28 User s Guide 334 Figure 248 MVR Group Configuration Example View...
Страница 406: ...Chapter 54 Spanning Tree Protocol XS3800 28 User s Guide 406 Figure 302 MSTP and Legacy RSTP Network Example...
Страница 420: ...Chapter 57 VLAN XS3800 28 User s Guide 420 Figure 315 SWITHCING VLAN VLAN Setup Static VLAN Add Edit Standalone Mode...
Страница 439: ...Chapter 57 VLAN XS3800 28 User s Guide 439 Figure 336 SWITCHING VLAN Port Based VLAN Setup Port Isolation...
Страница 540: ...Chapter 72 VRRP XS3800 28 User s Guide 540 Figure 434 VRRP Example 2 VRRP Status on Switch B...
Страница 581: ...Chapter 77 Policy Rule XS3800 28 User s Guide 581 Figure 456 Policy Example...
Страница 658: ...Chapter 86 Port Security XS3800 28 User s Guide 658 Figure 521 SECURITY Port Security Standalone Mode...
Страница 678: ...Chapter 87 MAINTENANCE XS3800 28 User s Guide 678 Figure 542 MAINTENANCE Configuration Configure Clone Stacking Mode...
Страница 680: ...Chapter 87 MAINTENANCE XS3800 28 User s Guide 680 Figure 543 MAINTENANCE Diagnostic Standalone Mode...
Страница 684: ...Chapter 87 MAINTENANCE XS3800 28 User s Guide 684 Figure 545 MAINTENANCE Firmware Upgrade Standalone Mode...
Страница 747: ...747 PART III Troubleshooting and Appendices...