


Chapter 4: Connecting External Equipment (Optional)
55
Numbers
Components
RJ-45 ports, each of which is located on
either end of a DX sensor package.
RJ-12 port, which is reserved for future
use and now blocked.
Removable rackmount brackets.
Note: A DX2 sensor does not have the RJ-12 port and looks slightly
different from the above image. For details, refer to the Environmental
Sensors and Actuators Guide (or Online Help).
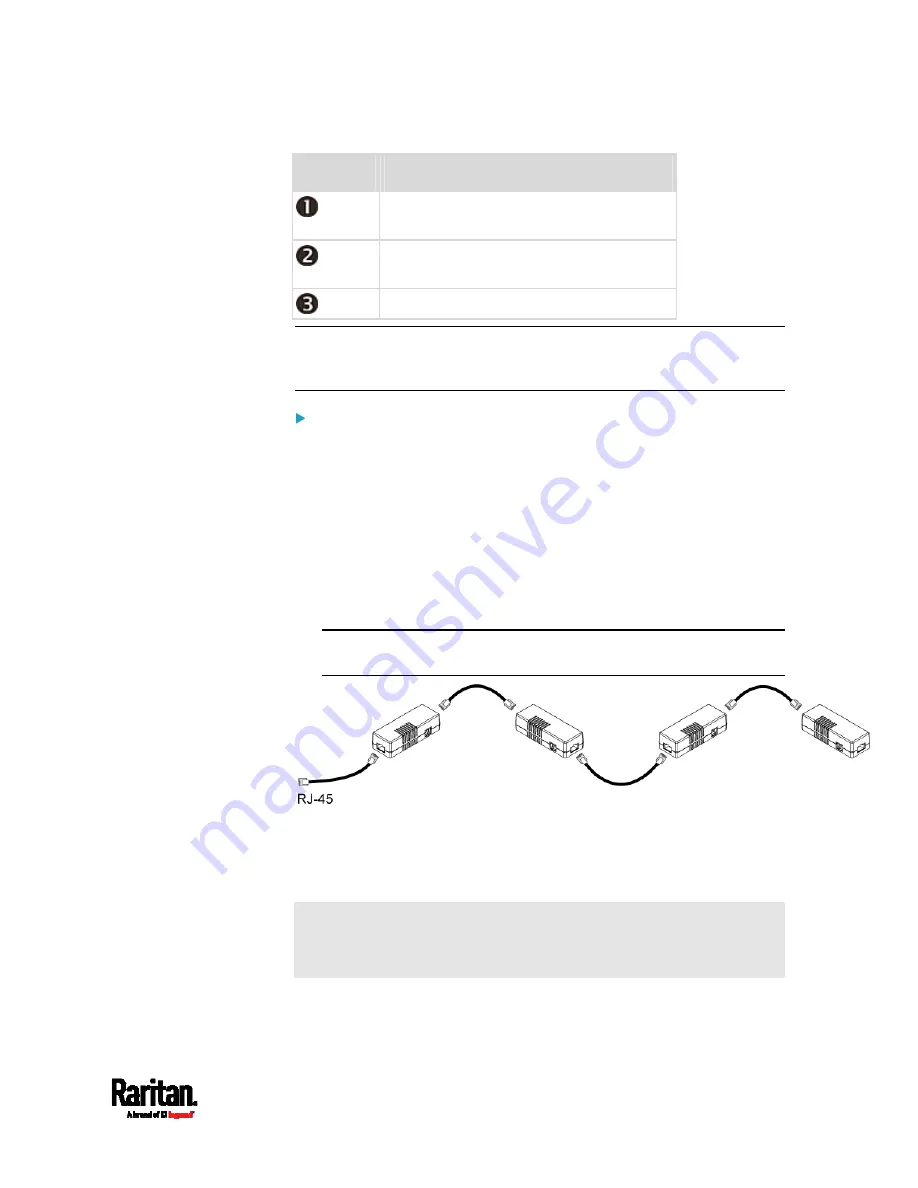
Connect DX sensor packages to the PX3TS:
1.
Connect a standard network patch cable (CAT5e or higher) to either
RJ-45 port on a DX sensor package.
2.
If you want to cascade DX packages, get an additional standard
network patch cable (CAT5e or higher) and then:
a.
Plug one end of the cable into the remaining RJ-45 port on the
prior DX package.
b.
Plug the other end into either RJ-45 port on an additional DX
package.
Repeat the same steps to cascade more DX packages.
Exception: You CANNOT cascade DX-PD2C5 sensor packages. A
PX3TS device supports only one DX-PD2C5.
3.
Connect the first DX sensor package to the PX3TS by plugging its
cable's connector into the RJ-45 SENSOR port of the PX3TS.
4.
If needed, connect a DPX2 sensor package to the end of the DX chain.
See
Connecting a DPX2 Sensor Package to DX
(on page 56).
Warning: The PX3TS does NOT support simultaneous connection of
both DX-PD2C5 and asset management strip(s) so do NOT connect
both of them at the same time.
Содержание PX3TS
Страница 5: ......
Страница 16: ...Contents xvii Index 807...
Страница 83: ...Chapter 4 Connecting External Equipment Optional 59 A DPX2 sensor package A DPX sensor package...
Страница 85: ...Chapter 4 Connecting External Equipment Optional 61...
Страница 754: ...Appendix H RADIUS Configuration Illustration 730 Note If your PX3TS uses PAP then select PAP...
Страница 755: ...Appendix H RADIUS Configuration Illustration 731 10 Select Standard to the left of the dialog and then click Add...
Страница 756: ...Appendix H RADIUS Configuration Illustration 732 11 Select Filter Id from the list of attributes and click Add...
Страница 759: ...Appendix H RADIUS Configuration Illustration 735 14 The new attribute is added Click OK...
Страница 760: ...Appendix H RADIUS Configuration Illustration 736 15 Click Next to continue...
Страница 792: ...Appendix I Additional PX3TS Information 768...
Страница 816: ...Appendix I Additional PX3TS Information 792 11 To print the currently selected topic click the Print this page icon...
Страница 820: ...Appendix J Integration 796 3 Click OK...


