


Chapter 6: Using the Web Interface
442
Identifying Snapshots Folders on Remote Servers
If saving snapshots onto a remote server, you can access those
snapshots via an appropriate third-party application, such as an FTP
client.
All snapshots are saved as JPEG and named according to the date and
time when saving the snapshots. Note that the date and time of the
filename are based on the time zone of the PX3TS device rather than that
of the computer or mobile device you are operating.
Tip: To check the time zone of your PX3TS device, choose Device Settings
> Date/Time. See
Setting the Date and Time
(on page 325).
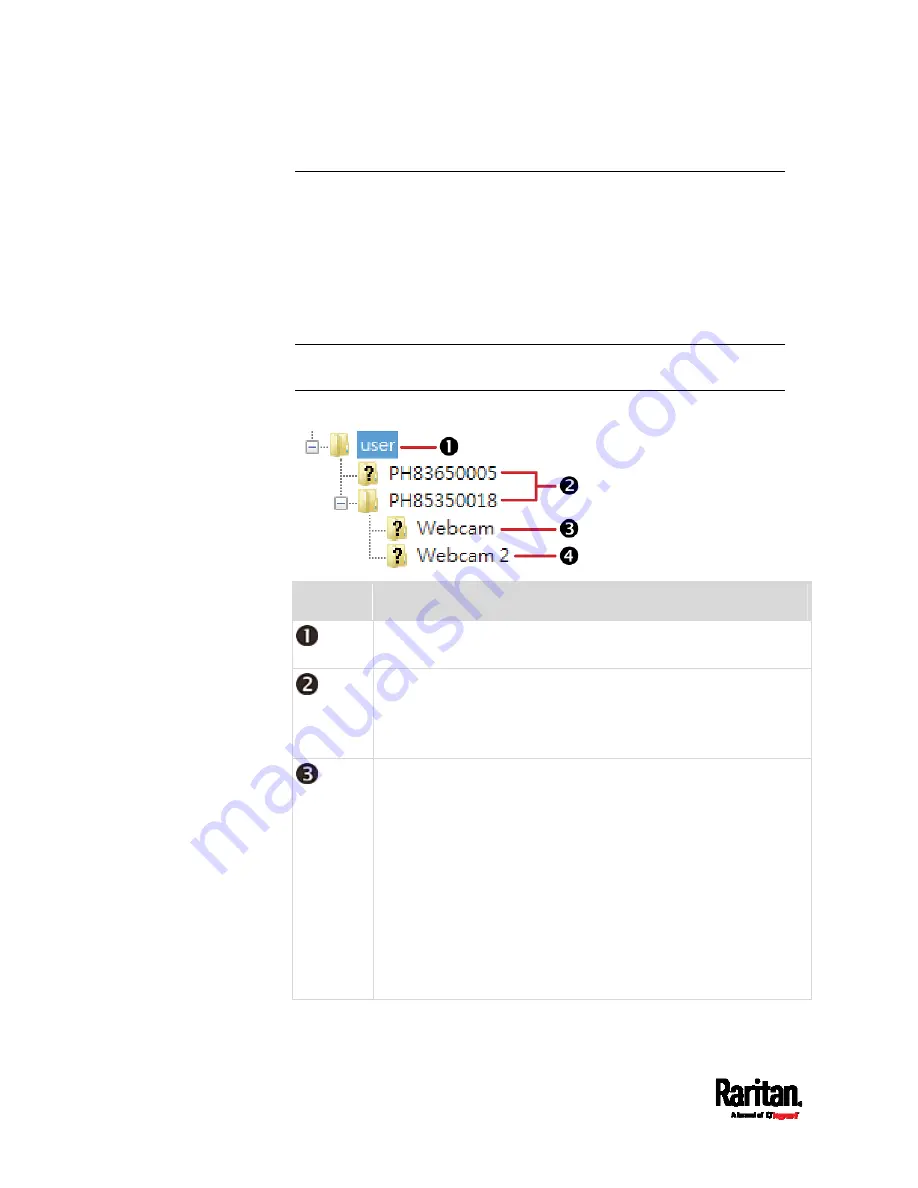
The structure of a snapshots folder looks similar to the diagram below.
Number
Folder name description
User-defined parent directory, whose name depends your server
settings, such as your FTP configuration.
Serial number of your PX3TS device where the webcam is
connected. For example,
PH85350018.
To find your PX3TS serial number, see
Device Information
(on page 405).
The name of the webcam that PX3TS detects first.
This is the folder where the snapshots captured by the first
webcam are stored.
The first webcam's default name is "Webcam".
You can customize the webcam's name, which will change
the snapshots folder's name.
See
Configuring Webcams and Viewing Live Images
(on
If the webcam's location is important, you can customize the
webcam's name based on its location when configuring
PX3TS to save snapshots onto a remote server.
Содержание PX3TS
Страница 5: ......
Страница 16: ...Contents xvii Index 807...
Страница 83: ...Chapter 4 Connecting External Equipment Optional 59 A DPX2 sensor package A DPX sensor package...
Страница 85: ...Chapter 4 Connecting External Equipment Optional 61...
Страница 754: ...Appendix H RADIUS Configuration Illustration 730 Note If your PX3TS uses PAP then select PAP...
Страница 755: ...Appendix H RADIUS Configuration Illustration 731 10 Select Standard to the left of the dialog and then click Add...
Страница 756: ...Appendix H RADIUS Configuration Illustration 732 11 Select Filter Id from the list of attributes and click Add...
Страница 759: ...Appendix H RADIUS Configuration Illustration 735 14 The new attribute is added Click OK...
Страница 760: ...Appendix H RADIUS Configuration Illustration 736 15 Click Next to continue...
Страница 792: ...Appendix I Additional PX3TS Information 768...
Страница 816: ...Appendix I Additional PX3TS Information 792 11 To print the currently selected topic click the Print this page icon...
Страница 820: ...Appendix J Integration 796 3 Click OK...


