CellAdvisor 5G User's Guide
77
To obtain a RSSI value, complete the following steps:
a
Press the
TRIGGER
button located on the antenna handle.
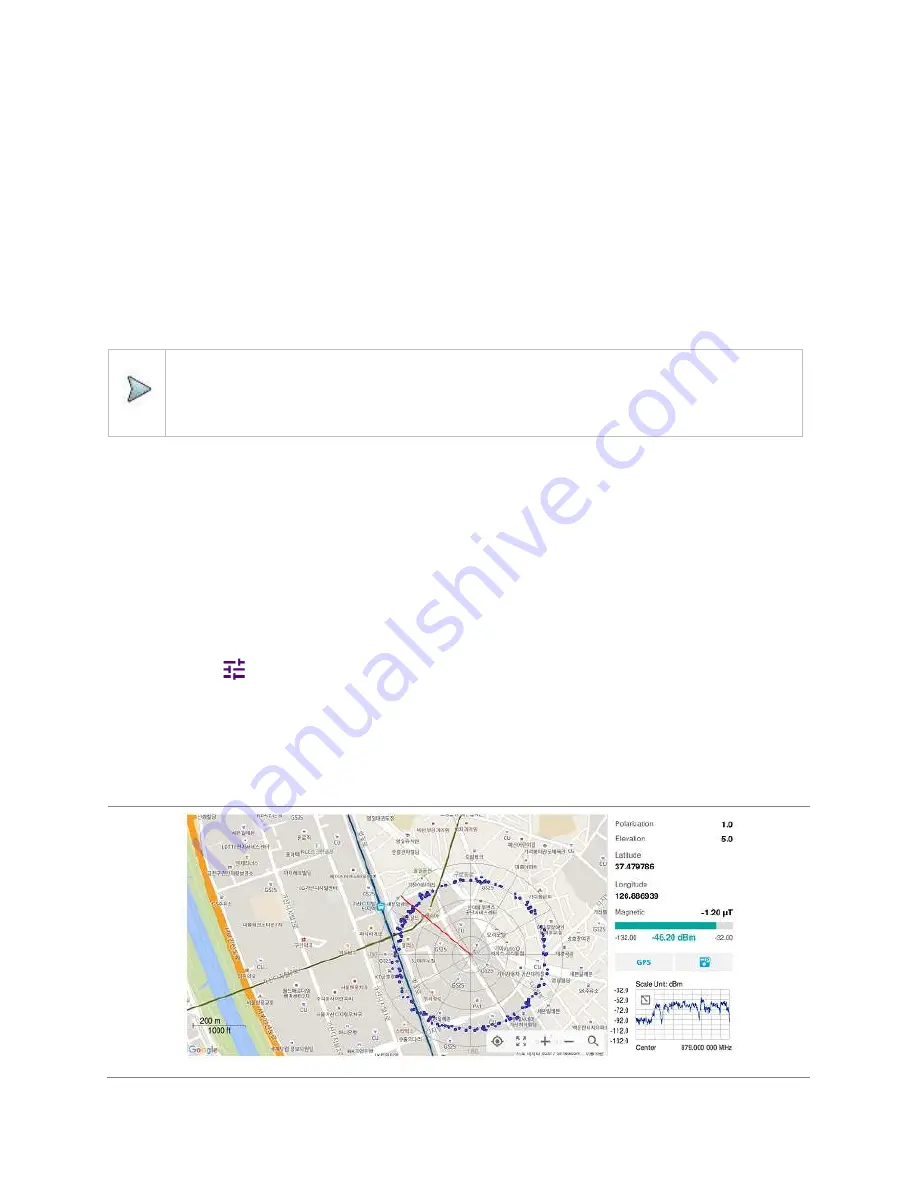
Every time you press the physical button on the handle, a beep is sounded and a power level of the received signal is
plotted as a blue dot on the radar chart. Depending on the strength of the measured value, you may hear different tones
of beeping.
b
With panning the antenna horizontally to vary the angle of the direction, repeat pressing the
TRIGGER
button to obtain at
least five points if you want to do the localization.
To obtain RSSI values continuously, complete the following steps:
a
Press and hold the
TRIGGER
button located on the antenna handle to start a continuous measurement.
b
Pan the antenna handle horizontally through the angle of 360 degrees you desire. A beep is sounded repeatedly to let
you know that the measurement is continuing, and measured values are plotted on the radar chart.
c
Release the
TRIGGER
button to stop the continuous measurement.
NOTE:
The maximum number you can plot on the radar chart is 2500 points both in the single and continuous
measurements. If your measurement reached to 500 points, you need to reset the measurement by pressing the
Localization soft key twice or performing the initialization of the AntennaAdvisor Handle. Concentric circles indicate
different levels of RSSI. You can use the AMP/SCALE hard to adjust the amplitude scale of the chart.
7
Tap
Setup
>
Screen Mode Full/Map
to change the display mode.
a
Map
: It displays measured points inside the base map image. If you are in the area outside the base map and continue
your measurement with the Trigger button, the instrument continues obtaining data even though the radar chart
disappears from the screen. You can view obtained data when you change this display option to Full.
b
Full
: It displays measured points without the base map image. In case that you made measurements in the area outside
the map image, selecting this option moves your measured data to the center of the display so that you can view the
result.
Localizing RSSI data
The Localization feature lets you view averaged and smoothed measurement data with a bold green line on the radar chart that
helps you determine the direction of the highest RSSI value. When you have five or more data points plotted on the radar chart, you
can perform this localization.
1
Tap the
Setup
(
) icon on the side bar.
2
Tap
Localization
.
All the measured points turn to green color and you can view the bold green line that indicates the possible direction of the
interference source.
3
Tap Localization again to clear all the data plots on the radar chart.
Radar chart
Summary of Contents for CellAdvisor 5G
Page 1: ...1 CellAdvisorTM 5G User s Guide ...
Page 2: ......
Page 18: ......
Page 22: ......
Page 110: ......
Page 146: ......
Page 182: ...Using LTE LTE A TDD Analyzer 170 CCDF measurement with LTE LTE A TDD Analyzer ...
Page 264: ......
Page 312: ......
Page 332: ......
Page 338: ......
Page 346: ...Using RFoCPRI Analyzer 334 Rx Settings with RFoCPRI Analyzer ...
Page 352: ......
Page 356: ...Appendix 344 ...
Page 357: ...345 ...
Page 358: ......


