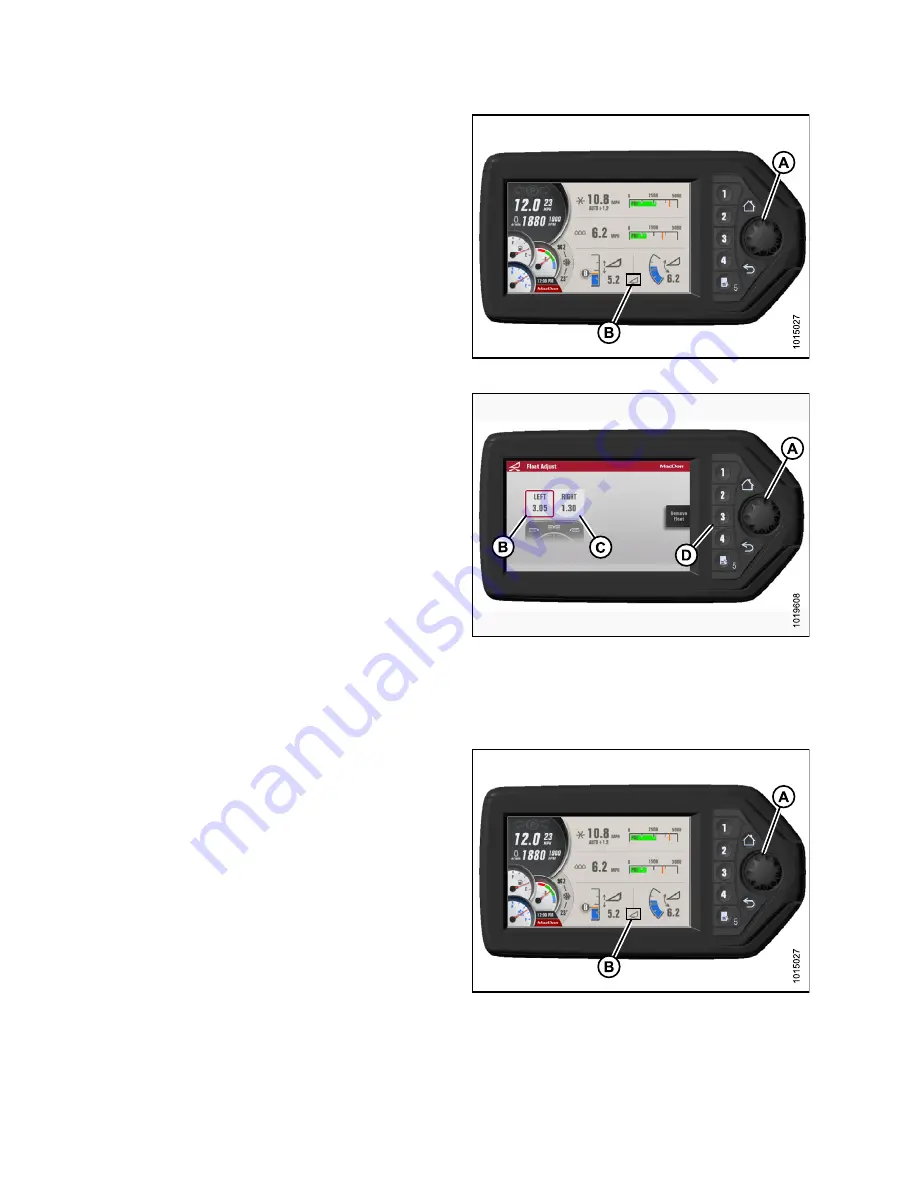
3. Press rotary scroll knob (A) on HPT to display the
QuickMenu system.
4. Rotate scroll knob (A) to highlight header
fl
oat icon (B)
and press scroll knob to select.
Figure 4.159: HPT Run Screen
5. Turn scroll knob (A) to highlight left (B) or right (C)
fl
oat
and press knob (A) to activate selection.
6. Turn scroll knob (A) to adjust
fl
oat setting and press
knob when
fi
nished.
IMPORTANT:
Float adjustments of
1.0
(out of 10) change the
header weight at the cutterbar by approximately
91 kg (200 lb.)
. Adjust
fl
oat in increments
0.05
to optimize
fi
eld performance.
7. Float is now set.
8. Use soft key 3 (D) to remove/resume
fl
oat and deck
position to previous setting for the attached header.
Figure 4.160: HPT Left/Right Float Settings
Removing and Restoring Float
Follow these steps to remove and restore the header
fl
oat settings:
1. Press rotary scroll knob (A) on Harvest Performance
Tracker (HPT) to display the QuickMenu system.
2. Rotate scroll knob (A) to highlight header
fl
oat
adjust (B) and press scroll knob to select.
Figure 4.161: Run Screen – HPT Display
214053
184
Revision A
Summary of Contents for M1240
Page 29: ...SAFETY 1 11 Safety Sign Locations Figure 1 31 Safety Sign Locations 214053 17 Revision A ...
Page 40: ......
Page 116: ......
Page 246: ......
Page 352: ...MAINTENANCE AND SERVICING Figure 5 175 Main Fuse Panel Decal MD 207815 214053 340 Revision A ...
Page 370: ......
Page 388: ......
Page 487: ......


