2
Kyocera 7135 Smartphone Reference Guide
What to do first
3.
Apply gentle pressure until the battery snaps into place. Then replace the battery cover by
inserting the top of the battery cover first. Apply gentle pressure to the bottom of the battery
cover to snap it closed.
Note:
In addition to the main battery you just installed, your phone has an internal backup battery. During
shipment, this backup battery may have become discharged. If so, the phone will not power up immediately
after you install the main battery. Just connect the phone to the power cable or place it in the cradle as
explained in the next section.
To charge the batteries
Both the batteries—the main battery you just installed and the internal backup battery—are
recharged when the phone is connected to power. You can charge the batteries using either the
power cable or the sync cradle.
To charge the batteries using the power cable
1.
Insert the small round plug of the power cable (a) into the
round port on the base of the phone. Plug the other end into
an AC power outlet.
The message “Phone is charging” appears on the screen. Before
your first use of the phone, wait until the message “Charging is
complete” appears. If the battery is completely drained, it may
take 2–3 hours to charge the first time.
2.
Unplug the phone from the power cable.
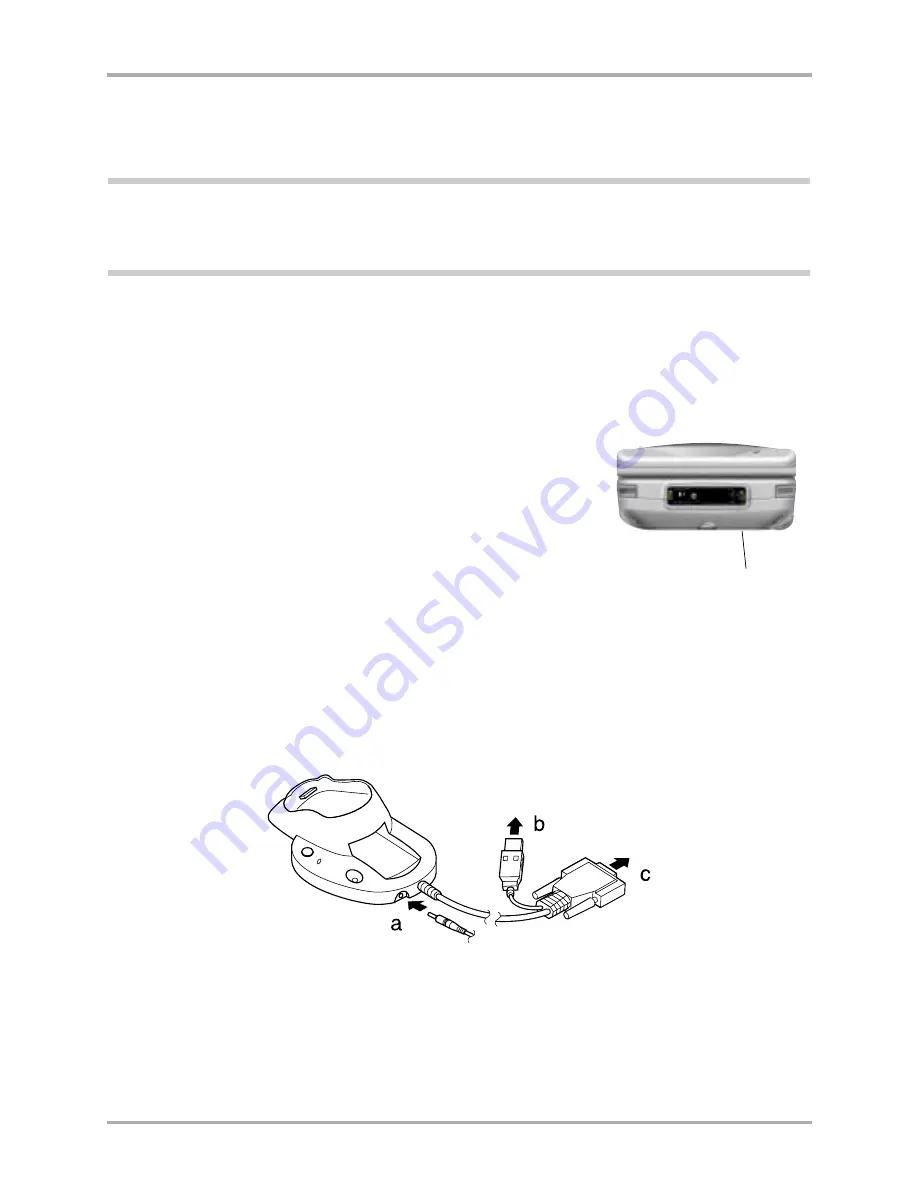
To charge the batteries in the sync cradle
1.
Place the sync cradle on a flat surface near your computer.
2.
Insert the small round plug of the power cable (a) into the base of the sync cradle. Plug the
cable’s other end into a power outlet.
3.
To attach the sync cradle to your computer:
■
Turn off the computer.
■
Plug the data cable from the sync cradle into a Universal Serial Bus serial communications
(COM) port (b) or the RS-232 serial port (c) on your computer. The sync cradle requires a
dedicated port; it cannot share a port with an internal modem, IR port, or other device.
■
Turn on the computer.
Insert small round
plug here
Summary of Contents for 7135 - Smartphone - CDMA2000 1X
Page 4: ......
Page 18: ...10 Kyocera 7135 Smartphone Reference Guide Where to go next ...
Page 52: ...44 Kyocera 7135 Smartphone Reference Guide Removing the Desktop software ...
Page 76: ...68 Kyocera 7135 Smartphone Reference Guide Beaming information ...
Page 88: ...80 Kyocera 7135 Smartphone Reference Guide Using Address Book menus ...
Page 96: ...88 Kyocera 7135 Smartphone Reference Guide Using the menus in Call History ...
Page 110: ...102 Kyocera 7135 Smartphone Reference Guide Using the Date Book menus ...
Page 120: ...112 Kyocera 7135 Smartphone Reference Guide Using Memo menus ...
Page 182: ...174 Kyocera 7135 Smartphone Reference Guide Setting ShortCuts preferences ...


