background image

7-40

Setup Mode

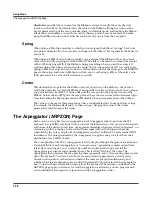
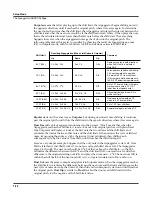
The Arpeggiator (ARPZON) Page

Latch

Latch determines how the Arpeggiator responds to notes when they are triggered.

Keys

 means that the Arpeggiator plays only while you are holding one or more keys down (or 

note triggers on). As you play different notes, they get added to the Arpeggiator, and as you 
release notes, they get taken out. If you play notes faster than the Arpeggiator’s current tempo, 
each subsequent note will be added to the arpeggiation at the next division of a beat. This can 
cause a lag between the time you play the note and the time you hear it in the arpeggiation.

In the next three modes, the Arpeggiator latches notes only when MIDI Controller 157 (Latch) 
sends a value of On (64 or higher). An easy way to experiment with these modes is to assign the 
Mod Wheel to send MIDI 157.

In 

Overplay

 mode, the Arpeggiator latches any notes that are being held when Latch turns on, 

and continues playing them, even after you let them go, until Latch turns off. Any notes that you 
play after Latch is already on do not get arpeggiated, even if they’re in the arpeggiation range.

Arpeg

 is similar: any notes held when Latch goes on are latched and arpeggiated, and keep 

going until Latch goes off. Any notes you play outside the arpeggiation range play normally. 
Notes that you play inside the arpeggiation range do not play normally; rather, if you hold them 
on, they become part of the arpeggiation. They drop out of the arpeggiation as soon as you 
release them.

Like Overplay and Arpeggiation, 

Add

 means that all notes being held when Latch goes on get 

latched, and keep playing until Latch goes off (even if you’ve released the notes). Any notes you 
play after Latch is already on also get latched.

Auto

 is independent of Latch; every note you play is automatically latched, and the Arpeggiator 

runs as long as you hold at least one arpeggiated note. As long as you keep holding on at least 
one note (it doesn’t have to be the same note the whole time), every note you play in the 
arpeggiation range gets latched.

Pedals

 is sort of a combination of Keys, Add, and Overplay modes. It relies on both Latch (MIDI 

157) and Latch2 (MIDI 158). If neither latch controller is on, notes will arpeggiate only while you 
are holding down keys (similar to Keys mode). If you activate Controller 158, the keys currently 
held down will latch, and any additional keys played while Controller 158 is on will also latch 
(similar to Add mode). When Controller 158 is off, any keys that are not currently held down 
will be removed from the arpeggiation. If you activate Controller 157, keys currently held down 
will latch, and any additional keys played while Controller 157 is on will play normally (similar 
to Overplay mode). This mode is called Pedals mode because you might want to assign 
Footswitch 1 to 

Latch

 (Controller 157) and Footswitch 2 to 

Latch2

 (Controller 158) to make the 

pedals function similarly to sustain and sostenuto pedals. Additionally, you could assign one 
Footswitch to 

SusLatch

 (Controller 160)—doing this makes the Footswitch act as a sustain pedal 

when Arp is off, and as a Latch pedal when Arp is on.

You can use the 

Panic

 soft button to stop arpeggiation at any time.

Order

This parameter determines the order in which the PC3 plays arpeggiated notes. 

Played

 causes 

them to play back in the chronological order in which you played and latched them. 

Upwards


means that notes play in ascending pitch order, regardless of their chronological order. 

Downwards

 means descending pitch order. 

UpDown

 causes notes to play from lowest pitch to 

highest, then from highest pitch to lowest, repeating the cycle until you stop the arpeggiation. 
The notes at the very top and very bottom only play once. 

UpDown Repeat

 is similar to 

UpDown

, except that the notes at the top and bottom play 

twice

 (repeat) when the Arpeggiator 

reverses direction.

Summary of Contents for PC3

Page 1: ...other products and brand names are trademarks or registered trademarks of their respective companies Product features and specifications are subject to changewithoutnotice You may legally print up to two 2 copies of this document for personal use Commercial use of any copies of this document is prohibited Young Chang Co retains ownership of all intellectual property represented by this document 910...

Page 2: ...ified service personnel when A The power supply cord or the plug has been damaged B Objects have fallen or liquid has been spilled into the product C The product has been exposed to rain D The product does not appear to be operating normally or exhibits a marked change in performance E The product has been dropped or the enclosure damaged 14 Do not attempt to service the product beyond that describ...

Page 3: ...Only use attachments accessories specified by the manufacturer 12 Use only with a cart stand tripod bracket or table specified by the manu facturer or sold with the apparatus When a cart is used use caution when moving the cart apparatus combination to avoid injury from tip over 13 Unplug this apparatus during lightning storms or when unused for long periods of time 14 CAUTION Danger of explosion if...

Page 4: ...Kurzweil Music Systems 19060 S Dominguez Hills Dr Rancho Dominguez California 90220 USA telephone 310 637 2000 fax 310 637 2025 http www kurzweilmusicsystems com Kurzweil Co LTD iPark Building 102 Floor 9 Jeongja Dong 9 Bundang Gu Soungnam Shi Gyeonggi Do 463 859 South Korea http www ycpiano co kr http www youngchang com ...

Page 5: ...r 1 5 Chapter 2 Startup Make Connections 2 1 Make Music 2 1 Startup the Details 2 2 Before You Start 2 2 Connecting the Power Cable Line Cord 2 2 Connecting Audio Cables 2 2 Connecting MIDI 2 3 Pedals 2 4 Breath 2 4 Ribbon 2 5 Switching On the Power 2 5 xD Cards 2 6 USB Port 2 6 Setting the Clock 2 6 PC3 Programs 2 7 Selecting Programs 2 7 Easy Audition 2 7 Program Mode Display 2 7 VAST Programs 2...

Page 6: ...resses 3 10 Intuitive Data Entry 3 11 Changing the Current Layer in Multi Layer Programs 3 11 Search 3 12 Quick Song Recording and Playback 3 12 Chapter 4 The Operating Modes What the Modes Are 4 1 Selecting Modes 4 1 Finding Square One 4 2 Using the Modes 4 2 Program Mode 4 2 Setup Mode 4 2 Quick Access Mode 4 3 Effects Mode 4 3 MIDI Mode 4 3 Master Mode 4 3 Song Mode 4 3 Storage Mode 4 3 Chapter...

Page 7: ...2 Algorithm Basics 6 13 Common DSP Control Parameters 6 14 Alt Input for Algorithms Cascade Mode 6 17 Dynamic VAST 6 18 The KEYMAP Page 6 19 Keymap 6 19 Transpose Xpose 6 19 Key Tracking KeyTrk 6 20 Velocity Tracking VelTrk 6 20 Method AltMethod 6 20 Stereo 6 20 Timbre Shift 6 21 Playback Mode 6 21 Alternative Controller AltControl 6 21 Alternative Switch AltControl and AltMethod 6 21 The LAYER Pa...

Page 8: ...6 34 Portamento 6 34 Portamento Rate 6 35 Attack Portamento 6 35 Globals 6 35 Output Gain Pan and Pan Mode 6 36 Demo Song 6 36 The LFO Page 6 36 Minimum Rate 6 37 Maximum Rate 6 37 Rate Control 6 38 LFO Shape 6 38 LFO Phase 6 38 The ASR Page 6 38 Trigger 6 39 Mode 6 39 Delay 6 39 Attack 6 39 Release 6 39 The Function FUN Page 6 40 The Amplitude Envelope AMPENV Page 6 41 Attack Segment Times 6 42 A...

Page 9: ... KB3 Programs 6 53 The Tone Wheels TONEWL Page 6 53 Upper Tone Wheel Keymap 6 53 Upper Volume Adjust 6 54 Number of Tone Wheels 6 54 Organ Map 6 54 Wheel Volume Map 6 54 Globals 6 54 Lower Transpose Upper Transpose 6 54 The Drawbars DRAWBR Page 6 55 Mode 6 55 Steps 6 55 Volume 6 55 Tune 6 55 The Set Drawbars SetDBR Soft Button 6 55 The PITCH Page 6 56 The AMP Page 6 56 The PERC1 Page 6 57 Percussi...

Page 10: ...Chapter 7 Setup Mode The Control Setup 7 2 Zone status LEDs in Setup Mode 7 3 Soloing a Zone 7 4 The Setup Editor 7 4 The Channel Program CH PROG Page 7 5 Program 7 5 Channel 7 6 MidiBank 7 6 MidiProg 7 6 Status 7 7 Destination 7 7 BankMode 7 7 EntryProgChg 7 8 Arpeggiator 7 8 The Key Velocity KEY VEL Page 7 9 Low Key LoKey High Key HiKey 7 10 Transpose 7 10 Note Map 7 10 Velocity Scale VelScale 7...

Page 11: ...h ARP SW Page 7 34 The SWITCH Page 7 35 The RIBBON Page 7 36 The Ribbon Configuration RIBCFG Page 7 37 Ribbon Configuration 7 37 Position Mode PosMode 7 37 Spring 7 38 Center 7 38 The Arpeggiator ARPZON Page 7 38 Active 7 39 Low Key LoKey and High Key HiKey 7 39 Latch 7 40 Order 7 40 Beats 7 41 Duration 7 41 Note Shift 7 41 Shift Limit 7 41 Limit Option 7 41 Glissando 7 43 Velocity 7 43 Simultaneous...

Page 12: ...ete 7 53 Dump 7 53 New Zone NewZn 7 53 Duplicate Zone DupZn 7 53 Import Zone ImpZn 7 53 Delete Zone DelZn 7 53 Chapter 8 Quick Access Mode Making Your Own QA Banks 8 2 Locking the Current QA Bank 8 2 The QA Editor 8 3 Chapter 9 Effects Basic Overview 9 1 Effects Stages and Routing 9 1 Processor Power Allocation 9 2 A Note on Modes 9 3 Aux Override 9 3 Master Effects 9 4 Effects Mode 9 5 The CHANFX...

Page 13: ... Enhancers 9 14 EQ Morpher 9 14 Compressors Expanders and Gates 9 14 Expansion 9 15 Multiband Compression 9 15 Gates 9 15 Super Gate 9 16 Chorus 9 16 Flanger 9 17 Quantize Flange 9 17 LaserVerb 9 17 Filters 9 18 Resonant Filter 9 18 Envelope Filter 9 18 Triggered Filter 9 18 LFO Filter 9 19 Distortion 9 19 Polydistort 9 20 Rotating Speakers 9 20 Vibrato Chorus 9 22 Tremolo and AutoPan 9 22 AutoPan...

Page 14: ... 5 Local Keyboard Channel LocalKbdCh 10 5 The Channels Page 10 5 Enable 10 6 Program 10 6 Pan 10 6 Volume 10 6 Program Lock Pan Lock Volume Lock 10 6 Program Change Formats 10 7 Extended Program Changes 10 7 QAccess 10 8 The Soft Buttons in MIDI Mode 10 10 Program Change PrgChg 10 10 Reset Channels RsetCh 10 10 Panic 10 10 Chapter 11 Master Mode Master Mode Page 1 11 1 Tune 11 2 Transpose 11 2 But...

Page 15: ...IN Page 12 1 Current Song CurSong 12 2 Tempo 12 2 Recording Track RecTrk 12 3 Program 12 3 Channel Chan 12 3 Volume Vol 12 3 Pan 12 4 Mode 12 4 Location Locat 12 4 Mode Indicators and x 12 4 Activity Indicators 12 4 Track Status Indicators 12 4 Track Channels 12 5 Soft Buttons on the MAIN Page 12 5 The Save Changes Dialog 12 6 Song Mode The BIG Page 12 7 Time In 12 7 Time Out 12 7 Song End 12 7 Lo...

Page 16: ...y and Stop Soft Buttons 12 13 The Done Soft Button 12 14 Song Mode The MISC Page 12 14 Control Chase 12 14 Quant 12 14 Grid 12 15 Swing 12 15 Release 12 15 Song Mode The STATS Page 12 15 The Song Editor 12 16 Song Editor The COMMON Page 12 16 Tempo 12 16 TimeSig 12 17 FX Track 12 17 DrumTrack 12 17 MidiDst 12 17 Soft Buttons on the COMMON Page 12 18 Song Editor The TRACK Page 12 18 Common Paramete...

Page 17: ...e Dialogue 13 4 The STORE Page 13 4 The Store Advanced Page 13 5 The LOAD Page 13 6 Loading Individual Objects 13 6 Loading Methods 13 8 The Utilities UTILS Page 13 10 Soft Buttons on the Utilities Page 13 10 Appendix A MIDI Implementation Chart Appendix B PC3 Bootloader Using the Bootloader Menu B 1 Updating PC3 Software and Objects B 2 PC3 Diagnostics B 3 System Reset B 3 File Utilities B 3 Rest...

Page 18: ...TOC xiv Delays D 14 Chorus D 16 Flange D 17 Phaser D 17 Trem Panner Spatial D 18 Rotary D 18 Distortion D 19 Dynamics D 20 EQ Filters D 20 Chorus Combi D 22 Flange Combi D 23 ...

Page 19: ...an such as a Hammond B3 And the PC3 s 24 dedicated sound select buttons along with its Quick Access banks will let you instantly choose and change sounds whenever you like If you ve used other Kurzweil gear you ll have no trouble getting up and running quickly Bear in mind however that the PC3 s beauties are more than skin deep you ll want to read this manual as well as the materials at the www ku...

Page 20: ... played on each MIDI channel There s an on board digital effects processor providing multiple simultaneous effects including real time effects control internally or via MIDI In fact the PC3 offers more effects processing power than Kurzweil s much lauded KSP8 studio effects processor In addition to the standard stereo audio output pair there are two additional balanced analog outputs as well as a ...

Page 21: ...de Mode Dynamic V A S T allows you to wire your own algorithms combining different DSP functions in any order you like including parallel and serial configurations Cascade Mode lets you route any layer of a program into the DSP of any other layer Any of the 32 layers of a program can go into any other layer When you re ready to jump in and start creating programs turn to Chapter 6 KB3 Tone Wheel Em...

Page 22: ...on t have all of these components please call your Kurzweil Young Chang dealer You may also want to purchase an xD memory card for storage 32MB 256MB will work Type S or no type stated formatted FAT16 and an xD card interface for your computer if one is not built in Boot Loader When you need to update the PC3 s software or run diagnostic tests you ll use the Boot Loader To bring up the Boot Loader...

Page 23: ...Your Kurzweil dealer stocks the following optional pedals FS 1 Standard box shaped switch pedal KFP 1 Single piano style switch pedal KFP 2M Double piano style switch pedal unit CC 1 Continuous pedal Ribbon Controller There s a dedicated modular jack like a telephone jack on the rear panel of the PC3 for connecting this 600 mm 24 inch ribbon controller You can configure the PC3 to use the ribbon as...

Page 24: ...1 6 Introduction Options ...

Page 25: ...evel 3 Connect the power cable 4 Make sure your sound system is at a safe volume level Also make sure that the PC3 s MASTER VOLUME slider on the far left side of the front panel is all the way down 5 Plug in a pair of stereo headphones or run standard 1 4 inch audio cables from your amplifier or mixer to the MIX audio outputs on the PC3 Use the Main Left out for mono Balanced TRS or Stereo cables a...

Page 26: ...e right plug it into a grounded outlet If your power source does not have the standard three hole outlet you should take the time to install a proper grounding system This will reduce the risk of a shock Connecting Audio Cables Analog After you ve turned down the level on your sound system connect the PC3 s analog audio outputs to your sound system using a pair of stereo or mono audio cables Mono ...

Page 27: ...m the MIDI Out port of another MIDI controller to the MIDI In port of the PC3 There are all sorts of possible configurations including additional synths personal computers MIDI effects processors and MIDI patch bays Depending on your system you may want to use the PC3 s MIDI Thru port to pass MIDI information from a MIDI controller to the PC3 and on to the next device in your system You can also co...

Page 28: ...ou might cause it to work backward The pedals are independently programmable within each zone of every setup Here are the default settings for the five pedals you can use with the PC3 Switch Pedal 1 Controller 64 Sustain Switch Pedal 2 Controller 66 Sostenuto Switch Pedal 3 Controller 67 Soft Continuous Control Pedal 1 Controller 11 Expression Volume Continuous Control Pedal 2 Controller 4 Foot Ped...

Page 29: ...cts When you configure it to have three sections each section sends its highest values at the end closest to the cable Caution The modular jack is designed for connection to the Kurzweil Ribbon Controller option only Don t plug any other modular plugs into the Ribbon jack Switching On the Power The PC3 s power switch is on the rear panel adjacent to the power cable connection When you power up the ...

Page 30: ...Type B USB port is only intended for connection to a USB Type A port In USB Storage mode a KurzweilPC3 virtual drive will appear on your computer desktop One important thing to know here is that this is a virtual drive You can save to this drive from the PC3 but you must immediately transfer that file to your desktop or other folder You must copy data from the PC3 virtual drive to your computer s d...

Page 31: ...he Plus or Minus button under the Alpha Wheel or the cursor buttons the arrow buttons to the right of the display The PC3 has various settings for responding to MIDI Program Change commands from external sources These are explained in Chapter 10 so we won t go into them here You should be able to change programs by sending Program Change commands from your MIDI controller Easy Audition Any time yo...

Page 32: ... All Controllers Off message both to the PC3 and over all 16 MIDI channels You won t need it often but it s nice to have VAST Programs A normal VAST program is what most of the factory programs are The info box contains details about the different layers in each program usually indicating the keymap used in each layer The line under the keymap name indicates the layer s keyboard range In this case...

Page 33: ...lect programs and setups is to use Quick Access mode where you select a Quick Access bank from a list of factory preset or user programmed banks Each bank contains ten memory slots or entries where you can store any combination of programs or setups While you re in Quick Access mode you can select any program or setup in the bank with buttons 0 through 9 or the cursor keys The PC3 comes with a few...

Page 34: ...em and objects programs setup etc using the boot loader to install upgrades into flash ROM You can perform the upgrade through USB or by transferring from an xD card At Kurzweil and Young Chang we have a long history of support for our instruments the K250 K1000 K2000 K2500 and K2600 have been repeatedly enhanced and these improvements have always been made available to instrument owners in the for...

Page 35: ...Select and play programs and modify them with the Program Editor Setup mode Select and play setups 16 keyboard zones with independent MIDI channel program and control assignments and modify them with the Setup Editor Quick Access mode Select from a list of preset banks each containing a list of ten programs and or setups that can be viewed in the display for easy selection Modify the preset banks ...

Page 36: ...e Buttons When you press a mode button its LED lights up to indicate that the mode has been selected If pressing a mode button does not light its LED press the Exit button one or more times then try again Additional labeling for each mode button indicates special functions that relate to some of the PC3 s editors Bank Buttons The Bank buttons situated in the top left corner of the PC3 s front pane...

Page 37: ...der past the current value for its selected function before slider movement will have any effect Most VAST programs use the sliders for these functions A Data Filter frequency Brightness B MIDI 13 Filter resonance Tremolo rate control C MIDI 22 Layer volume Envelope control Lo EQ D MIDI 23 Layer volume Envelope control Hi EQ E MIDI 24 Layer volume for thumps and release F MIDI 25 FX control 1 G MI...

Page 38: ...gory Strings button If you press the Category Organ button again you will be returned to program 3 in the Organ category In this way each category can have a favorite program You can make program selections within each category ahead of time This way you ll be able to access the program you want in any category simply by pressing appropriate category button Important things to remember about your ...

Page 39: ...ill raise and lower pitch by a whole step although some programs use the pitch wheel to lower pitch by as much as an octave The Pitch Wheel has a spring so that it will snap back to place i e back to the original pitch when you release it The Mod Wheel performs a variety of functions Different programs may use it for filter sweeps tremolo vibrato wah or layer volume The Arp button turns on and off ...

Page 40: ...hat mode with one of the mode buttons Within each mode and its editor s the various pages are selected with the navigation buttons There are many pages but there are a few features common to each page The illustration below shows the entry level page for Program mode The Top Line On the top line of most pages there s a reminder of which mode you re in and which page you re on Many pages display ad...

Page 41: ...their values with the cursor You can change the highlighted value with any of the data entry methods described in the data entry section below The Chan Layer Buttons To the left of the display are two buttons labeled Chan Layer Their function depends on the current mode In Program mode for example they shift through the MIDI channels showing the program assigned to each channel This changes the MI...

Page 42: ...on will take you to that page For example in the Program Editor on the PITCH page you might see LFO1 assigned as the value for Pitch Control Source 1 If you select this parameter the cursor will highlight its value LFO1 in this case then press the Edit button you ll jump to the page where you can edit the parameters of LFO1 Naturally you can find every page in the current editor by using the soft b...

Page 43: ...e button on the alphanumeric pad This button is used primarily for entering negative numeric values and switching from uppercase to lowercase letters and vice versa The Alphanumeric Pad As its name implies this set of 14 buttons lets you enter numeric values and to enter names one character at a time Depending on where you are the PC3 automatically enters letters or numerals as appropriate you don...

Page 44: ... all tracks on any TRACK page in Song Editor Storage mode Left Right cursor buttons Select all items in a list Move cursor to end of name in naming dialog up down cursor buttons Clear all selections in a list Move cursor to beginning of name in naming dialog Program Editor Chan Layer Select Layer 1 Any Editor Plus Minus Scroll through the currently selected parameter s list of values in regular or...

Page 45: ... use the keyboard to choose control sources since most key numbers correspond to a value on the control source list If you have a certain control source that you use over and over for example LFO1 this can be the quickest way to enter its value To do this highlight a parameter which uses a value from the control source list hold down Enter then strike the key corresponding to the control source yo...

Page 46: ...ee buttons labeled Record Play Pause and Stop below the mode selection buttons They control the recording and playback of songs from any mode you don t have to be in Song mode to record or play back However you ll need to make sure that the Demo Button parameter on Master Mode Page 2 is set to Off Otherwise these buttons are used for Easy Audition see page 2 7 Master Mode is described in Chapter 1...

Page 47: ...he editors corresponding to the current operating mode Pressing one of the mode buttons selects the corresponding mode This is the mode s entry level At the entry level the LED of the selected mode is lit Only one mode can be selected at a time From any primary mode you can get to any other primary mode simply by pressing one of the mode buttons If you re in an editor however you must press Exit t...

Page 48: ...tup and Quick Access modes We ll describe each of the eight modes briefly in this section Program Mode The PC3 starts up in Program mode where you can select play and edit programs The Program mode entry level page shows the currently selected program as well as a small segment of the program list The Program Editor takes you to the core of the PC3 s sound editing parameters Setup Mode Setup mode l...

Page 49: ...m Change commands Effects Mode Effects mode sets the behavior of the PC3 s effects processor The Effects mode page lets you tell the PC3 how to select effects configurations called chains Chapters 9 shows you how MIDI Mode You ll use MIDI mode to configure the PC3 s interaction with other MIDI instruments by setting parameters for transmitting and receiving MIDI You ll also use it to configure your P...

Page 50: ...4 4 The Operating Modes Using the Modes ...

Page 51: ...bject If you ve been wondering what we mean by the term object it s an expression we use for anything that can be named saved deleted or edited Here s a list of all the types of objects Programs Factory preset or user programmed sounds stored in ROM or flash memory A program is one or more layers of sound with programmable DSP functions applied to the keymaps within each layer Setups Factory preset...

Page 52: ...lues the VelTouch parameter on the Master mode page for example In this case the object s ID appears in the value field along with the object s name You can enter objects as values by entering their IDs with the alphanumeric pad This is especially convenient for programs since their ID numbers are usually the same as their MIDI program change numbers The object type and ID enable you to store hundr...

Page 53: ...you change your mind about the name press the Rename soft button for another try ROM Objects If the object you started from was a ROM factory preset object the PC3 will automatically suggest the next available unused ID as the ID for the edited object If that s the ID you want press the Save soft button and the object will be stored in memory with that ID Otherwise you can select any ID from 1 to ...

Page 54: ... data entry methods for naming Adv automatically moves the cursor one space to the right each time you strike a key just like a typewriter or computer keyboard This is the most convenient setting l L Delete move characters left one space Move cursor left one space Move cursor right one space Shift Space 2 a A 3 b B c C 4 d D 5 e E f F 6 g G 7 h H 8 i I j J 9 k K 0 zero m M Hyphen _ Underscore n N ...

Page 55: ... that has dependent objects the Delete dialog gives you a choice Delete dependent objects If you press Yes the PC3 will delete the object and all its dependent objects when you execute the Delete function In our example if you were deleting the setup you created and you chose to delete dependent objects the dependent program would get deleted as well If you press No at the Delete dependent objects...

Page 56: ...urrent program s FX preset plays program dry MIDI Mute 2 Mutes Layer 2 of current program Master Mute 4 Mutes Layer 4 of current program Song Mute Active Mutes active layer of current program Storage Compare Negates effect of unsaved edits and plays last saved unedited version of object being edited Chan Layer In Program Editor these two buttons scroll through layers of current program in Setup Ed...

Page 57: ... Dynamic VAST lets you wire your own algorithms You can combine different DSP functions in any order you like including parallel and serial configurations VAST and KB3 Programs It is important to understand the difference between VAST programs and KB3 programs VAST programs contain up to 32 layers each of which contains a keymap which in turn consists of a number of samples assigned to a particular...

Page 58: ...attack velocities These assignments constitute the keymap When you trigger a note the PC3 looks to the keymap of each layer of the currently active VAST program s to determine which samples to play The sound engine then fetches the requested samples and generates a digital signal representing the sound of the samples This signal first passes through the five DSP functions that make up the algorithm ...

Page 59: ...t program MIDI channel and control assignments Selected for performance and editing in Program mode up to 32 layers per program A keymap processed through an algorithm modulated by control sources Up to 128 sample roots assigned to play at programmable key and velocity ranges Individual digital sound recordings stored in ROM stereo samples use two voices of polyphony ...

Page 60: ...56 You can use up to 91 of them in a KB3 program the 92nd is reserved to produce key click Because the oscillators start running as soon as you select a KB3 program there are always voices available unlike VAST programs which start stealing notes when you reach the polyphony limit The oscillators we ll call them tone wheels from here on are divided into an upper and lower group The upper tone whee...

Page 61: ...s parameter and change its value to KB3 Control 4 Don t forget to save Playing KB3 Programs One of the standard performance features of many tone wheel organs is the set of drawbars for emulating the stops on a pipe organ Moving the drawbars controls the amplitude of either the fundamentals or the harmonics of the notes out to increase amplitude in to decrease it The PC3 s sliders serve as the nin...

Page 62: ... a KB3 program from an external MIDI source there are two things to keep in mind Certain MIDI Controller numbers always control specific KB3 features The value of the LocalKbdCh parameter affects how KB3 programs respond to MIDI Controller messages Controller Numbers Table 6 3 lists the MIDI Controller numbers that control KB3 features The first column lists the Controller numbers that KB3 programs ...

Page 63: ...6 3 are certain to work There are some possible disadvantages to this however First the PC3 doesn t relay incoming MIDI to its MIDI Out port Perhaps more importantly if you change the channel on your MIDI source the PC3 plays the program on the channel used by your MIDI source regardless of the PC3 s current channel For example if your MIDI source transmits on Channel 1 and you set the PC3 s curre...

Page 64: ...consistent and relatively standard fashion for most setups and VAST programs it necessitates a few adjustments to make incoming MIDI Controller messages control the KB3 features listed in Table 6 3 Without these adjustments some of the KB3 features won t respond to MIDI Controller messages this is true when you re playing programs as well as when you re playing setups To make everything work prope...

Page 65: ...red keyboard lines overlapping or a split keyboard lines not overlapping The info box can display up to four layers at a time If the current program has more than four layers you can view their keymaps by pressing and holding down the Enter button and scrolling with the Chan Layer buttons For KB3 programs the info box shows the keymap used for the upper tone wheels Control Setup The Control Setup ...

Page 66: ...t Buttons in Program Mode Use the Octav and Octav soft buttons to transpose up or down by a full octave Pressing both Octav buttons simultaneously returns the transposition to its original setting Pressing the Panic soft button sends an All Notes Off message and an All Controllers Off message on all 16 MIDI channels Press the Info soft button to see all of the controller assignments of the current...

Page 67: ...key This method will work in most places within the Program Editor but there is an exception if the parameter you have highlighted has a note number or control source as its value then holding Enter and striking a note will call up that note or control source For all other parameters however this method will switch between layers The Soft Buttons in the Program Editor The Program Editor s soft but...

Page 68: ... of its function in the Program editor When activated the button s LED will light up Mute 1 2 3 and 4 Each of the top four MODE select buttons serve to mute one of the current program s first four layers Pressing the Program button mutes layer 1 pressing the MIDI button mutes layer 2 pressing the Setup button mutes layer 3 and pressing the Master button mutes layer 4 Solo Pressing the Q Access butt...

Page 69: ...tions of the algorithm Split wires may rejoin within the algorithm or they may pass all the way through as split signals If the last block has two wires at its output we call it a double output algorithm If it has one wire it s a single output algorithm even if there are two wires in earlier portions of the algorithm Each block of the algorithm represents a certain function in the signal path In e...

Page 70: ...y the behavior of the DSP functions themselves The parameters on the various control input pages are very similar in fact there are six parameters that appear on almost every page Consequently we refer to them as the common DSP control parameters Although the parameters on the control input pages differ slightly from function to function you can expect to see some or all of the common DSP control ...

Page 71: ...an be modulated by a control source Fine Adjust Parameter You can add slight detuning to the pitch with the fine adjust parameters Notice that there are actually two fine adjust parameters for the Pitch function one that changes the pitch in cents 100ths of a semitone and one that changes it according to its frequency in increments of Hertz cycles per second Since we re discussing the universal cont...

Page 72: ...nes or one octave Source 2 Src2 This one s even more programmable Like Src1 you choose a control source from the list But instead of setting a fixed depth you can set a minimum and maximum depth then assign another control source to determine how much depth you get Try this example Make sure Src1 is set to OFF first so the two sources don t interact Start with Program 199 and press Edit Press the PI...

Page 73: ...meter lets you select any other layer to go through the current layer s DSP You can set it up so that layer 1 goes into layer 2 into 3 as shown above If you turn down the volume on layers 1 and 2 then you are hearing true cascading it s like a big chain with each algorithm feeding into the next and what you hear is layer 3 s output You can also have the volumes of all three layers turned up which ...

Page 74: ...hemes are possible Using Cascade mode in conjunction with Dynamic VAST gives you almost infinite control over your program s sound and behavior by enabling you to create your own unique complex algorithms To enter the Dynamic VAST editor select the ALG Algorithm page by pressing the ALG soft button Highlight the Algorithm parameter select an algorithm and press the edit button This action calls up ...

Page 75: ...l up the KEYMAP page The parameters on this page affect sample root selection i e which samples are played on which keys Keymap Assign keymap from ROM to the current layer Keymaps are collections of samples assigned to note and velocity ranges Transpose Xpose Transpose the current keymap up as much as 127 semitones ten octaves and a perfect fifth or down as much as 128 semitones ten octaves and a m...

Page 76: ... enough the next higher or lower sample root will be played which in some cases many drum programs for example will play an entirely different sound Positive values will play higher pitches of the sample root when you use hard attack velocities they shift the keymap downward while negative values will play lower pitches Method AltMethod See Alternative Switch AltControl and AltMethod below Stereo ...

Page 77: ...e to 4 semitones then setting the Adjust on the PITCH page to 4 semitones For multi sample layers with narrow key ranges large amounts of timbre shifting will cause different sample roots to be played back Playback Mode This gives you numerous options for manipulating the samples in the current layer as you trigger them Normal leaves the samples unaffected while Reverse plays them in reverse At a ...

Page 78: ...an acoustic instrument As an example set Keymap to 14 Flute Now set the AltControl parameter to Chan St Channel State Now if you play notes separately the initial breathy chiff will be heard But if you play the notes legato connecting them smoothly the Alt point is used and you do not hear the chiff This is because the Chan St is turned on as long as any note is being held Most of the PC3 s ROM sa...

Page 79: ...Attack velocities above this threshold will not trigger notes in this layer Using LoVel and HiVel you can set up velocity switching between up to eight layers If you need even more you can do it using the Enable and Enable Sense S parameters page 6 24 Pitch Bend Mode Bend This determines how Pitch bend control messages will affect the current layer A value of All bends all notes that are on when t...

Page 80: ...of the attack The delay is measured in seconds Enable This assigns a control source to activate or deactivate the layer When the value of the assigned control source is between the minimum and maximum thresholds set by the Sense S parameter the layer is active When the value of the assigned control source is below the minimum or above the maximum the layer is inactive By default many layers have t...

Page 81: ...n you have a range of 4 for each level Layer 1 is 0 3 Layer 2 is 4 7 and so on It won t be easy to play precisely enough to trigger the layer you want On the other hand if you re using Song mode or an external sequencer you can edit attack velocity levels and get exactly the results you want Opaque An opaque layer blocks all higher numbered layers in its range allowing only the opaque layer to pla...

Page 82: ...ment of their amplitude envelopes even if the notes have been released If you have a sound with a slow attack or an attack that s delayed with the delay control setting this parameter to On will make sure your notes reach full amplitude even if you re playing fast When set to Off notes will release as soon as you release the note generate a Note Off If the first attack segment of the layer s amplit...

Page 83: ...ic representation of the signal path as well as the currently selected DSP functions within the signal path To use a different algorithm select the Algorithm parameter and use any data entry method to select a different one To change the DSP function within an algorithm move the cursor to the block you want to change then use the Alpha Wheel or Plus Minus buttons There s a staggering number of com...

Page 84: ...ide of the DSPCTL page is the subpage of the highlighted function parameter on the subpage are the fine adjust parameters and hard wired parameters To access the parameters on the subpage highlight the function parameter you wish to edit and then press the button to move the cursor into the subpage Function Parameter Range of Values Default Pitch Pitch 128 to 127 semitones 0 Fine Adjust 100 cents 0...

Page 85: ... coarsely adjust the function parameter in these left hand fields as noted in Common DSP Control Parameters any adjustments made to the function parameters on the DSPMOD page are reflected in the corresponding function parameters on the DSPCTL page The right hand side of the DSPCTL page is the subpage of the highlighted function parameter on the subpage are the programmable parameters To access the ...

Page 86: ...above DSPMOD page corresponds to the following algorithm The OUTPUT Page Press the OUTPUT soft button to get to the OUTPUT page where you set the layer s pre and post FX panning There are actually four different configurations of the OUTPUT page which one you see depends on whether the current layer uses a stereo keymap and whether it uses program FX or layer specific effects more on this in The Pro...

Page 87: ... pan position remains as defined with the Pan parameter ignoring MIDI pan messages When the mode is MIDI MIDI pan messages MIDI 10 will shift the sound to the left or right of the Pan parameter setting Message values below 64 shift it left while those above 64 shift it right A setting of Auto assigns the pan setting of each note based on its MIDI note number In this case Middle C MIDI note number 6...

Page 88: ...control is at minimum With XFadeSense set to Reverse the layer is at zero amplitude when the Crossfade control is at minimum This parameter is similar to the Src1 and Depth parameters for the Amp function on the DSPCTL and DSPMOD pages but the attenuation curve for the Crossfade parameter is optimized specifically for crossfades To crossfade two layers in the same program assign the same control so...

Page 89: ...but you probably won t want to do this The COMMON Page The COMMON page is reached by pressing the COMMON soft button in the Program Editor Here s where you find 12 frequently used parameters that affect the entire current program not just the current layer Notice that when the Monophonic parameter is set to its default value of Off the four monophonic parameters do not appear on the page Parameter ...

Page 90: ...s either on or off The default value of Off means that portamento is disabled for the current program Portamento is a glide between pitches On actual acoustic instruments like violin and bass it s achieved by sliding a finger along a vibrating string On most keyboards that offer portamento it s achieved by holding down a key that triggers the starting note then striking and releasing other keys The...

Page 91: ... one semitone toward the ending pitch At a setting of 12 keys second for example the pitch would glide an octave every second The list of values is nonlinear that is the increments get larger as you scroll to higher values Attack Portamento This parameter toggles between two types of portamento When set to On the PC3 remembers the starting pitch so you don t have to hold a note on to achieve porta...

Page 92: ...ram you want by pressing the Play Pause button with one program selected and then selecting another program None of the KB3 programs have demo songs but by this method you could for example hear the demo song for program 83 Big Old Jupiter played with the KB3 program 53 Testify The LFO Page LFOs are low frequency i e subsonic frequency oscillators You ll use the LFO page to define the behavior of t...

Page 93: ... LFO then the LFO rate is fixed and you can specify neither Maximum Rate nor Rate Control The display changes thusly Maximum Rate This is the fastest possible rate for the LFO When its Rate Control is set to ON or when the control source assigned to it is at its maximum the LFO runs at its maximum rate Parameter Group Available for each of LFO1 and LFO2 Range of Values Default Minimum Rate 1 4 note...

Page 94: ... on the pitch LFO Phase Use this parameter to determine the starting point of the LFO s cycle One complete cycle of the LFO is 360 degrees 0 degrees phase corresponds to a control signal value of 0 becoming positive Each 90 degree increment in the phase represents a quarter cycle of the LFO When an LFO is local the phase parameter gives you control over the starting point of the LFO for each note ...

Page 95: ...the attack and release sections then loop forward and cycle through again until the ASR s trigger switches off If the mode is set to Hold the ASR maintains its position at the end of the attack section until the ASR s trigger switches off The ASR then goes into its release section If the ASR s trigger switches off before the attack section is complete the ASR goes directly to its release section D...

Page 96: ...gning one or more of them as control sources The FUN page looks like this There are three parameters for each FUN Inputs a and b can be any control source from the Control Source list The control sources you want to combine are the ones you ll assign as the values for these parameters The Function parameter determines what mathematical function is applied to the two inputs When a FUN has been assi...

Page 97: ...you want to build your own amplitude envelope just turn the Alpha Wheel a click The value Natural will change to User and a set of AMPENV parameters will appear The sound will change when you do this because the default settings for the User envelope as shown in the diagram below take effect as soon as you leave Natural mode Returning to Natural mode applies the original amplitude envelope once ag...

Page 98: ...at the completion of the segment For the Loop parameter the values define how the envelope loops and how many times the loop cycles Attack Segment Times These indicate how long it takes for the current layer s amplitude to reach its final level from its starting level Attack Segment Levels These are the final levels that each segment achieves at completion The levels are expressed as percentages of t...

Page 99: ...de envelope Values of seg1F seg2F and seg3F are forward loops In each case the amplitude envelope plays through the attack and decay sections then loops back to the beginning of the first second or third attack segments respectively Values of seg1B seg2B and seg3B are bidirectional loops The amplitude envelope plays through the attack and decay sections then reverses and plays backward to the begin...

Page 100: ...ke the AMPENV page The only differences are that you can program an amount for Rel3 the Rel1 and Rel2 limits which are 100 and in the envelope graphic which has a dotted line running horizontally across the display This is the zero level line negative level values for the various envelope segments will cause the envelope graphic to dip below this line The Envelope Control ENVCTL Page Envelopes are...

Page 101: ...ilence two seconds after the completion of the last attack segment The decay time is two seconds the decay rate is 50 per second Now if you select the ENVCTL page and set the Decay Adjust parameter to a value of 2 000x you ve increased the decay rate by a factor of two The rate increases to 100 per second and the decay time is now one second instead of two Adjust This is the familiar Coarse adjust...

Page 102: ... is multiplied when the control is at its maximum Impact Impact punches the volume during the first 20 milliseconds of the attack of an envelope Use this feature to get maximum thump from your bass and drum sounds The Program FX PROGFX Page Press the PROGFX soft button to call up the Program FX PROGFX page This is the page that you will use to apply effects to a program and to configure the routing ...

Page 103: ...d Parameters The Auxiliary Send parameters determines the level of the program signal sent to the auxiliary effects chain Aux Send The Aux Send parameter determines the level of the program signal sent to the auxiliary effects chain Pre Post Insert The Pre Post Insert parameter determines the point at which the auxiliary effect is applied to the signal When this parameter is set to Post the PC3 ap...

Page 104: ...tput to Sec keep in mind that by this method the dry signal is sent to the auxiliary audio outputs When Type is set to the Aux Send parameter values are in units of percent The value specified in the Aux Send parameter is the percentage of which the wet auxiliary signal comprises the final signal the insert signal comprises the rest of the final signal To hear equal parts wet signal and dry signal on...

Page 105: ...on on program FX Layer Specific FX Mode With Layer Specific FX selected you can configure the effects for the current layer This mode s parameters are similar to those of the PROGFX page This mode is shown in the following display All of the Layer Specific FX mode parameters have the same functions and ranges of values as their corresponding parameters on the PROGFX page See The Program FX PROGFX Page...

Page 106: ...ange in the controller value If you change programs and then press the SetCtl soft button before engaging any of the controllers the control values will remain at zero The number in parentheses that appears next to the controller name is the MIDI controller number with which that controller transmits and receives by default i e with the Control Setup set to 126 Internal Voices on the MIDI mode Tra...

Page 107: ...yer duplicating the settings of all its parameters The copy becomes the current layer and is the highest numbered layer in the program Import Layer ImpLyr Copy a specific layer from another program into the current program This button brings up a dialog that prompts you to select a layer number and a program number The dialog tells you the currently selected layer and the total number of layers in ...

Page 108: ... program from memory You can also delete any other program from memory by scrolling through the list that appears when you press the Delete soft button then pressing Delete again when the desired program is selected If you attempt to delete a ROM program the PC3 will say it s deleting the program but it doesn t actually do it Dump Send a MIDI System Exclusive dump of the current program s settings...

Page 109: ...aveforms for the lower half of its tone wheels and samples for the upper half of its tone wheels Using the parameters on the TONEWL page you can specify which sample you wish to use the number of tone wheels which will affect how many other voices are available to you and other related settings Upper Tone Wheel Keymap Use this parameter to indicate the keymap and thereby the samples to use for the...

Page 110: ...s is a bit more idealized it s smoothed out but less realistic Bob s is more uneven based on an old B3 Wheel Volume Map The wheel volume map determines the volume level for each tone wheel We ve provided several tone wheel volume maps here based on measurements we ve taken on different organs Equal is a map with all tone wheels at the same volume It s not based on a real B3 Bright is a good normal...

Page 111: ...ter lets you specify the increments by which drawbar volumes will change Choose either 0 8 to approximate the drawbar settings on actual organs or choose 0 127 for a finer degree of resolution Volume This parameter appears only if you ve set Mode see above to Preset Use the Volume parameter to set the preset volume of each of the nine drawbars The available values will be 0 8 or 0 127 depending on ...

Page 112: ...P Control Parameters on page 6 14 The DSP Control DSPCTL Page on page 6 28 and The DSP Modulation DSPMOD Page on page 6 29 The AMP Page The AMP page parameters for KB3 programs is much like the AMP page parameters for VAST programs The only difference is that for KB3 programs there are no KeyTrk or VelTrk parameters For a full description of the AMP page parameters see Common DSP Control Parameter...

Page 113: ...at are triggered during the short duration of the percussion envelope Once the envelope runs its course any notes you play while at least one key is held down get no percussion On keyboard models you can turn percussion on or off by pressing Assignable Controller Button 5 Mute button 5 Volume This parameter switches between loud and soft percussion settings The actual amplitude is set on the PERC2...

Page 114: ...values add velocity tracking so that increased velocity results in louder percussion LowHarm Controls which drawbar is used as the basis for the percussion when Harmonic is set to Low On an actual tone wheel organ this is Drawbar 4 2nd harmonic The actual pitch obtained depends on the drawbar tuning HighHarm Controls which drawbar is used as the basis for the percussion when Harmonic is set to Hig...

Page 115: ...e to the attack of notes Unlike the percussion the key click is multi triggered which means that every new note will trigger it The parameters on this page primarily control the decay volume and pitch of the key click Parameter Group Available for each combination of the Volume and Decay parameters on the PERC1 page Range of Values Percussion Level 0 to 24 0 dB Decay Time 0 01 to 5 10 seconds in 0...

Page 116: ...lick ReTrigThresh This parameter lets you set the volume level below which key click must decay before it will be retriggered Note Attack Controls the attack characteristic of notes Normal provides a smoothed attack while a setting of Hard has an instant attack and will produce an audible click in addition to any amount of key click specified with the other parameters on this page you might prefer ...

Page 117: ...reamp response Off emulates organs that have been modified to have a direct out before the preamp and expression pedal Leakage Controls the level of the simulated crosstalk and signal bleed of adjacent tone wheels in the model This is provided to help dirty up the sound to make it a bit more realistic A setting of 96 dB gives the purest tones other values add more simulated leakage This level is sc...

Page 118: ...ute button 2 When you select a KB3 program the PC3 sends several MIDI Controller messages both locally and to the MIDI Out port One of those messages is Controller number 95 with a value corresponding to the value of VibChorCtl Off 0 On 127 VibChorSel Choose the vibrato or chorus program there are three of each you wish to use with this KB3 program Note that you must set VibChorCtl also on the MIS...

Page 119: ...o a real EQ Each EQ section has Gain G Frequency F and Width W controls Frequency controls the center frequency of the band Width controls the bandwidth Gain controls the amount of boost or cut The OUTPUT Page Use this page to route the current program s post FX signals The two Pan parameters correspond to those of the VAST Program editor OUTPUT page See page 6 30 The Out Gain parameter correspond...

Page 120: ...wheel organ will depend not only on its age but also on how well it has been maintained Octave folding where an octave or part of an octave is repeated at the top or bottom of the keyboard is handled automatically by KB3 Mode emulating the folding done on actual tone wheel organs Early Tone Wheel Organs Instruments of this period had 91 tone wheels To get this sound go to the TONEWL page select 91...

Page 121: ...r Setup mode You ll see a list of setups which you can select with any data entry method The info box on the left hand side of the main Setup mode page displays the zones and corresponding programs used in the current setup If there are more than four zones in the current setup you can view the other zones by holding down the Enter button and scrolling through the current setup s zones with the Ch...

Page 122: ...control setup those changes will affect all programs when you are in Program mode You may want to program several different control setups and switch among them for different applications Control Setup Setup Editor Page Zone 1 Parameters Affecting Program Mode Parameters Not Affecting Program Mode CH PROG Arpeggiator Destination BankMode LocalPrg Channel MIDIBank MIDIProg Status EntryProgChg KEY V...

Page 123: ...lines in the info box matches the number of zone status LEDs that are lit Green Active zone As long as no other zone is soloed an active zone plays notes and generates controller information program changes and entry exit controller values If another zone is soloed an active zone is backgrounded it s status LED remains green but it doesn t play notes or generate controller information Orange Muted...

Page 124: ...ations to SoloZn See Controllers on page 7 19 for more information on controller destination assignments in Setup mode The Setup Editor From Setup mode press the Edit button to enter the Setup Editor where you can make changes to the currently selected setup Use the soft buttons to select the various Setup Editor pages The upper line of each page displays the usual mode reminder as well as the cur...

Page 125: ...oth the MIDI Program and MIDI Bank parameters to match the local program and bank numbers NOTE MIDI Banks and PC3 banks are not the same nor is there a direct one to one correspondence between the two As mentioned previously programs 1 127 fall into MIDI Bank 0 programs 128 255 fall into MIDI Bank 1 and so on program IDs 1 128 fall into PC3 bank Base 1 programs 128 255 fall into Base2 and so on re...

Page 126: ... VEL page to set one zone s Note Map to Linear and the other zone s Note Map to Off Another example create two or more zones that are identical except for their transposition settings Now you can play parallel intervals or chords with single keystrikes MidiBank Before reading this section on MIDI Banks be sure to read the note in the section Program on page 7 5 The PC3 s programs are divided into ...

Page 127: ... a pair of destinations MIDI Local USB_MIDI Local or USB_MIDI MIDI or transmits to all destinations USB_MIDI MIDI Local BankMode The BankMode you choose determines how bank numbers will be sent over MIDI when the setup is selected and in what format It also affects how many MIDI banks and programs you can choose None means no bank number is sent just the program number Ctl 0 means that the bank nu...

Page 128: ...umbers for the programs in the 16 zones will be sent via MIDI when a setup is selected By setting this parameter to Off you can select a setup on the PC3 without changing the internal programs or those on MIDI devices receiving from the PC3 This is useful if you want to send only controller data to the PC3 or to MIDI devices without changing program assignments Arpeggiator The Arpeggiator paramete...

Page 129: ... range transposition and Note Maps for each zone Parameter Range of Values Default Low Key C 1 to G9 C 1 High Key C 1 to G9 G9 Transpose 128 to 127 Semitones 0 Note Map Note Map List Linear Low Velocity 1 to 127 1 High Velocity 1 to 127 127 Velocity Scale 300 100 Velocity Offset 128 to 127 0 Velocity Curve Velocity Curve List Linear ...

Page 130: ...are sent from the PC3 The default setting is Linear all notes go out as played Pressing the Minus button takes you to Off no notes are sent but controllers and other non note data are Setting Note Map to Inverse effectively turns the keyboard upside down with the highest key being A 0 and the lowest C 9 If you set Note Map to Constant all of the keys on the keyboard will play the same note The not...

Page 131: ...e versa This is useful for creating velocity based crossfades between zones See the following section on Velocity Offset for ideas about negative scaling The following illustration shows what happens when you change Velocity Scale Note that Velocity Scale is the only parameter changed in this example the other parameters are set to their defaults offset 0 curve linear min 1 max 127 MIDI Velocity 1...

Page 132: ...ocity available will be 102 while any keystroke 25 or below will produce a velocity of 1 a velocity value of zero has a special meaning in MIDI and cannot be used for Note Ons You can think of Scale as being a proportional change to the velocity while Offset is a linear change The maximum values for Offset are 127 The following illustration shows the effects of Velocity Offset Note that Velocity O...

Page 133: ...ies will end up as zeroes well ones actually since a MIDI note on with velocity zero is something else So to get true inverse scaling that is minus 100 you must set an offset of 127 to get the full range of velocities Setting the offset to 127 and the scale to 100 produces a slope like this which is the same as the reverse linear curve Note that Offset and Scale affect only MIDI velocities that is...

Page 134: ...tice velocity differences less than with a linear curve while when you re playing hard you ll notice velocity differences more Compress produces a velocity curve that is the opposite of the expanded curve that is you ll notice velocity differences more when you re playing softly than when you re playing hard MIDI Velocity 127 0 127 Strike Velocity 64 64 Velocity Curve Linear Velocity Curve Compres...

Page 135: ...ing you set one parameter instead of two MIDI Velocity 127 0 127 Strike Velocity 64 64 Velocity Curve Linear Velocity Curve Bump Velocity Curve Crossfade as you hit the keys harder increase the velocity MIDI velocity increases proportionally MIDI velocity is greatest at medium strike velocity Below medium strike velocity MIDI velocity is less than with Linear curve above medium strike velocity MID...

Page 136: ...different sounds depending on how hard you strike it The values can be anywhere from 1 to 127 As with other parameters zones can overlap or be totally discrete or be identical Usually LoVel will have a smaller value than HiVel but as with LoKey and HiKey you may also create a gap in velocity response by setting negative ranges for velocity MIDI Velocity 127 0 127 Strike Velocity 64 64 Velocity Min...

Page 137: ...parameter on the MIDI mode CHANNELS page see Chapter 10 determines whether this parameter has any effect Entry Pan Exit Pan You can set entry and exit values for Pan as well When you select a setup the PC3 sends a MIDI pan control MIDI Controller 10 message on each MIDI Channel in each zone another MIDI pan control message is sent when you exit the setup The Entry and Exit values for Pan are the s...

Page 138: ...reflected only in Setup mode If you specify BendRangeUp and Down values for the control setup they will not be reflected in any other mode and pitch bend messages in the current program will result in behavior as specified for the Pitch Bend Range parameters on the COMMON page in the Program Editor BendRangeUp ct and BendRangeDown ct lets you fine tune the value for Bend Range semitones 100 cents equa...

Page 139: ...own gives you a full octave of downward bend In most factory setups AuxBend 1 is the assignment for the Ribbon Aux Bend 2 Range The PC3 allows you to specify a third pitch bend range this is called AuxBend 2 and it defines the range for MIDI Controller 15 messages For AuxBend 2 you can set only one range for both upward and downward pitch bending Controllers Controller editing is one of the stronge...

Page 140: ... 2 The two Panel Switches above the Pitch and Mod Wheels and Program Buttons 1 8 The three Footswitch pedal jacks 1 2 and 3 The following tables and illustration provide an overview of the physical controllers and their parameters Continuous Controllers Physical Controller Setup Editor Page Parameter Values Sliders A B C D E F G H I SLID SLID2 Destination Control Destination List Scale 300 to 300 ...

Page 141: ...Destination List On Value None 0 to 127 Off Value None 0 to 127 Entry Value None Off On Exit Value None Off On Arp and SW switches ARP SW SWITCH same as Footswitches Programmable switches 1 to 8 SWPRG1 SWPRG2 SWPRG3 SWPRG4 SWPRG5 SWPRG6 SWPRG7 SWPRG8 same as Footswitches Table 7 4 Switch Controllers Controller Number Corresponding Destination Name Description 0 OFF Bank By default when you enter 0...

Page 142: ...ion for SW button 30 31 MIDI 30 31 MIDI Controllers 30 31 32 Bank 33 63 33 63 MIDI Controllers 33 63 64 Sustain Default destination for Footswitch 1 65 PortSw Monophonic PC3 programs respond to this Controller if portamento is turned on 66 SostPd Default destination for Footswitch 2 holds notes that are currently down but not notes played subsequently 67 SoftPd Default destination for Footswitch 3...

Page 143: ... a predetermined velocity threshold as an on off control source 107 VTRIG2 Velocity Trigger 2 a legacy feature that uses a predetermined velocity threshold as an on off control source 108 RandV1 Random large range 109 RandV2 Random small range 110 ASR1 ASR Envelope 1 111 ASR2 ASR Envelope 2 112 FUN1 Function 1 113 FUN2 Function 2 114 LFO1 FLO 1 115 LFO1ph LFO 1 Phase 116 LFO2 LFO 2 117 Data MPr Da...

Page 144: ...Inc Setup Increment increments current setup number 140 SetupDec Setup Decrement increments current setup number 141 SetpGoto Go to Setup selects setup 142 Start Sequencer function 143 Stop Sequencer function 144 Continue Sequencer function 145 TransUp Transpose Up ST 146 TransDown Transpose Down ST 147 ArpOn Arpeggiator On SeeThe Arpeggiator ARPZON Page on page 7 38 148 ArpOff Arpeggiator Off See...

Page 145: ...tain and Arpeggiator Latch SeeThe Arpeggiator ARPZON Page on page 7 38 161 Panic Panic 162 SoloZn Solo Zone 163 RiffOn Riff On See Riffs on page 7 46 164 RiffOff Riff Off See Riffs on page 7 46 165 RiffDur Riff Duration See Riffs on page 7 46 166 RiffVel Riff Velocity See Riffs on page 7 46 167 RiffDly Riff Delay See Riffs on page 7 46 168 TapTempo Tap Tempo 169 KB3Mutes KB3 Mutes in Setup Mode va...

Page 146: ...lues there s no need for separate Max and Min parameters If Add is 25 the minimum value of the controller will be 25 If it is 25 and scale is 100 the first one fifth of the controller s movement 25 127 1 5 will send value of 0 and the maximum value of the controller will be 102 127 25 As with velocity Scale is a proportional change to the controller while Offset is a linear change The values for Off...

Page 147: ...one means no command is sent Switch Controller Parameters Switch physical controllers have only two states on and off The PC3 switch controllers are Panel Switches Arp and SW Footswitch Pedals 1 2 and 3 Programmable Switches 1 8 Program Select buttons 1 8 Keep in mind the following two things when working with the PC3 s switches First the buttons above the sliders are dedicated to zone status and ...

Page 148: ...h in which case you might set OnControl to 7 Volume and OnValue to 50 and OffControl to 7 and OffValue to 127 OnControl and OffControl can also both be set to Off so that turning on the switch has no effect at all in this zone This can be useful when you are using one switch for multiple functions in different zones OffValue OffValue is the value of the Controller when the switch is off The defaul...

Page 149: ...eel has two parameters one for pushing the pitch wheel up and one for pushing it down whereas the mod wheel has one The WHEEL page parameters are described in Continuous Controllers on page 7 20 Parameter Range of Values Default Destination PWUp Control Destination List PitchUp Destination PWDn Control Destination List PitchDwn Destination MWhl Control Destination List MWheel Scale 300 100 Add 128...

Page 150: ...e SLIDER page parameters are described in Continuous Controllers on page 7 20 Parameter Range of Values Default Destination Slider A Control Destination List Data Destination Slider B Control Destination List MIDI 13 Destination Slider C Control Destination List MIDI 22 Destination Slider D Control Destination List MIDI 23 Destination Slider E Control Destination List MIDI 24 Destination Slider F ...

Page 151: ...assign these controllers on each of the 16 zones or you can assign any combination of these controllers to the same zone The CPEDAL page parameters are described in Continuous Controllers on page 7 20 Parameter Range of Values Default Destination CPed1 Control Destination List Express Destination CPed2 Control Destination List Foot Destination Breath Control Destination List Breath Scale 300 100 A...

Page 152: ...push down on the note pressure messages will be sent from Zone 1 As with any other physical controller however you can disable pressure in any zone or scale it or offset it differently in the various zones It might help to think of pressure as an extra wheel wheels operate in a zone regardless of Key Range and so does pressure The PRESS page parameters are described in Continuous Controllers on pa...

Page 153: ...spective Destination parameters is the Control Destination list There are three Footswitch pages one for each Footswitch The FT SW page parameters are described in Switch Controllers on page 7 21 Parameter Range of Values Default Type Momentary Toggle Momentary On Control Control Destination List Ft Sw1 Sustain Ft Sw2 SostPd Ft Sw3 SoftPd On Value None 0 to 127 127 Off Control Control Destination ...

Page 154: ...f the PC3 arpeggiator but you can assign this switch to any Controller See The Arpeggiator ARPZON Page on page 7 38 for information on how to configure the PC3 s arpeggiator The ARP SW page parameters are described in Switch Controllers on page 7 21 Parameter Range of Values Default Type Momentary Toggled Toggled On Control Control Destination List ArpOn On Value None 0 to 127 127 Off Control Contr...

Page 155: ...ign this switch to any MIDI Controller The SWITCH page parameters are described in Switch Controllers on page 7 21 Parameter Range of Values Default Type Momentary Toggled Toggled On Control Control Destination List MIDI29 On Value None 0 to 127 127 Off Control Control Destination List MIDI29 Off Value None 0 to 127 0 Entry Value None Off On None Exit Value None Off On None ...

Page 156: ...he three sections The large arrow above the ribbon points to the center of the ribbon for when the ribbon is configured in one section Note that there are three assignable parameter groups on the RIBBON page When the Ribbon is set to act as a single section controller the only parameters that affect its behavior are those of Section 1 Sect1 When the Ribbon is set to act as a three section controlle...

Page 157: ...that you can adjust the parameters of each section Position Mode PosMode When you touch the ribbons the PC3 responds in one of two ways depending on the setting of the PosMode parameter Relative means that wherever you touch the Ribbon becomes the zero point for whatever the Ribbon is controlling you won t notice any change in the sound until you slide your finger Relative mode tends to be the most...

Page 158: ... right Note that setting the Spring parameter to Off disables the Center parameter for that ribbon The value you choose for this parameter can have considerable effect In many factory setups for example the Ribbon affects pitch In these setups changing the value of the Center parameter would transpose the setup The Arpeggiator ARPZON Page Each zone in a setup has its own Arpeggiator Each Arpeggiat...

Page 159: ...by the Arpeggiator when it is on Low Key LoKey and High Key HiKey The Arpeggiator processes notes within the range of these parameters Notes outside the specified range play normally and do not become part of the arpeggiation sequence Set the LoKey and HiKey parameters using the data entry wheel or buttons Parameter Range of Values Default Active On Off Off Low Key C 1 to G9 C 1 High Key C 1 to G9 ...

Page 160: ... as long as you hold at least one arpeggiated note As long as you keep holding on at least one note it doesn t have to be the same note the whole time every note you play in the arpeggiation range gets latched Pedals is sort of a combination of Keys Add and Overplay modes It relies on both Latch MIDI 157 and Latch2 MIDI 158 If neither latch controller is on notes will arpeggiate only while you are...

Page 161: ... effect on percussion sounds or other sounds whose duration is fixed Note Shift You can tell the Arpeggiator to transpose all of the currently latched notes each time it plays through them Note Shift determines how much transposition will occur for each cycle of notes For example if you have latched C4 and F4 and you assign a Note Shift of 2 the Arpeggiator will play C4 F4 D4 G4 E4 A4 and so on unt...

Page 162: ... note in the Arpeggiator cycle is C4 Note Shift is 4 a third and Shift Limit is 7 so notes won t get shifted above G4 The Arpeggiator plays C4 then E4 The next note should be G 4 but that s above the shift limit so the PC3 calculates the difference between that G 4 and the shift limit G4 one semitone It adds that difference to the original starting note C4 and plays that note next C 4 The next not...

Page 163: ...notes play at the velocity of the most recently played note With Velocity set to Pressure the velocities are controlled by keyboard pressure as you push down on any key the velocities get higher and as you ease up they get lower There s another element that affects arpeggiator velocity ArpVel whose Control number is 155 Input from any physical controller assigned to send ArpVel or any entry value ...

Page 164: ... the PC3 to sync up with the tempo from another device assuming the device is sending MIDI clock data to the PC3 via MIDI or USB by setting Clock Source to External When Clock Source is set to External the Tempo parameter disappears from the display 154 ArpLmtOp LimitOption 155 ArpVel Velocity 156 ArpDur Duration 159 ArpGliss Glissando Parameter Range of Values Default Tempo 20 to 120 120 Clock So...

Page 165: ...regular arpeggios make sure the Beats parameter settings on the ARPZON page of each zone that you want to sync are the same Different Beats values result in irregular but potentially very interesting arpeggios Aux FX Channel The Aux FX Channel determines the FX channel through which all of the zones in the current setup are sent For example if a zone 2 in a setup has a program with 25 Basic Delay ...

Page 166: ...the non KB3 sounds See Chapter 6 for more information on the KB3 channel Riffs Riffs are full songs or individual tracks of a song created in the PC3 sequencer that you can trigger in setup mode Standard MIDI files may also be imported to the sequencer and then used as riffs in setups Every zone in a setup can have it s own riff a completely independent sequence To use riffs create a setup Note the...

Page 167: ...range from A 0 to A 0 and your riff will be triggered to start only by pressing the A 0 key If you want your trigger key range to be larger set your Trigger key range to be for instance A 0 to A 1 Now any key that is pressed within this range will trigger your riff to start Note the LoKey and HiKey values on the KEYVEL page do affect the riff If your riff s trigger and release notes are not within...

Page 168: ...ameter set to First Avail the riff that is started first will be the master If the bass riff starts first the drum riff will see that as the first available riff to sync to and will do so If the drum riff is started first the bass riff will see that as the first available riff to sync to and will do so If you have multiple riffs already playing triggered riffs with SyncZone set to First Avail will sync...

Page 169: ...hile no other riffs are running As soon as you start another riff the bass riff will start playing as well provided that it is set to sync to another zone or first available If another riff is already running AnyBeatWait behaves just like AnyBeat The RIFF2 Page The second Riff page appears as shown below and has the following parameters Parameter Range of Values Default Link Off On Off Re Channel O...

Page 170: ...was recorded at C4 you would set Transpose to On and Root Note to C1 Your riff will now play in the desired range when triggered from the C1 key which now corresponds to the note C4 Duration Duration changes the duration of each MIDI note The percentage is that of the original duration of the notes in the sequence TickOffset You can fine tune the start time of your riff by using the TickOffset para...

Page 171: ...r to specify the riff stop point Like the Start parameter the time format for Stop is Bar Beat Tick Beat can be set from 1 to 4 Tick can be set from 0 to 959 Refer to Table 7 6 for Tick values The PC3 restricts the selectable values for the Stop parameter such that the current riff is at least one beat long Beat Subdivision Beat Subdivision Moment Tick Value Quarter note 1st 0 8th note 1st 0 2nd 4...

Page 172: ...tons located above the program Category buttons Each button has its own SWPRG page but each page is essentially identical The SWPRG page parameters are described in Switch Controllers on page 7 21 The Utility Soft Buttons In addition to the Setup Editor s pages there are basic library and editing soft buttons Their functions are described below Name This enables you to rename the current setup Use...

Page 173: ...ettings There is also a function for dumping all setups To dump all setups go to Master mode Select the OBJECT page and press the Dump soft button to select which objects to dump via SysEx New Zone NewZn Press NewZn to create a new zone with default parameters The PC3 imports this zone from Zone 1 of 128 Default Setup If there are parameters or entire pages you use often you can create your own De...

Page 174: ...7 54 Setup Mode The Utility Soft Buttons ...

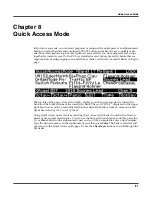
Page 175: ...om left to right displays you the current mode the current QA bank and the Locked status of the current QA bank The word LOCK displayed in the upper right hand corner of the screen indicates that the current QA bank is locked more on locked QA banks in Locking the Current QA Bank Using Quick Access mode involves selecting Quick Access QA banks from the list of factory preset or user programmed ban...

Page 176: ... up the Save QA Bank dialogue Note that if no changes have been made to the current QA bank pressing the QckSav button will not call up the Save QA Bank dialogue but will inform you that no changes have been made the current QA bank Locking the Current QA Bank As described above on any unlocked QA bank you can change the object of the highlighted entry by using the Alpha Wheel or buttons and you c...

Page 177: ... page above for example entry 9 is the current entry The Type field tells you that the object stored at entry 9 is a program The cursor highlights the program s ID and name Use the Alpha Wheel or buttons to scroll through the programs If you want to store a setup in the current entry instead of a program press the Type soft button when you do this notice that the Type field change from Program to Se...

Page 178: ...8 4 Quick Access Mode Making Your Own QA Banks ...

Page 179: ...ree type of effects that are applied during different stages in a program s signal path Insert Effects Auxiliary Aux Effects and the global master EQ compressor Insert Effects are placed directly in the signal path at the output of a program as described in the Program mode chapter these Insert Effects can apply to either the whole program or only to selected layers within the program Each program...

Page 180: ...bral setup or song Processor Power Allocation Each Effect Chain is composed of an effect box or a series of effect boxes Each effect box uses a certain amount of the PC3 s effects processing power The amount of processing power used by an effect box or Chain reflects how complex the effect s algorithm is more complex effects require more processing power Accordingly each Chain and effect box uses a...

Page 181: ...ions in Effect mode apply in every mode except for Setup mode and Song mode In both Setup and Song mode the configurations for each mode s own four Effects pages prevail over the configurations in Effects mode Aux Override In Effects mode Setup mode and Song mode the AUXFX1 and AUXFX2 pages provide overrides for Aux Chain selection and other Aux Effects parameters Normally the Aux Effects Chains are...

Page 182: ...e PC3 s primary outputs Neither the EQ nor the Compressor use up any DSP units so you needn t account for them when allocating effects processing power See Equalizers EQ on page 9 13 and Compressors Expanders and Gates on page 9 14 for explanations of the parameters for the Master EQ and Compressor The Master Effects can be accessed in the MASTER page in Effects mode or the MASTFX in Setup mode an...

Page 183: ... on page 9 2 for a description of reading and configuring the CHANFX page The AUXFX1 and AUXFX2 Pages NOTE In Setup mode and Song mode these pages corresponds in appearance and function to the AUXFX pages though they work on a per setup song basis Pressing the AUXFX1 soft button or the AUXFX2 soft button calls up respectively the AUXFX1 page or the AUXFX2 page As stated above in Effects mode Setup ...

Page 184: ...uto uses the output pair specified in the current program or the program on the specified Aux Effects channel Mod Override This parameter can be used to override the Mod Control source of the current program or the program on the specified Aux Effects channel A setting of None yields no override in Mod Control source and uses the Mod Control source specified in the current program Send Levels and Pre ...

Page 185: ... from the MASTER page set the Mode parameter to Master To use the settings in the current control setup select Setup Controlling the Master Effects from the control setup allows for convenient switching between different configurations Order Use the Order parameter to determine the order of the two effects Setting Order to Compressor EQ routes signal through the Compressor first and then through the...

Page 186: ...make up the Chain The Chain editor MAIN page of the Chain 269 PnoEnhancRvb3 appears as shown below At the top right of the display is the number of DSP units used by the currently selected effect box and by the Chain as a whole 2 5 Units indicates that the current effect box is using two DSP units and the Chain is using a total of five DSP units for all of its effects There are a total of 16 units ...

Page 187: ...ox parameter specifies which effect box in the Chain to which the Mod will be applied Param The Param parameter selects which parameter of the specified box s effect will be modulated Adjust The Adjust parameter sets a fixed value for the specified parameter Param that is applied before any modulation Source The Source parameter determines the Control source that will modulate the parameter Param in r...

Page 188: ...resent A setting of 50 wet means the dry and processed signals are roughly equal in level In some algorithms separate Wet Dry parameters are provided for the Left and Right input channels In some cases this parameters can have negative values which indicate that the Wet signal is polarity inverted Out Gain sets the gain at the output of a preset In Out enables or disables the effect You can think ...

Page 189: ... reverb signal from the dry signal so the dry signal is not obscured EarRef Lvl adjusts the mix level of the early reflection portion of algorithms which offer early reflections Late Lvl adjusts the mix level of the late reverb portion of algorithms which offer early reflections Diff Scale scales the diffusion of the early reflections that is how spread out they are as a group over time At very low se...

Page 190: ...At 100 only the left dry signal goes to the left output while at 100 only the right dry signal passes to the right output and at 0 equal amounts of the left and right dry signals pass to their respective outputs Tapn Level is the level of each numbered tap from 0 to 100 relative to the overall output of the effect Tapn Bal is the left right balance of each of the numbered taps At 100 only the left...

Page 191: ... popular in Monster Truck radio spots DegenRegen This one s a big looping delay with lots of gain distortion and filtering and with a compressor to keep it all under control Very cool Equalizers EQ The PC3 has both Graphic and Parametric EQ algorithms Parametric EQ sections are also found on a number of combination algorithms The Graphic equalizer is available as stereo linked parameters for left a...

Page 192: ...s are at interpolated positions When morphing from A to B settings the A filter 1 will change to the B filter 1 A filter 2 moves to B filter 2 and so on Range is 0 to 100 Compressors Expanders and Gates A wide range of Compression and Expansion effects is available in the PC3 The various algorithms include different combinations of compressors with soft knee characteristic the compression action comes...

Page 193: ...nsion Algorithms containing Expanders have these controls Atk or Exp Atk Attack how fast the expander turns off when the input signal rises above the threshold level adjustable from 0 0 to 228 0 ms Rel or Exp Rel Release how fast the expander turns back on after the signal drops below the threshold level adjustable from 0 to 3000 ms Ratio or Exp Ratio how much the gain is reduced below the expansi...

Page 194: ...threshold or keeps going above the threshold within the interval specified by Gate Time If it is Off the gate closes down after Env Time has elapsed regardless off the sidechain level and the sidechain level must fall below the threshold and come back up again before the gate will open again Chorus Chorus is an effect which gives the illusion of multiple voices playing in unison The effect is achie...

Page 195: ...ng the number of bits available to the signal DynamRange dynamic range controls how many bits to remove from the signal data words The lower the level the greater the distortion At 0 dB the hottest of signals will toggle between only two quantization levels thereby producing a square wave Every 6 dB added doubles the number of quantization levels reducing the noise and getting closer to the origin...

Page 196: ...ant Filter Frequency or Freq is the fixed resonant frequency of the filter Its range is 16 to 8372 Hz Envelope Filter Envelope Filter is a resonant filter whose center frequency can be made to vary according to the level of the incoming signal Filter Type can be Lowpass Highpass Bandpass or Notch band cut Min Freq is the minimum resonant frequency of the filter that is the filter frequency when the inp...

Page 197: ...o follow System tempo See Chapter 4 for information about tempo control of PC3 parameters Min Freq and Max Freq are the low and high limits of the resonant frequency as the filter is swept You can set the Min Freq higher than the Max Freq in which case the filter will sweep upside down relative to the controlling clock The range for both is 16 to 8372 Hz LFO Shape is the waveform type for the LFO Ch...

Page 198: ...nds rotates each band separately through a virtual speaker and then combines the outputs with a pair of virtual microphones whose angle relative to the speakers is adjustable A number of very sophisticated parameters have been included in the Rotating Speakers algorithm to give the effect a great degree of realism Because of the complexity of the algorithms you might want to approach any parameter...

Page 199: ...e done with caution real time adjustments to it will result in large sample skips which will cause clicks in the signal passing through The range is 0 to 360 0 degrees In Distort Rotary only The following parameters relate to rotation speed Speed sets the rotating speakers to run at either the slow rate or the fast rate Brake when set to On slows the rotating speakers to a halt Lo Mode in the Norm...

Page 200: ...of the waveform period When the width is set to 50 the result is a square wave This parameter has no effect if other waveform types are chosen Range is 0 to 100 AutoPan Origin determines the axis for the panning motion At 0 the panning is centered between the speakers Positive values shift the axis to the right while negative values shift it to the left At 100 or 100 the range limits there is no p...

Page 201: ...KSP8 Algorithm Reference Guide Ring Modulation Ring modulation multiplies two signals the carrier and the modulator together to produce unusual often non harmonic overtones The Ring Modulator algorithm in the PC3 has two modes L R in which two mono signals are modulated together and Osc in which the input is stereo and it is modulated with the sum of five waveforms that are generated from oscillato...

Page 202: ...y have a higher frequency than the other Range is 16 to 25088 Hz Pan High Mid Low sets the pan position for each band Range is 100 fully left to 100 fully right Delay High Mid Low sets the delay for each band Range is 0 to 1000 ms Stereo Image This algorithm provides enhancement for a stereo signal It also features a stereo correlation meter It uses some parameters from Mono to Stereo and some fro...

Page 203: ... at NoDpth and have no function except to connect sources to meters To use the algorithm save a stereo preset containing the algorithm then a chain containing that preset Go to one of the Chain MOD pages and choose one of the meter parameters Bipole N or Monopole N You will not be able to modify the Adjust or Depth fields but you can select any source you want You can view the meters on PARAM page ...

Page 204: ...9 26 Effects Mono Algorithms ...

Page 205: ...ee available MIDI mode pages The TRANSMIT Page Press the XMIT soft button and the TRANSMIT page appears Use the parameters on this page to control how the PC3 sends MIDI information to its MIDI Out port These settings to some extent affect the PC3 s response to its own keyboard and controllers but they primarily affect the responses of other MIDI devices that are receiving MIDI from the PC3 on the...

Page 206: ...p The transmit Velocity Map affects the way the PC3 sends velocity information to its MIDI Out port Different maps generate different velocity values for the same attack velocity that is they apply different curves to the attack velocities the PC3 receives and remap them to new velocities before transmitting them to the MIDI Out port Important The MIDI Velocity Maps affect only those MIDI velocity...

Page 207: ...ram change command is determined by the settings for three parameters on the CH PRG page in the Setup Editor Change Setups ChgSetups This parameter determines the exact timing of setup changes when you select a different setup either by a normal data entry method or via MIDI program change commands Choose KeyUp to indicate that you want setup changes to take place only when you ve released all cur...

Page 208: ...ore This is because some older Roland products occasionally send an All Notes Off message when no keys are held down even if you re sustaining notes with a pedal You might find all your sustains missing from your sequence for example if you re driving your PC3 from one of Roland s hardware sequencers Setting this parameter to Ignore takes care of this problem Regardless of the setting for this para...

Page 209: ...keyboard that you use to control all the gear in your studio or you use a lot of outboard sequencing If you re using the PC3 as a standalone music workstation or performance keyboard you can ignore this parameter The Channels Page Press the CHANLS soft button to select the CHANNELS page where you can define numerous parameters for each MIDI channel independently Use the Chan Layer buttons to select...

Page 210: ...an message MIDI Pan MIDI 10 messages will change the value of this parameter unless the PanLock parameter described below is set to On If the Mode parameter on the OUTPUT page in the Program Editor is set to Fixed changing the value of Pan on the CHANNELS page in MIDI mode has no effect Volume This sets the volume for any program assigned to the currently selected channel A value of 0 is silence a...

Page 211: ...a MIDI device that can handle the MIDI Controller 0 or 32 program change format you ll have the greatest flexibility if you set the ProgChgType parameter to a value of Extended When you re using the extended program change format then depending on the value of the BankSelect parameter on the RECEIVE page in MIDI mode the PC3 will respond to either MIDI Controller 0 or 32 program change commands for...

Page 212: ... the currently selected memory bank The QA Ext program change format lets you select any one of those programs or setups via MIDI If you select another memory bank you have a different set of 200 programs and setups at your disposal When you re using this format the PC3 will respond to MC 0 or 32 messages for selecting QA banks and to PCHs for selecting entries within the current bank PCHs select ...

Page 213: ...m the PC3 with the alphanumeric buttonpad the cursor buttons the Alpha Wheel the Plus Minus buttons or the Chan Layer buttons also sends corresponding program change commands to the PC3 s MIDI Out port The PC3 sends either an MC 0 or 32 message followed by a PCH The following tables give specific examples Current QA Bank Entry From Alphanumeric Pad Commands Sent MC 0 or 32 PCH 1 0 0 10 1 9 0 19 2 0...

Page 214: ...lpha Wheel and the Prog and Prog soft buttons can all be used to change the program change number that will be sent When you ve set the channel and the program change number press the Send soft button to send the program change command Or press the Cancel soft button if you don t want to send it You can change the channel and the program number as many times as you want before you press Send You a...

Page 215: ...elete all of your User objects The Digital Out Mode goes up to 192K and Syncs to External Clock Also on the Master mode page is General MIDI Mode Check www kurzweilmusicsystems com for more info Master Mode Page 1 On the Master mode page you ll find parameters for setting the overall tuning and transposition of the PC3 sampling rate for digital output and for several keyboard and programming adjust...

Page 216: ...he button presses you make on the first instrument may execute other functions on the second instrument Again it s important to keep in mind that the state of your PC3 must be identical to its state when you recorded the sequence of button presses If you ve added or deleted any objects stored in RAM for example the sequence of button presses will select different objects when you play back the butt...

Page 217: ...Tempo When Clock Source is set to Internal the Tempo parameter sets the PC3 system s tempo The Tempo parameter values are in units of bpm beats per minute Clock Source With the Clock Source parameter you can set the PC3 to generate its own tempo by setting Clock Source to Internal or you can set the PC3 to sync up with the tempo from another device assuming the device is sending MIDI clock data to...

Page 218: ...tonation Most modern western music uses what is known as equal temperament This means that the interval between each semitone of the 12 tone octave is precisely the same as every other semitone Many different intonation intervals have evolved over the centuries however and the PC3 supplies you with 17 different intonation tables to choose from By changing the value for this parameter you select fr...

Page 219: ... is used as a template for new and clear songs in Song mode 1 Equal No detuning of any intervals The standard for modern western music 2 Classic Just Tunings are defined based on the ratios of the frequencies between intervals The original tuning of Classical European music 3 Just Flat 7th Similar to classic Just but with the Dominant 7th flatted an additional 15 cents 4 Harmonic The perfect 4th Tri...

Page 220: ...you press the Save soft button Intonation Key IntonaKey This sets the tonic or base note from which the currently selected intonation table calculates its intervals If you select G as the intonation key for example and the intonation table you select tunes the minor 2nd down by 50 cents then G will be a quartertone flat relative to equal intonation If you change the intonation key to D then D will ...

Page 221: ...ts into various banks naming or renaming objects and deleting objects To access these functions press the OBJECT soft button while in Master mode Rename The Rename utility allows you to rename an object without entering an editor When you press Rename after highlighting the desired object you will see a dialog prompting you for an object name with a suggested default The default name that you see ...

Page 222: ... Yes to this question all dependent objects of the selected objects are deleted unless they are being used as dependents of other objects that are to remain in memory Answering No will delete only those objects that were selected CLOCK Pressing the CLOCK soft button calls up the PC3 System Clock page TapTmp Pressing the TapTmp soft button calls up the Tap Tempo page where you can tap the system te...

Page 223: ... voice s symbol on the Voices Status page turns into a dot during the release portion of that voice s envelope When the voice decays to silence it is no longer active and the dot disappears The Voice Status symbols appears as shown below The Voice Status page gives you an indication of the envelope level of each voice though not necessarily the volume level Nonetheless this can give you a valuable...

Page 224: ...in when you bought it CAUTION Resetting the PC3 system causes ALL parameters to be restored to default values and ALL user objects to be erased The PC3 will ask you if you want to delete everything meaning all RAM objects and a pair of Yes No soft buttons will appear Press No if you want to keep any objects you have saved Press Yes and everything stored in RAM will be erased After a few seconds th...

Page 225: ...unds with a sequencer Rather you are recording commands that cause sounds to be played Nonetheless we will sometimes explain sequencer features by drawing analogies to familiar tape recording techniques such as splicing and overdubbing There are several advantages to recording a song by sequencing For one thing sequencer commands take up much less disk space than digitally recorded music would so ...

Page 226: ...that have data on them and the internal clock is set to match the setting of the Tempo parameter Tempo The Tempo parameter determines the initial tempo for the selected song Whatever the tempo is set to when you record your first track will be the song s initial tempo To change a song s initial tempo press Record the Song Status will change to REC READY set the tempo desired then press Stop The ini...

Page 227: ...the program currently assigned to that channel Program Scroll through the programs in memory to select the program before initially recording each track of your song Any MIDI program changes on the current RecTrk or Chan cause the ID and name of the track s program to change during playback This parameter s name is not visible when RecTrk is set to None or Mult to make room for the Chan parameter ...

Page 228: ...lue changes relative to current location of the song during playback and recording You can set this to a negative Bar and Beat location to start playback a set length of time before the beginning of the song Whenever you set the Locate point that location will be used as the return point when Stop is pressed Simply press Stop again to reset the song to the top 1 1 Mode Indicators and x Mode Indica...

Page 229: ...u to press Play and Record simultaneously to begin recording The PC3 s transport buttons aren t like that however It s important that you press only one of these soft buttons at a time to insure proper recording start points and to always be sure of the current sequencer status The Rec soft button changes the Song Status to REC READY if the current Song Status is STOPPED If the current Song Status...

Page 230: ...or if you have entered the Song Editor and made changes then pressed Exit or if you press Save in the Song Editor PlayOld appears along with the PlayNew soft button in the Save Changes dialog after the recording process has been stopped Pressing PlayOld will play the current song minus the last but not yet saved recorded data You can toggle between Play Old and Play New without restarting the song...

Page 231: ...tart time for Loop or Punch In recording more on this below Time Out The Time Out parameter determines the stop time for Loop or Punch In recording Song End The Song End parameter determines the end point for the song Note that when Time Out and Song End are set to the same location changes made to Song End are reflected in Time Out Parameter Range of Values Default Current Position Bar Beat Depend...

Page 232: ...e segment of the song between Time In and Time Out Punch With the Punch parameter set to Punch the sequencer in RECORDING mode will record events only between Time In and Time Out Metro The Metro parameter determines the recording modes in which the metronome will play With Metro set to Rec the metronome only plays while recording is in progress With Metro set to Always the metronome plays during ...

Page 233: ...acks The bottom line shows the current settings which may change throughout the course of the sequence for the current track Below is displayed an example MIXER page Uneditable The Rec Play and Stop Soft Buttons These soft buttons function as described in The Rec Play and Stop Soft Buttons on page 12 5 The Keep Soft Button Pressing the Keep soft button captures the current settings for each track ...

Page 234: ...ver plays With Metronome set to Rec the metronome only plays during recording With Metronome set to Always the metronome plays during playback and recording CountOff This parameter determines the number of measures the PC3 will count off before recording The PC3 will only count off if you start recording at 1 1 0 Program This parameter determines the program with which the metronome is played If y...

Page 235: ... each measure Soft Note This parameter determines the MIDI number of the note played by the metronome for the upbeats the 2 3 and 4 of each measure Soft Vel This parameter determines the velocity of the note played by the metronome for the upbeats the 2 3 and 4 of each measure The Rec Play and Stop Soft Buttons These soft buttons function as described in The Rec Play and Stop Soft Buttons on page ...

Page 236: ...g playback With Notes set to On only the notes within the specified note range with velocities within specified velocity range are recorded played LoKey LoKey determines the lowest key that is recorded played back when Notes is set to On Hi The Hi to the right of LoKey determines the highest key that is recorded played back when Notes is set to On Parameter Range of Values Default Note Filter Notes ...

Page 237: ... Controllers is set to On LoVal LoVal determines the lowest value for the specified controller that is recorded played back when Controllers is set to On Hi The Hi to the right of LoVal determines the highest value for that specified controller that is recorded played back when Controllers is set to On PitchBend This parameter enables disables pitch bend events to be recorded played back ProgChange ...

Page 238: ... note MIDI events from the beginning of the song up to the current time are computed and the most recent non note MIDI event is sent out before starting playback This ensures that the volume panning program changes and other controllers for the song are correct regardless of where you start the song With Control Chase set to Off the sequencer behaves as previously described Quant The Quantize para...

Page 239: ...other user objects loaded in any other modes The events in the PC3 are similar to events of other sequencers with a single major difference the Note events are stored as a single big event i e one PC3 Note event is comprised of the note on and note off events All other events are stored as single events on the PC3 The fields on the STATS page are Max the maximum number of notes events in memory Use...

Page 240: ...he front panel of the PC3 to display the COMMON page and begin editing a song This is where you will find parameters common to all tracks such as tempo and time signature control parameters for effects and soft buttons for switching to other Song editor pages The top line of this page displays the selected track or tracks Select the available current track for editing by using the Chan Layer button...

Page 241: ...ff or setup NOT the riff or setup song itself there is a D designating the track playing the drum program as a Drum Track the originally recorded Note events on that track will remain unchanged The Drum Tracks settings do not have any effect on edits made on the TRACK page in the Song Editor Any tracks defined as Drum Tracks are transposed when a transposition is applied to these tracks from the TR...

Page 242: ...perates and on what region of the selected track s As usual the top line of this page displays the selected track or tracks Select the available current track s for editing by using the Chan Layer buttons Press both of the Chan Layer buttons together to select All tracks Below is an example of the TRACK page for the Bounce function You will notice that the page is divided into two halves with the ...

Page 243: ...K page It appears at the lower left hand corner of the page The Locate bar beat and tick will change in real time during playback and recording to reflect the song s current position It can be set to any bar beat and tick including negative values Playback begins at and Stop resets the song to the Locate bar beat and tick Region Criteria Box Parameters From and To From and To are available in most ...

Page 244: ...en Ctl is set to All Available Values are 0 127 Soft Buttons on the TRACK Page FromTo is a quick way to define the region of time you intend to edit There are a couple of ways to use this feature when the sequence is playing back in real time and both ways will set the temporal boundaries of the region One way is to first position the cursor over the From parameter in the Region Criteria box and the...

Page 245: ...rack use the Events parameter in the Region Criteria box to select a specific MIDI event type you would like the edit function to affect Some event types provide you more criteria selection parameters It is often a good idea to set Events to Notes when copying and then add any necessary controller or other data to the track at a later time DstTrack 1 to 16 All Select a destination track for the cop...

Page 246: ...on track Bounce Use the Bounce function to move the selected events from the current track to another track either merging with or overwriting existing data on the destination track The Bounce function differs from the Copy function in that the original data is not preserved in the original track As on a multi track tape recorder Bounce will always put the data in the same timeline on the new trac...

Page 247: ...en you perform this function rather they are offset by the length of the blank time being added to a Bar and Beat later in the song Amount Bars Beats Ticks The length of the blank time being added is defined as a number of Bars and Beats in the Amount parameter There are no Region Criteria parameters available for the Insert function Delete The Delete function is used to remove a region of time fro...

Page 248: ...id 1 1 to 1 480 This setting determines the size of the Quantize grid expressed as a fraction of a Bar with a 4 4 meter Set Grid to 1 1 for whole note grid 1 16 for sixteenth notes All of the standard note durations and every fractional Bar divisions in between are available as the size of the Input Quantize grid Swing 100 to 125 The Swing percentage is applied to the quantize grid 0 swing is stra...

Page 249: ...ndary location Amount Bars Beats Ticks The Ticks parameter specifies the number of bars beats and ticks that the MIDI events from within the selected region are moved forward for positive values or backward for negative values in time relative to their original locations Mode Merge Erase The Mode setting determines whether the shifted events merge with or erase existing events on the destination tr...

Page 250: ...ed track is All tracks then the destination track will be All tracks as well No matter what channel the current track source track in the source song is set to when you use the grab function the events will be played on the destination track s channel Location Bars Beats Ticks Specify a bar beat and tick location in the destination track where the grabbed data will be placed with the Location para...

Page 251: ...om the original or scaled values Values for velocities can not be less than 1 or greater than 127 Values for controllers can not be less than 0 or greater than 127 As an example to set all Velocities to a value of 55 you would set Scale to 0 multiplies all original values by zero and set Offset to 55 adds 55 to the product of the Scale parameter Mode Constant PosRamp NegRamp Set Mode to Constant t...

Page 252: ...l Source List 0 to 120 The Old Controller is set to the Controller type that you wish to remap This Controller data must already exist on the current track in order to apply it to the New Controller type New Control Source List 0 to 120 The New parameter is set to the Controller code you wish to have use the existing values once used by the Old Controller to produce a different effect Song Editor ...

Page 253: ...ts may not have been executed and you may hear unexpected results For example if you have program changes at bar 1 and bar 8 then if you jump from bar 1 to bar 9 any notes you scroll through will be played with the program change from bar 1 The channel of the selected event is displayed on the top line of the page Use the Chan Layer buttons to select an active track to view and edit the MIDI event...

Page 254: ...uffer so that you can immediately paste it into a new location Paste Inserts the most recent cut or copied event into the Event list at the currently selected Bar Beat Tick location The pasted event will share the same location with the event that already existed at that location in the Event list but it will appear before the pre existing event New Inserts a new event by duplicating the current e...

Page 255: ...f the page is a line indicating the currently selected storage device There two selectable storage destinations Card and USB Next to each destination is the name of the attached card or device if any In the top right hand corner of the page is displayed the currently selected storage destination The currently selected device will be read from or written to when you load save rename or delete files ...

Page 256: ... appear Press the Yes soft button when you are ready to begin The PC3 will remind you that formatting will erase the xD card and will give you two more chances to cancel the formatting procedure we want to make sure you don t accidentally erase any cards Press the Yes soft button to continue formatting When formatting begins the display will tell you that the card is being formatted The blue xD LE...

Page 257: ...isk Drive Information For xD cards the manufacturer and card size are displayed Common Dialogues These are dialogues that the PC3 calls up when about to perform certain storage functions The Select Directory Dialogue When storing an object or group of objects the PC3 prompt s you to select a directory in which to save that object or group There are three navigating soft buttons on the left side of...

Page 258: ... file saved or loaded New directory names will default to either DIRNAME after a powerup or the name will be that of the most recent file saved or loaded Once you choose a name to start with or the default you can edit the name using the Left and Right cursor buttons the Delete and Insert soft buttons and the and soft buttons Pressed OK soft button saves the object in the current directory The displ...

Page 259: ...aved see The Store Advanced Page If you choose to store using the bank method all RAM objects within that bank will be saved You cannot store ROM objects If you wish to store a ROM object such as a program you must first save it internally as a RAM program If any objects within the selected bank have dependent RAM objects that exist in a different bank you will be asked if you want to save dependen...

Page 260: ...al objects from the current storage device Along the bottom of the Load page there are four soft buttons Below are descriptions of their functions Parent Moves you up one level in the directory hierarchy If the display is already at the root directory this button has no effect Open Open selected file or directory See below for instructions on opening files to view objects OK Load selected file See be...

Page 261: ...selected object by pressing Select again The asterisk will disappear The easiest way to choose objects for loading is to scroll the list and individually press Select on each object you want to load The Next button will cause the index into the list to jump to the next selected object forward in the list When the end of the list is reached the search will wrap around from the beginning If you have...

Page 262: ... the Fill method Append Merge and Overwrt try to preserve the numbers stored with the objects in the file but this should only really be necessary if you depend on program numbers or effect numbers to be at a certain MIDI program change number OvFill is like Fill except the selected bank or Everything is cleared out before loading Overwrt and OvFill operate in different ways after a selected bank h...

Page 263: ...to the Base2 129 256 bank The following table shows the IDs that each program end up with when you load the programs from the Classic Keys bank 255 384 into the Base2 bank Program ID Program Name 129 Piano Stack 133 Ole Upright 1 134 WestCoastPno Pad 139 The Ancient 140 DancePnoEchplex Program ID Program Name 260 Brighter CP 261 TouchRezSynthCP 264 Inside Out CP 265 Pianet Classic Original Program...

Page 264: ...multiple file copy between devices Open Opens the highlighted directory Parent Moves you up one level in the directory hierarchy If the display is already at the root directory this button has no effect When you first open a directory for viewing the index is 1 the first file in the list The PC3 remembers the index of the previous directory you were in before you pressed Open so if you return to that ...

Page 265: ...tions Messages Altered Note Number 0 127 0 11 sets intonation key True Voice 0 127 0 127 Velocity Note ON O O Note OFF O O After Touch Keys X O Channels O O Pitch Bender O O Control Change O 0 31 32 63 LSB 64 127 O 0 31 32 63 LSB 64 127 Controller assignments are programmable Program Change O 1 999 O 1 999 Standard and custom formats True 0 127 0 127 System Exclusive O O System Common Song Pos O O...

Page 266: ...A 2 MIDI Implementation Chart ...

Page 267: ... a ROM chip that cannot be erased and therefore is permanently installed in your PC3 Using the Bootloader Menu Normally the Bootloader program will do its tasks and hand over control to the synthesizer program automatically If you want to interact with the Bootloader itself hold down the Exit button to the right of the display while turning the power on while the message Initializing Scanner is di...

Page 268: ...vailable having the name KurzweilPC3 Files can be dragged and dropped directly to this device icon and will be immediately available on the PC3 The UPDATE IMAGE menu looks like this Use the soft buttons below the display to choose the appropriate module to update Most of the time you ll want to choose MAIN IMAGE or MAIN OBJECT The executable image file will be a file with a name like PC3SY150 BIN Th...

Page 269: ...op without altering anything Remember to save your work in the Storage menu Once deleted the files are completely removed from the PC3 and there is no way to retrieve them File Utilities These functions allow you to move files from the external storage onto the PC3 internal file system or vice versa It is also possible to execute PC3 images directly from a card or USB file which can be useful in diagn...

Page 270: ...also copy the current PC3 executable image and diagnostics images and the PC3 object library to the same external medium used for the PC3FILES program Choose FILE UTILITIES and EXEC from file soft buttons and select PC3FILES BIN from the list of files shown Press the soft button labeled CHOOSE to execute the PC3FILES program The program will display the menu Press the soft button labeled FORMAT FLAS...

Page 271: ...es from 100 to 125 230 should be used for 200 to 240 Generally North America uses 115 and Europe and Asia Australia use 230 but there are exceptions to this general rule The PC3 uses two 250 mA fast blow fuses for 230V or two 500 mA fast blow fuses for 115V These can be either 1 25 X 0 25 size or 5 mm X 20 mm size fuses Extra fuses are not provided so you will need to acquire the correct fuse befo...

Page 272: ...C 2 Pull up gently to open the fuse holder cover The cover is hinged next to the power cord connection Pry out the fuse holder ...

Page 273: ...C 3 If there is only one fuse in the fuse holder you must remove the metal clip on the empty side The clip just pulls off ...

Page 274: ... size or 5 mm X 20 mm size fuses If using 5 mm X 20 mm size fuses install them towards the inside end of the fuse holder near the metal pins as shown here Replace the fuse holder in the power entry module with the indicator for the desired voltage towards the edge of the module away from the power switch Close the fuse holder cover and check that the desired voltage indication shows through the ho...

Page 275: ...C Tubes 62 Bassie Orchestra 11 Lola Piano 37 SimpleHipHopLead 63 P Funk Horns 12 TakeMeToThePilot 38 Stereo TouchKoto 64 70s Stones Horns 13 Deb s Ghost Pno 39 Modwheel DJ 65 Big LA Strings 14 Ken Brns Uprigt 40 Retro Sparkle 66 DarkNYCStudio 15 SMiLE RkyRaccoon 41 RealSupasticious 67 Pop Tripper Str 16 Piano String 42 Joe s Clav 68 LoFi Studio Str 17 Beaten in Rhds 43 Rufus Marley WAH 69 Vienna O...

Page 276: ... 159 TX Stack 1 94 Fairlight Pad 127 Magic Celeste 160 Tight Bright FM 95 Tronesque 128 Drums n Bells 161 PolyTechnobreath 96 So Lush Pad 129 Piano Stack 162 PianoSynth Stack 97 Boutique Six Str 130 Dark Grand 163 Elec Grand Stack 98 Boutique 12 Str 131 Grand Piano 440 164 BigSyn HornStack 99 Emo Verser 132 Piano Recital 165 70s Arena Synth 100 Voxxed Elec 12 133 Ole Upright 1 166 80s Arena Synth ...

Page 277: ...g 258 Gabriel s Melt 193 Studio A Strings 226 MediumCrunchLead 259 VideoKilledRadio 194 Studio B Octaves 227 DoubleCleanChrs 260 Brighter CP 195 NashvilleStrings 228 Comp d Phaser 261 TouchRezSynthCP 196 Processed Strgs 229 TremBucker 262 Power CP 197 Owen s Strings 230 Cascade Sitar 263 Dark Chorus CP 198 Studio C Strings 231 Heavy Buckers 264 Inside Out CP 199 Tender Strings 232 Nasty 70s Guitar...

Page 278: ...RP Str Oberheim 292 TreblClavWhlmute 325 Octave Tron Str 358 FX Sweep ARP 293 Mutron Synth sw 326 Siberian Khatru 359 HotFilter ARP 294 Bi Phaz Clav 327 Modwhl Remix Str 360 St P PWM BASS 295 80s Flange Clav 328 Pdl PitchbendStr 361 SquareChirpLead 296 VAST Env SynClav 329 Silent Sorrow 362 My Old PPG 2 3 297 Charlemagne Clav 330 Bandpass Choir 363 Kashmir Str Brs 298 Switch Pickups 331 Swept Tron...

Page 279: ...ad MuteTrumpet 391 Poltergeist Trem 424 Tremolo Flute 457 Solo Tenor Sax 392 Many Characters 425 Fast Orch Flute 458 Sax Horns MuteTrp 393 Pizz w PercUpTop 426 Piccolo 459 Solo Trombone 394 Fast Str Perc 427 Solo Oboe 460 Ens Trombone 395 Fast Winds Pizz 428 Slow Oboe 461 Trombone Section 396 Imperial Army 429 Fast Orch Oboe 462 Dyn Orch Bones 397 BattleSceneOrch 430 Lead Oboe 463 Bari Horn Sectio...

Page 280: ... Lead Upper Range 490 AllStops AllVox 523 Lead Divisi Mix 556 Lead Div 8ves 491 Pipes Voices 524 Lead Tutti Mix 557 Dual UpperDivisi 492 Orch Timpani 525 Fast Tutti Mix 558 Dual Upper tutti 493 Solo Timpani 526 Fast Divisi Mix 559 Dual Half Trem 494 Tam Cym BD Timp 527 AggressTutti Mix 560 Fast Mix Octaves 495 Basic Orch Perc 528 AggressDivisiMix 561 Fast Divisi 8ves 496 Timp Aux Perc 529 Agrs lo ...

Page 281: ...dagio Tremolo 621 Aggresso Violin d 910 ClassicTrafficB3 589 Lead Violins I 622 Aggresso Viola 911 Warm B3 590 Lead Violins II 623 Aggresso Viola d 912 Warmer B3 591 Lead Violins div 624 Aggresso Cello 913 ChorusEcho Organ 592 Lead Violas 625 Aggresso Cello d 914 SlowPhase Organ 593 Lead Violas div 626 Agresso Bassi 915 EchoRoom B 594 Lead Celli 627 Agresso Bassi d 916 Lord s DirtBomb 595 Lead Cell...

Page 282: ...000 Diagnostic Sine 941 Gimme Some 1001 Propht V Sync Ld 942 The Grinder 1002 Tempo SyncPulse 943 Mean Bean 1003 Slo Syn Orch 944 Dew Dropper 1004 Anabrass 945 Two Out 1005 Fat Syn Orch 946 J s All Out 1006 WheelGrowlMoogue 947 My Sunday 1007 The Way It Is 948 Good Starter 1008 AlphaCentauri 949 Sacrificer 1009 SynOrcWhaleCall 950 Lee Michaels B3 1010 Downes Lead 951 GM Standard Kit 1011 Minipulse ...

Page 283: ...cBass EP 72 Nylon and Ivory 11 Sanctuary 42 ARP Bass 73 Drawbr Slidr SW 12 World Beneath 43 Fretless Split 74 Mini E3 Clav 13 DeepBurn 44 Big Lead 75 Plucked Hammers 14 Sync Scene 45 SynBass Lead 126 Internal Voices 15 MeanClav Rhds 46 Play 127 Clear Setup 16 Bigband P Bttn1 47 MovieBuildup 128 Default Setup 17 MeanPianet Piano 48 GuitarEnsemble 18 Oldtimey Blues 49 Big n Warm Pn Gt 19 OldR B 50 J...

Page 284: ...e 19 of the KSP8 Algorithm Reference and its 3 pages of parameters are described starting on page 21 of the KSP8 Algorithm Reference Reverbs Booth 1 Small Wood Booth alg 4 Classic Place 2U Ambience 2 Natural Room alg 5 Classic Verb 2U 3 PrettySmallPlace alg 4 Classic Place 2U 4 NiceLittleBooth alg 1 MiniVerb 1U 5 Sun Room alg 5 Classic Verb 2U 6 Soundboard alg 7 TQ Verb 3U 7 Add More Air alg 10 Om...

Page 285: ...U 38 Bigger Perc Room alg 7 TQ Verb 3U 39 Sizzly Drum Room alg 5 Classic Verb 2U Chamber 40 Live Chamber alg 11 OmniVerb 3U 41 Brass Chamber alg 1 MiniVerb 1U 42 Sax Chamber alg 1 MiniVerb 1U 43 Plebe Chamber alg 1 MiniVerb 1U 44 JudgeJudyChamber alg 7 TQ Verb 3U 45 Bloom Chamber alg 7 TQ Verb 3U 46 ClassicalChamber alg 7 TQ Verb 3U 47 In The Studio alg 4 Classic Place 2U 48 My Garage alg 4 Classi...

Page 286: ...3U 72 Sweeter Hall alg 7 TQ Verb 3U 73 The Piano Hall alg 7 TQ Verb 3U 74 Bloom Hall alg 9 Diffuse Verb 3U 75 Recital Hall alg 12 Panaural Room 3U 76 Generic Hall alg 12 Panaural Room 3U 77 Burst Space alg 9 Diffuse Verb 3U 78 Real Dense Hall alg 7 TQ Verb 3U 79 Concert Hall alg 9 Diffuse Verb 3U 80 Standing Ovation alg 11 OmniVerb 3U 81 Flinty Hall alg 7 TQ Verb 3U 82 HighSchool Gym alg 7 TQ Verb...

Page 287: ...se Reverb 2 alg 15 Finite Verb 3U 107 Reverse Reverb 3 alg 15 Finite Verb 3U Gated 108 Gated Reverb alg 3 Gated MiniVerb 2U 109 Gate Plate alg 3 Gated MiniVerb 2U w Comprs 110 Vocal Room alg 53 Gate Cmp EQ Rvb 4U 111 Vocal Stage alg 53 Gate Cmp EQ Rvb 4U 112 Reverb Compress alg 51 Reverb Compress 3U 113 Reverb Compress2 alg 51 Reverb Compress 3U 114 Drum Comprs Rvb alg 51 Reverb Compress 3U 115 Rv...

Page 288: ...b 3U 137 Cheap LaserVerb alg 101 LaserVerb Lite 2U 138 Gated LaserVerb alg 104 Gated LaserVerb 3U 139 Rvrs LaserVerb alg 103 Revrse LaserVerb 4U 140 LazerfazerEchoes alg 102 Mono LaserVerb 1U 141 Simple LaserVerb alg 102 Mono LaserVerb 1U 142 Crystallizer alg 100 LaserVerb 3U 143 Spry Young Boy alg 101 LaserVerb Lite 2U Rvb w Dly 144 Gunshot Verb alg 105 LasrDly Reverb 2U 145 Slapverb alg 11 OmniV...

Page 289: ...2 8 Tap Delay BPM 2U 170 Multitaps ms alg 156 Complex Echo 1U 171 Diffuse Slaps alg 156 Complex Echo 1U 172 OffbeatFlamDelay alg 150 4 Tap Delay BPM 1U 173 Sloppy Echoes alg 156 Complex Echo 1U 174 Pad Psychosis alg 191 Dual MovDelay 1U 175 500ms BehindSrce alg 156 Complex Echo 1U 176 Dub Skanque Dly alg 154 Spectral 4 Tap 2U 177 Electronica Slap alg 156 Complex Echo 1U 178 Spectral 4 Tap alg 154 ...

Page 290: ...Chorus Morris alg 202 Dual Chorus 1 1U 206 Everyday Chorus alg 202 Dual Chorus 1 1U 207 Thick Chorus alg 202 Dual Chorus 2 2U 208 Soft Chorus alg 202 Dual Chorus 2 2U 209 Rock Chorus alg 202 Dual Chorus 2 2U 210 Sm Stereo Chorus alg 200 Chorus 1 1U 211 Lg Stereo Chorus alg 201 Chorus 2 2U 212 Full Chorus alg 402 Chorus 4Tap 2U 213 Dense Gtr Chorus alg 201 Chorus 2 2U 214 Standrd Gtr Chor alg 406 S...

Page 291: ... Delay 1U 238 NarrowResFlange alg 452 Flange 4Tap 2U 239 TightSlapFlange alg 450 Flange Delay 1U 240 Flanged Taps alg 455 Flange LasrDly 2U 241 StFlange Delay alg 456 St Flange Delay 1U 242 StFlng 3vs2Delay alg 456 St Flange Delay 1U 243 Singing Flanger alg 456 St Flange Delay 1U 244 DampedEchoFlange alg 456 St Flange Delay 1U 245 Stereo Flanger alg 225 Flanger 2 2U 246 Gulp Flange alg 225 Flanger...

Page 292: ...alg 258 Barberpole Comb 4U 269 Westward Waves alg 385 Frequency Offset 2U TREM 270 Tremolo BPM alg 270 Tremolo BPM 1U PANNER 271 Fast Tremolo BPM alg 270 Tremolo BPM 1U SPATIAL 272 Tremolo in Hz alg 271 Tremolo 1U 273 FastPulseTremolo alg 270 Tremolo BPM 1U 274 Simple Panner alg 275 AutoPanner 1U 275 Dual Panner alg 276 Dual AutoPanner 2U 276 Widespread alg 280 Stereo Image 1U 277 Widener Mn St al...

Page 293: ...beAmp 3U 302 SaturatedGtrDist alg 310 Gate TubeAmp 3U 303 Mean 70 sFunkGtr alg 310 Gate TubeAmp 3U 304 Blown Speaker alg 390 Chaos 2U 305 Synth Distortion alg 303 PolyDistort EQ 2U 306 Superphasulate alg 170 Degen Regen BPM 4U 307 Dist Cab EPiano alg 301 MonoDistort Cab 2U 308 Distortion EQ alg 302 MonoDistort EQ 2U 309 Burnt Transistor alg 304 StereoDistort EQ 3U 310 SubtleDistortion alg 300 Mono...

Page 294: ...U 339 Expander alg 340 Expander 1U 340 Simple Gate alg 343 Gate 1U 341 Gate w SC EQ alg 344 Gate w SC EQ 2U 342 3Band Compressor alg 336 3 Band Compress 4U 343 3Band Compress2 alg 336 3 Band Compress 4U 344 Mid Compressor alg 335 Band Compress 3U 345 OddHarmSuppress alg 374 HarmonicSuppress 2U 346 60Hz Buzz Kill alg 374 HarmonicSuppress 2U 347 Dual SK Compress alg 347 Dual SKCompress 2U 348 Dual C...

Page 295: ... 372 Ring Modulator alg 380 Ring Modulator 1U 373 PitcherA alg 381 Pitcher 1U 374 Pitcher B alg 381 Pitcher 1U 375 PolyPtVoxChanger alg 382 Poly Pitcher 2U 376 HollowPolyPitchr alg 382 Poly Pitcher 2U 377 Pitcher Chorus alg 411 MonoPitcher Chor 2U 378 Pitcher Flange alg 461 MonoPitcher Flan 2U 379 Pitcher Chor Dly alg 409 Pitcher Chor Dly 2U 380 Pitcher Flng Dly alg 459 Pitcher Flan Dly 2U 381 Rin...

Page 296: ... Reverb 2U 409 ChorusMedChamber alg 404 Chorus Reverb 2U 410 Chorus MiniHall alg 404 Chorus Reverb 2U 411 Chorus HiCeiling alg 404 Chorus Reverb 2U 412 ChorBigBrtPlate alg 404 Chorus Reverb 2U 413 CathedralChorus alg 404 Chorus Reverb 2U 414 Flam Dly Bckgrnd alg 403 Chor Dly Reverb 2U 415 CDHall Halo alg 403 Chor Dly Reverb 2U 416 CrackedPorcelain alg 401 Chorus 4Tap 1U 417 Rich Delay alg 403 Chor...

Page 297: ... 403 Chor Dly Reverb 2U 442 Laser Amalgam alg 405 Chorus LasrDly 2U 443 Cut it out CDR alg 403 Chor Dly Reverb 2U 444 Chor Delay Booth alg 403 Chor Dly Reverb 2U 445 Chor Tin Room alg 403 Chor Dly Reverb 2U 446 Boiler Plate alg 403 Chor Dly Reverb 2U 447 O T T Pad alg 403 Chor Dly Reverb 2U 448 TheChorusCloset alg 403 Chor Dly Reverb 2U 449 C D alg 402 Chorus 4Tap 2U FLANGE 450 Flange Delay alg 45...

Page 298: ...76 Laserflange alg 455 Flange LasrDly 2U 477 Pewter FlangeVrb alg 454 2U 478 WeirdFlangePlate alg 454 2U 479 F D Hall alg 453 Flan Dly Reverb 2U 480 SyntheticRmFlg alg 453 Flan Dly Reverb 2U 481 Space Flanger alg 452 Flange 4Tap 2U 482 Lazertag Flange alg 455 Flange LasrDly 2U 483 Flange Pitcher alg 384 Flange Pitcher 2U 484 Flange Shaper alg 321 Flange Shaper 2U 485 Pitch Spinner alg 384 Flange Pi...

Page 299: ... 6 39 Attack Portamento parameter Common 6 35 Attack Time and Level parameters AmpEnv 6 42 Audio cables 2 2 Audio output parameters 6 32 AutoPan 9 22 B Bank Buttons 3 2 Bank Select MIDI Receive page 10 5 Banks 3 2 Basic editing 5 1 Basic MIDI channel 10 4 Bass Freq 9 13 Bass Gain 9 13 Battery 1 4 Bipole 9 25 Boot Loader 1 4 Bootloader B 1 Bottom line of display 3 6 Bounce Song Mode TRACK Page 12 2...

Page 300: ... DiffBassF 9 24 DiffBassG 9 24 Digital audio output 2 3 Digital Output Mode 11 3 Directories 13 2 Disk Drive Information 13 3 Disk format requirements 13 1 Disk Mode 5 5 13 1 Disk mode 4 3 Display 3 6 Dist Drive 9 19 Distortion 9 19 Dly Coarse 9 17 Dly Fine 9 18 DlyCrs 9 17 DlyFi 9 17 Double button presses 3 10 DRAWBR page Program Editor 6 55 Drive 9 14 Drum Tracks Song mode 12 17 Dry Bal 9 12 Duc...

Page 301: ... Function soft buttons 6 51 fuses C 1 FX bypass 5 6 FXMod Diagnostic 9 25 G g 13 2 Gate Time 9 16 Gated Ducking Delay 9 13 Gates 9 14 Globals parameter Common 6 35 6 54 Grab Song Mode TRACK Page 12 26 Graphic equalizer 9 13 Grounding 2 2 H Half Wts 9 23 Hard reset 11 10 Headroom 9 17 HF Damping parameter 9 10 Hi Beam W 9 20 Hi Fast 9 21 Hi Gain 9 20 Hi Res Delay 9 21 Hi Size 9 21 Hi Slow 9 21 Hi T...

Page 302: ... 9 21 Lo Res Dly 9 21 Lo Size 9 21 Lo Slow 9 21 Lo Trem 9 21 LoAccelCrv 9 21 Loading files 5 5 Loading Individual Objects 13 6 Lock parameters 10 6 LoFst Slow 9 21 LoMic A 9 20 LoMic B 9 20 Loop Type parameter AmpEnv 6 43 Looping samples 6 21 LoResonate 9 21 LoResXcurs 9 21 LoSlow Fst 9 21 LoSpinDir 9 21 Low Key parameter Layer 6 23 Low Velocity parameter Layer 6 23 LP Freq 9 20 Lvl 9 20 M MakeUp G...

Page 303: ...g 5 2 RAM 5 2 5 3 Renaming 5 2 ROM 5 2 5 3 Octav 6 10 Odd Wts 9 23 OK soft button 13 10 Opaque parameter Layer 6 25 Origin 9 22 Osc1 Freq 9 23 Osc1 Lvl 9 23 Osc1 Shape 9 23 Osc1PlsWid 9 23 Osc1Smooth 9 23 Out Gain parameter 9 10 OUTPUT page Program Editor KB3 6 63 Overview 1 3 Overwrt soft button 13 8 OvFill soft button 13 8 P Pages 3 6 AMP KB3 6 56 AMPENV Amplitude envelope 6 41 ASR Attack Sustai...

Page 304: ... 6 53 Program lock 10 6 Program mode 2 7 4 2 6 1 6 9 Soft buttons 6 10 Program mode page 6 9 Programs D 1 Adding layers 6 51 Deleting 6 52 Deleting layers 6 51 Dumping 6 52 Duplicating layers 6 51 Editing KB3 6 53 Editing VAST 6 11 Importing layers 6 51 KB3 2 8 6 4 Renaming 6 52 Saving 6 52 selecting 2 7 VAST 2 8 6 2 Ptch Offst 9 23 Pulse Width 9 19 9 22 Punctuation 5 3 Q Quantize Song Mode TRACK ...

Page 305: ...Page 7 2 Pressure Press Page 7 32 Ribbon Configuration RIBCFG Page 7 37 RIBBON Page 7 37 WHEEL Page 7 29 Setup mode 4 2 7 1 Setups 2 9 D 9 Aux Bend 1 7 19 Aux Bend 2 7 19 BEND Page 7 18 Bend Range 7 18 COMMON Page 7 44 Continuous Control Pedal CPEDAL Page 7 31 Continuous Controller Parameters 7 26 Controllers 7 19 Curve Curv 7 26 Destination 7 7 Destination Dest 7 26 Entry Ent and Exit States 7 28 ...

Page 306: ...evel 9 12 Threshold 9 15 Thru Out switch 2 3 Timbre Shift parameter Keymap 6 21 Toggle switch type 7 27 TONEWL page Program Editor 6 53 Top line of display 3 6 TRACK Page Song Editor 12 18 Transpose Master 11 2 MIDI 10 2 Song Mode TRACK Page 12 25 Transpose parameter Keymap 6 19 Transposing setups 7 1 Treb Freq 9 13 Treb Gain 9 13 Tremolo 9 22 Trig Filt 9 18 Trig parameter Layer 6 24 Trigger 9 19 ...

Page 307: ...Index ix X XCouple parameter 9 10 Xcrs Fin 9 17 Xcurs Crs 9 17 xD memory cards 1 4 2 6 Xfer 9 14 XMIT page 10 1 Xover 9 20 Xpose 2 8 6 10 Z Zone status LEDs 7 3 Zones Soloing 7 4 ...

Page 308: ...Index x ...
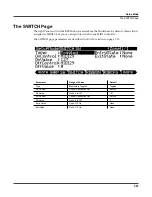
Reviews: