7-26
Setup Mode
Controllers
Continuous Controller Parameters
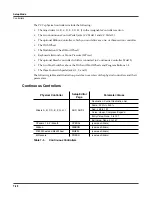
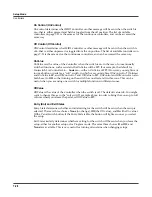
The continuous (physical) controllers are those that have a
range
of values: the two wheels, the
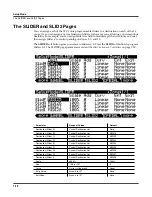
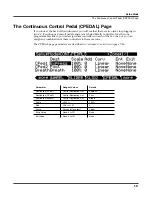
optional ribbon controller, the nine sliders, the two Continuous Control pedals, the optional
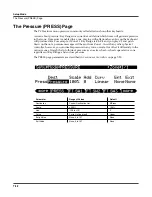
breath controller (the jack of which is connected to CC pedal 2), and mono pressure (aftertouch).
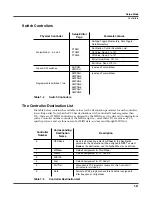
As the table on page 7-20 shows, all of them use the same parameters. Each parameter’s
function is described below.
Dest
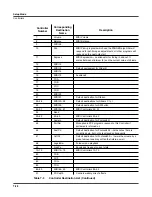
Use this parameter to select a destination from the MIDI Controller Destination list (see
page 7-21).
Scale
After you’ve selected a continuous physical controller, you can modify the controller’s response
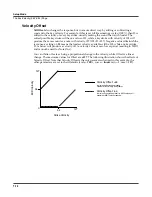
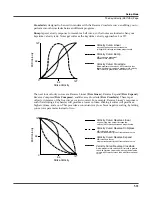
similarly to the ways you can modify velocity response. Refer to the graphs beginning on
page 7-11 for illustrations of the velocity scaling parameters.
Scale
lets you amplify or diminish the action of the controller. Full scale is 100%. Higher values
will make the controller more sensitive, and lower values will make it less so. Setting the scale to
a negative number makes the controller action work in reverse. As with velocity, you can use a
controller to crossfade between two zones by setting the scaling for one zone positive and the
other negative. Maximum scale values are
+300%
and
-300%
.
Add
This adds or subtracts a constant to the controller, and at the same time sets minimum or
maximum values (there’s no need for separate Max and Min parameters). If Add is
25
, the
minimum value of the controller will be 25. If it is
-25
(and scale is
100%
) the first one-fifth of the
controller’s movement (25/127
≈
1/5) will send value of 0, and the maximum value of the
controller will be 102 (= 127-25). As with velocity, Scale is a proportional change to the controller,
while Offset is a linear change. The values for Offset range from
-128
to
127
.
Curv
This lets you taper the controller response. The default setting is
Linear
, which means that the
response follows a straight line as you move the controller.
Setting Curv to
Expand
produces a curve that is less steep than the linear curve at keystrike
velocities below 64, and steeper than the linear curve at keystrike velocities above 64. In other
words, when you’re playing softly, you’ll notice velocity differences less than with a linear
curve, while when you’re playing hard, you’ll notice velocity differences more.
Setting Curv to
Compress
produces a velocity curve that is the opposite of the expanded
curve—that is, you’ll notice velocity differences more when you’re playing softly than when
you’re playing hard.
You can also create “reverse” versions of the three described curves. First, select your desired
curve. Then set the Scale parameter to
-100%
, and set the Add parameter to
127
. This makes the
selected controller send a value of 127 when all the way down and a value of 0 when all the way
up.
To get an idea of how these curves affect controller response, refer to the Velocity Curve charts,
which begin on page 7-11.
Summary of Contents for PC3
Page 24: ...1 6 Introduction Options ...
Page 50: ...4 4 The Operating Modes Using the Modes ...
Page 174: ...7 54 Setup Mode The Utility Soft Buttons ...
Page 178: ...8 4 Quick Access Mode Making Your Own QA Banks ...
Page 204: ...9 26 Effects Mono Algorithms ...
Page 266: ...A 2 MIDI Implementation Chart ...
Page 308: ...Index x ...

