RS-1600-X24 User Guide
114
6
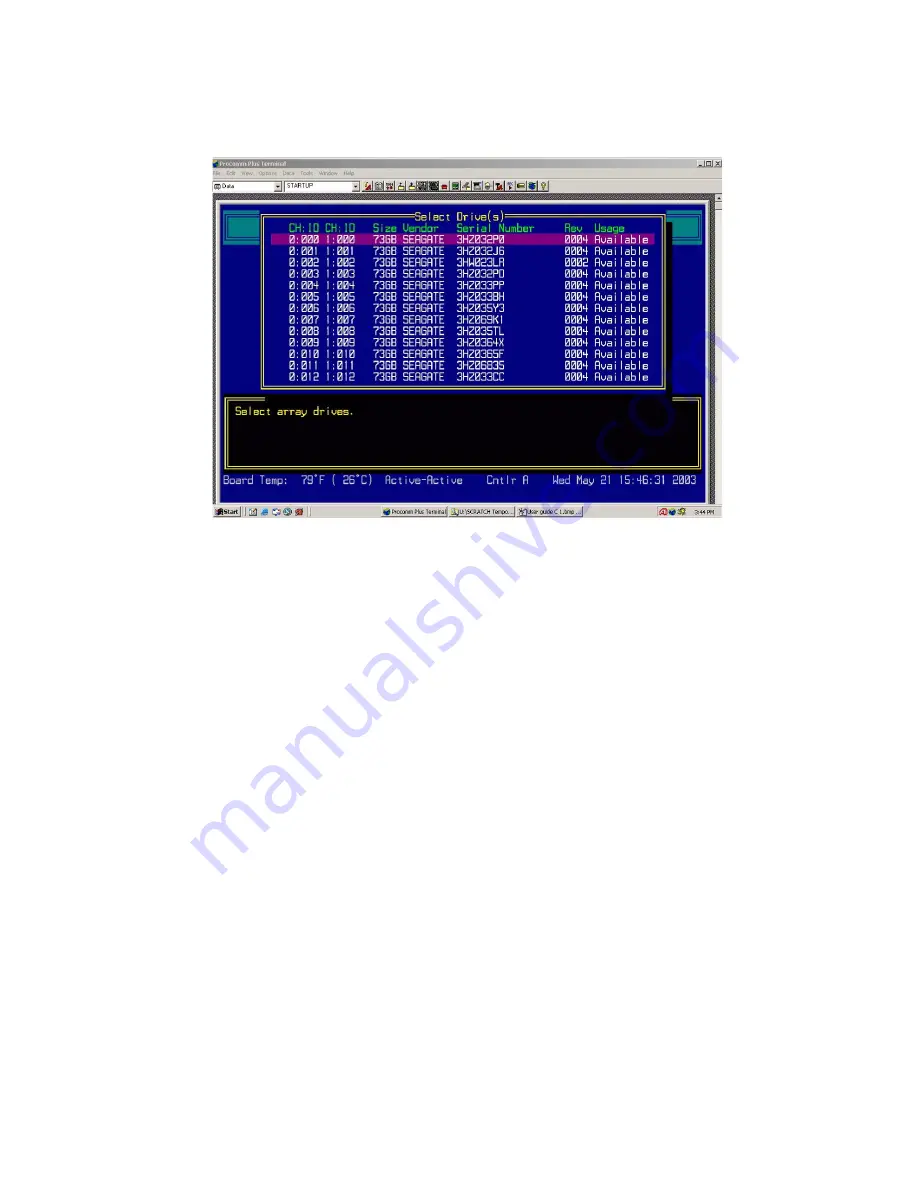
Select the drives you want to use for the array and press
Enter
.
You select a drive by highlighting it and pressing
Enter
. Each selected drive turns gray in the drive list.
After you press
Enter
for the number of drives you entered previously, the system automatically goes to
the next screen. To skip a drive, use the
↑
or
↓
key.
You may want to select drives from different disk channels (I/O modules), which keeps the array online
even if one channel becomes unavailable.
If the array is mirrored, RAID 3, RAID 4, RAID 5, or RAID 50
and
you have one or more drives left, the
Number of Spares screen displays.
7
If the Number of Spares screen displays, enter the number of spares you want to add and press
Enter
.
This creates dedicated spares that can only be used by this array. A dedicated spare drive will not be
available for any other use.
If you do not want a dedicated spare, enter
0
.
The Select Drives screen displays.
8
If the Select Drives screen displays, select the drive you want to use as a dedicated spare and press
Enter
.
Only available drives, that is, drives that are not members of an array and are not assigned as a dedicated
or pool spares, display. You can delete a dedicated spare from the array at any time. For more
information, see
E.1.2, ”Deleting a Dedicated Spare”, on page 168
.
Summary of Contents for RS-1600-X24
Page 1: ...RS 1600 X24 User Guide Part No 43061 01A Issue 1 0 June 23 2003 ...
Page 9: ...Contents ix Index 229 ...
Page 10: ...x RS 1600 X24 User Guide ...
Page 50: ...RS 1600 X24 User Guide 32 ...
Page 56: ...RS 1600 X24 User Guide 38 ...
Page 70: ...RS 1600 X24 User Guide 52 ...
Page 112: ...RS 1600 X24 User Guide 94 ...
Page 170: ...RS 1600 X24 User Guide 152 ...
Page 190: ...RS 1600 X24 User Guide 172 ...
Page 206: ...RS 1600 X24 User Guide 188 ...
Page 230: ...RS 1600 X24 User Guide 212 ...
Page 238: ...RS 1600 X24 User Guide 220 ...
Page 246: ...RS 1600 X24 User Guide 228 ...


