


UNREGISTERED VERSION OF PICTURED
UNREGISTERED VERSION OF PICTURED
3»6 Cooling system
THERMOMETER
6.6b
...
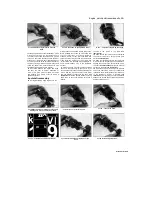
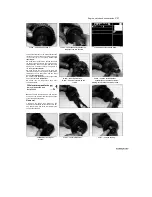
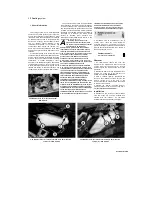
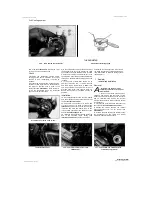
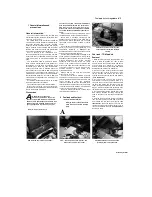
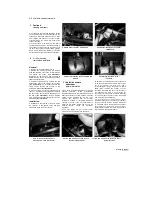
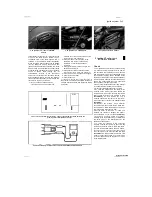
and withdraw the thermostat
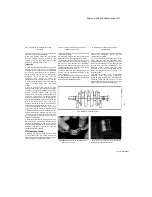
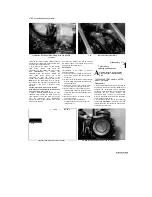
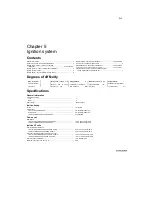
6.8 Thermostat testing set-up
how it fits
(see illustration).
Discard the cover
O-ring as a new one must be used.
Check
7
Examine the thermostat visually before
carrying out the test. If it remains in the open
position at room temperature, it should be
renewed.
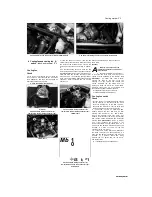
8 Suspend the thermostat by a piece of wire in a
container of cold water. Place a thermometer in
the water so that the bulb is close to the
thermostat
(see illustration).
Heat the water,
noting the temperature when the thermostat
opens, and compare the result
with the specifications given at the beginning of
the Chapter. Also check the amount the valve
opens after it has been heated at 95°C for a few
minutes and compare the measurement to the
specifications. If the readings obtained differ from
those given, the thermostat is faulty and must be
renewed.
9 In the event of thermostat failure, as an
emergency measure only, it can be removed
and the machine used without it.
Note:
Take
care when starting the engine from cold as it
will take much longer than usual to warm up.
Ensure that a new unit is installed as soon as
possible.
Installation
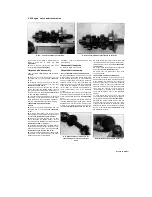
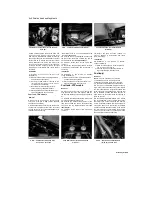
10 Fit the thermostat into the housing, making
sure that it seats correctly and that the hole is at
the top
(see illustration 6.6b).
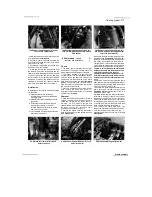
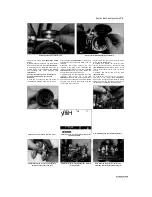
11
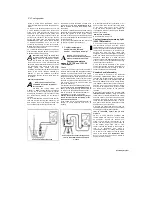
Fit a new O-ring onto the cover, using a dab
of grease to keep it in place if required
(see
illustration).
Fit the cover onto the housing, then
install the two bolts and tighten them to the
torque setting specified at the beginning of the
Chapter
(see illustrations 6.6a).
12
Install the thermostat housing and tighten the
bolt to the specified torque setting
(see
illustrations 4.9b and c).
Connect the hoses
and tighten the clamps securely. Also connect
the wiring connectors, not forgetting the earth
lead, where fitted. 13 Refill the cooling system
(see Chapter 1).
7 Radiator -
removal and installation
Removal
Warning: The engine must be
completely cool before carrying out
this procedure.
1 Remove the fairing side panels on
TDM and XTZ models, and the fairing on TRX
models (see Chapter 8). Remove the fuel tank,
and on TDM and TRX models, the air filter
housing (see Chapter 4). Drain the cooling system
(see Chapter 1).
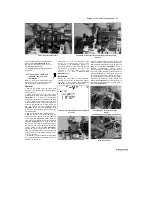
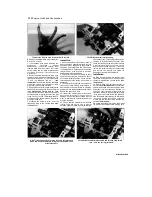
2 Trace the fan motor wiring and disconnect it at
the connector
(see illustrations 4.3a and b).
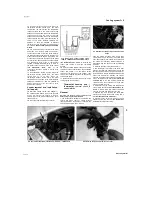
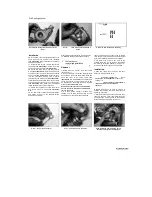
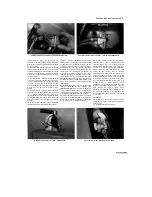
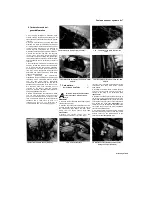
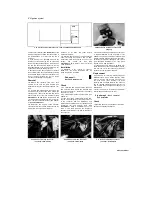
3
Slacken the clamps securing the radiator
hoses and detach them from the radiator
(see
illustrations).
4
Unscrew the bolts securing the radiator, noting
the arrangement of the collars and rubber
grommets, and carefully manoeuvre
7.3a Detach the upper.
7.3b ... and lower radiator hoses (early
TDM shown)...
7.3c ... and on TDM and TRX models the
overflow hose (arrowed)
UNREGISTERED VERSION OF PICTURE-D
Scaned by Stalker
UNREGISTERED VERSION OF PICTURE-DI
THERMOSTAT
6.11 Fit the cover using
a
new O-ring
A
Содержание XTZ750
Страница 174: ...UNREGISTERED VI ScanedbyStalker UNREGISTERED VI ...
Страница 207: ...Wiring diagrams 9 29 _____Scaned by Stalker 5 l 6o Cxj fi I JICM ...
Страница 208: ...UNREGISTERED VI 9 30 Wiring diagrams UNREGISTERED VERSION 01 ONREGISTEREDVI Scaned by Stalker ONREGISTERED VERSION 0 ...
Страница 209: ...I UNREGISTERED VI Wiring diagrams 9 31 ____ Scaned by Stalker UNREGISTERED VERSION OF PICTURE DESK ...
Страница 210: ...9 32 Wiring diagrams Scaned by Stalker ...
Страница 211: ...XTZ750 gauge Starter circuit Neutral Starter cut off relay switch rnotor ...


