Chapter 4 - Configuring Advanced Bucket Management
Create a Tape Partition
2.
Select
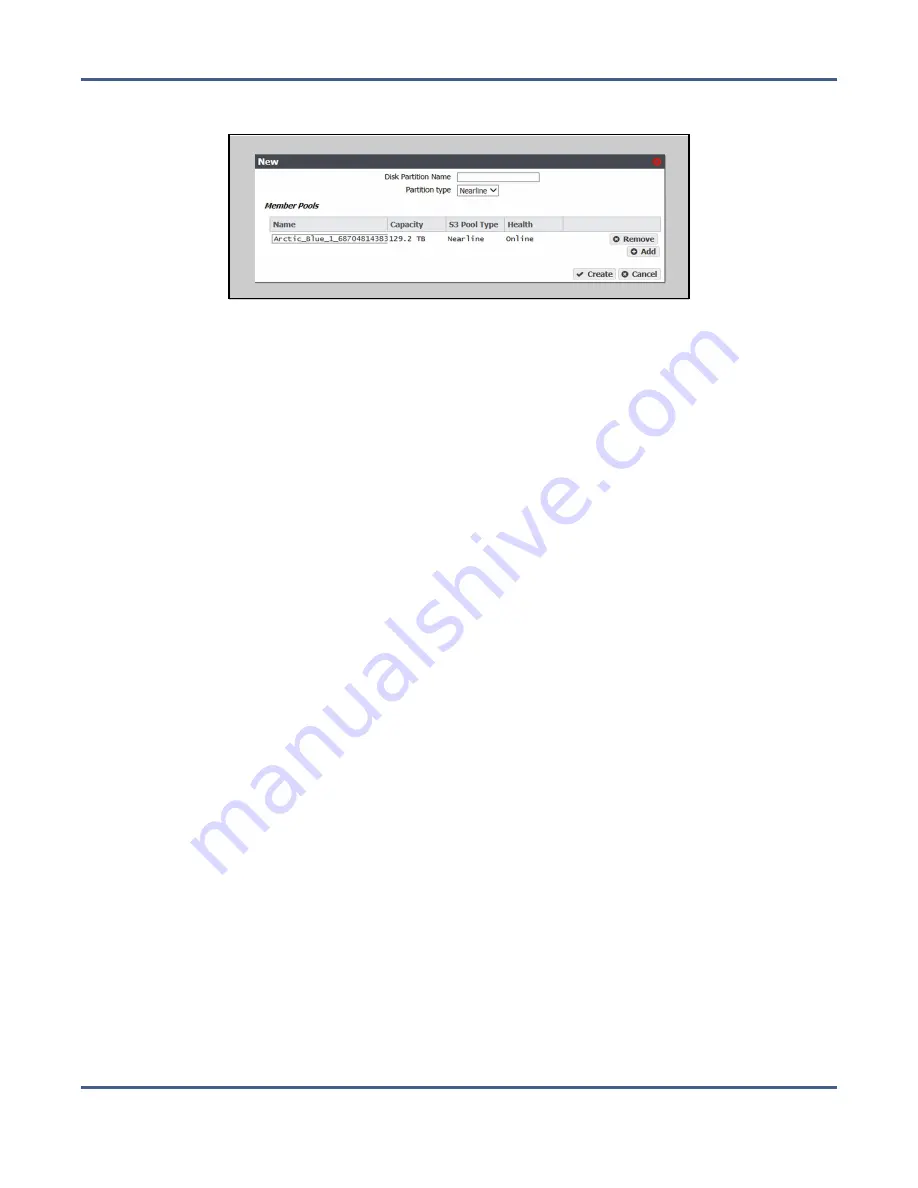
Action > New Disk Partition
. The New Disk Partition dialog box displays.
Figure 33
The New Disk Partition dialog box.
3.
Enter a name for the disk partition in the
Disk Partition Name
field.
4.
Use the drop-down menu to select the
Partition type
. You cannot mix different types of
storage pools in a disk partition.
• Select
Online
to use a storage pool on a 44-bay expansion node, or a 107-bay
expansion nodes with SAS drives.
• Select
Nearline
to use a storage pool on an 96-bay expansion node, or a 107-bay
expansion nodes with SATA drives.
5.
Add a storage pool to the disk partition.
a.
In the Member Pools pane, click
Add
. A new row appears in the pane.
b.
Use the
Name
drop down menu to select a storage pool from the list of previously
configured storage pools. The Capacity, Type, and Health of the storage pool display.
Note:
It may take up to 1 minute after creating an online or nearline storage pool before
it displays in the Member Pools list.
c.
If desired, repeat
and
to add additional storage pools to the disk
partition.
6.
Click
Create
. The new disk partition displays on the Advanced Bucket Management
screen.
C
REATE A
T
APE
P
ARTITION
Use the
for your Spectra Logic or other supported tape library to
create a partition. Once the BlackPearl system detects a partition on a tape library connected
to it, the tape partition is automatically listed on the Advanced Bucket Management screen.
November 2020
User Guide-BlackPearl Converged Storage System
- 108 -


