6-5
Camer
a
6
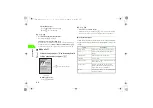
Tip
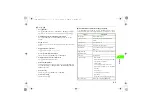
• To use Auto Timer
Press
M
(OPTIONS) and select
→
Auto Timer
→
On(10sec)
. Press
c
to
shoot an image in 10 seconds. To cancel the shooting, press
y
(CANCEL).
• To switch between the internal and external cameras
Press
M
(OPTIONS) and select
Camera Direction
while the camera is
activated.
• To zoom in or out
Use
s
to zoom in or out by one level (Eight levels are available, except 1600 x
1200).
• To adjust brightness (exposure)
Use
j
to set the level (+2, +1, 0, -1 or -2).
• To set a captured image as wallpaper
After shooting, press
M
(OPTIONS) and select
Wallpaper
.
• To switch from Picture mode to Video mode
Press
y
(VIDEO) which in Picture mode.
• To reduce window flicker
A window may flicker due to fluorescent light, etc. Press
M
(OPTIONS) and
select
Camera Settings
→
Image Tuning
→
Mode 1 (50Hz)
or
Mode 2
(60Hz)
to adjust flicker.
• To rename a file
After shooting, press
M
(OPTIONS) and select
Rename
.
• To shoot successively
After shooting, press
c
.
!
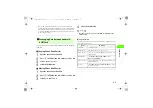
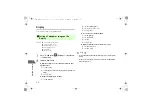
OPTIONS menu available before image capturing
To use the OPTIONS menu listed below, press
M
(OPTIONS) while the camera is
activated. Available menu items vary depending on the specified mode or settings.
Option
Description
Image Viewer
Activate Image Viewer.
Camera Direction
Switch between the internal and external
cameras.
Display Settings
Select an image size.
Picture Quality
Select an image quality mode.
White Balance
Select a mode suitable for light to adjust the
image color.
Night Mode On
(Night Mode Off)
Set to On for shooting at night or in a dark place.
Auto Timer
Use Auto Timer.
Camera Settings
・
Memory Status
Display available memory capacity, the number
of images that can be saved.
・
Display Settings
Select to display an image at the same
magnification or enlarge it to the size suitable
for Display.
・
Shutter Sound
Select from three types of sound.
・
Image Tuning
Change the setting to reduce window flicker.
Bar Code Reader
Activate Bar Code Reader (
z
p.6-8).
_706N_manual_E.book 5 ページ 2007年2月23日 金曜日 午後5時21分
Содержание 706N
Страница 33: ...Getting Started _706N_manual_E book 1...
Страница 62: ...Basic Handset Operations _706N_manual_E book 1...
Страница 80: ...Entering Characters _706N_manual_E book 1...
Страница 100: ...Phone Book _706N_manual_E book 1...
Страница 111: ...Video Call _706N_manual_E book 1...
Страница 117: ...Camera _706N_manual_E book 1...
Страница 126: ...Display Lighting _706N_manual_E book 1...
Страница 135: ...Sounds _706N_manual_E book 1...
Страница 141: ...Entertainment _706N_manual_E book 1...
Страница 159: ...Data Management _706N_manual_E book 1...
Страница 171: ...External Connection _706N_manual_E book 1...
Страница 180: ...Handset Security _706N_manual_E book 1...
Страница 190: ...Organiser Tools _706N_manual_E book 1...
Страница 206: ...Advanced Settings _706N_manual_E book 1...
Страница 212: ...Optional Services _706N_manual_E book 1...
Страница 224: ...Messaging _706N_manual_E book 1...
Страница 256: ...Web _706N_manual_E book 1...
Страница 273: ...S Appli _706N_manual_E book 1...
Страница 281: ...Appendix _706N_manual_E book 1...
Страница 308: ...19 28 19 Appendix _706N_manual_E book 28...
Страница 310: ...19 30 19 Appendix Emoticons Enter Emoticon Enter Emoticon Enter Emoticon _706N_manual_E book 30...
Страница 311: ...19 19 31 Appendix Enter Emoticon Enter Emoticon Enter Emoticon _706N_manual_E book 31...

