


The Invert (Inv) selection is not applied when the
mnemonic is in split mode. In split mode, the top
half of the display is inverted, and the bottom is not.
11.
Enter the new name of the custom control in the
name field next to the bank.
Deleting Custom Controls
Any custom control on the switcher can be deleted to
remove unused customs to free up space for new custom
controls.
To Delete a Custom Control
There is no undo for this delete function.
1.
Press
MENU
>
BANK 1
>
DELETE
Click
Navigation Menu
>
Custom Control
>
Editor
(Beta)
.
2.
Use the
Bank
knob to select the bank that the
custom control you want to delete is stored on, or
select the bank button directly. Click
Bank X
to
select the bank that the custom control you want to
delete is on.
3.
Use the
CC
knob to select the custom control that
you want to delete, or select the custom control on
the bus directly. Click the custom control button that
you want to delete.
4.
Press the
Func
knob. Click
Delete
.
5.
Press the
Confrm
knob to delete the custom control.
Click
Delete
to delete the custom control.
Copying and Pasting Custom
Controls
The contents, or events, of a custom control can be copied
from one custom control and pasted to another. Along
with the events, the name and mnemonic settings are also
copied.
To Copy and Paste a Custom Control
1.
Press
MENU
>
BANK 1
>
Edit
. Click
Navigation
Menu
>
Custom Control
>
Editor (Beta)
.
2.
Use the
Bank
knob to select the bank that the
custom control you want to copy is on, or select the
bank button directly. Click
Bank X
to select the
bank that the custom control you want to copy is on.
3.
Use the
CC
knob to select the custom control that
you want to copy, or select the custom control on
the bus directly. If the custom control has a macro
recorded, an
*
is shown next to the number. Click
the custom control that you want to copy.
4.
Press
Copy
.
Tip:
If you have a C10 or C1 control panel, use the Func
knob to select Copy and press the Func knob to perform
the copy.
5.
Click
Copy
.
6.
Select the custom control that you want to paste into.
7.
Press
Paste
.
Tip:
If you do not have a C10 or C1 control panel, sse the
Func knob to select Paste and press the Func knob to
perform the paste.
8.
Click
Paste
.
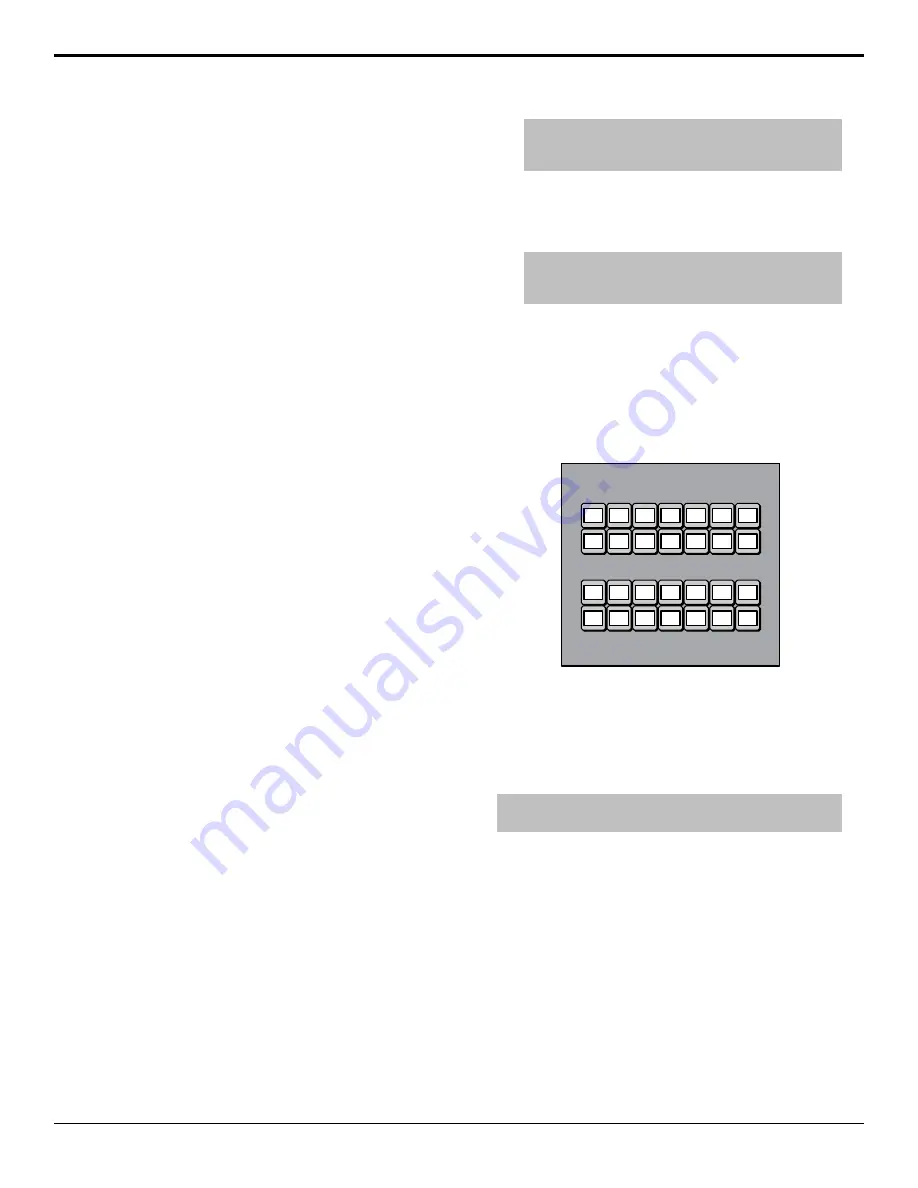
SideShot Custom Control Shot Box
The SideShot connects to the switcher and provides
quick access to the first 24 custom controls on banks 1-4
or 5-8. Refer to the instructions that came with SideShot
for setup information.
C
USTOM
C
ONTROL
S
HOT
B
OX
B1
B2
B3
1
2
3
4
5
6
7
8
9
10 11 12
13 14 15 16 17 18
19 20 21 22 23 24 B4
Figure 27: SideShot Button Mapping
The four buttons on the right side of the module select
the active custom control bank, and the remaining buttons
trigger the custom control on the bank. The mnemonic
for the custom control is inverted if the custom control
is running.
Tip:
Double-press one of the bank buttons to select a bank in
the 5-8 range. (B1=B5), (B2=B6), (B3=B7), (B4=B8)
86
• Custom Controls — Carbonite Operation Manual (v13.0)