d)
Press
START/STOP
to finish recording.
To Edit a CC From DashBoard
When editing a custom control, you can delete and insert
events at any point in the custom control, or append
events to the end.
Tip:
When editing a custom control, press Run Event to run
the currently selected event. This can help you diagnose
problems in a custom control.
1.
Click
Navigation Menu
>
Custom Control
>
Editor (Beta)
.
2.
Click
Bank X
to select the bank that the custom
control you want to edit is on.
3.
Click the custom control that you want to edit.
4.
Click the event that you want to edit or insert an
event before.
Refer to
on page 62 for
information on available events.
5.
Edit the custom control or event.
•
Append (Record)
— start inserting events to
the end of the custom control
•
Append
— insert the current event at the end
of the custom control
•
Copy
— copy the entire custom control
•
Delete
— delete the entire custom control
•
Delete Event
— delete the currently selected
event
•
Edit Event
— edit the parameters of the
currently selected event
•
Insert (Record)
— start insert events after the
currently selected event
•
Insert
— insert the current event after the
currently selected event
•
Record
— start recording a new custom control
over the existing one
•
Run Event
— run the currently selected event
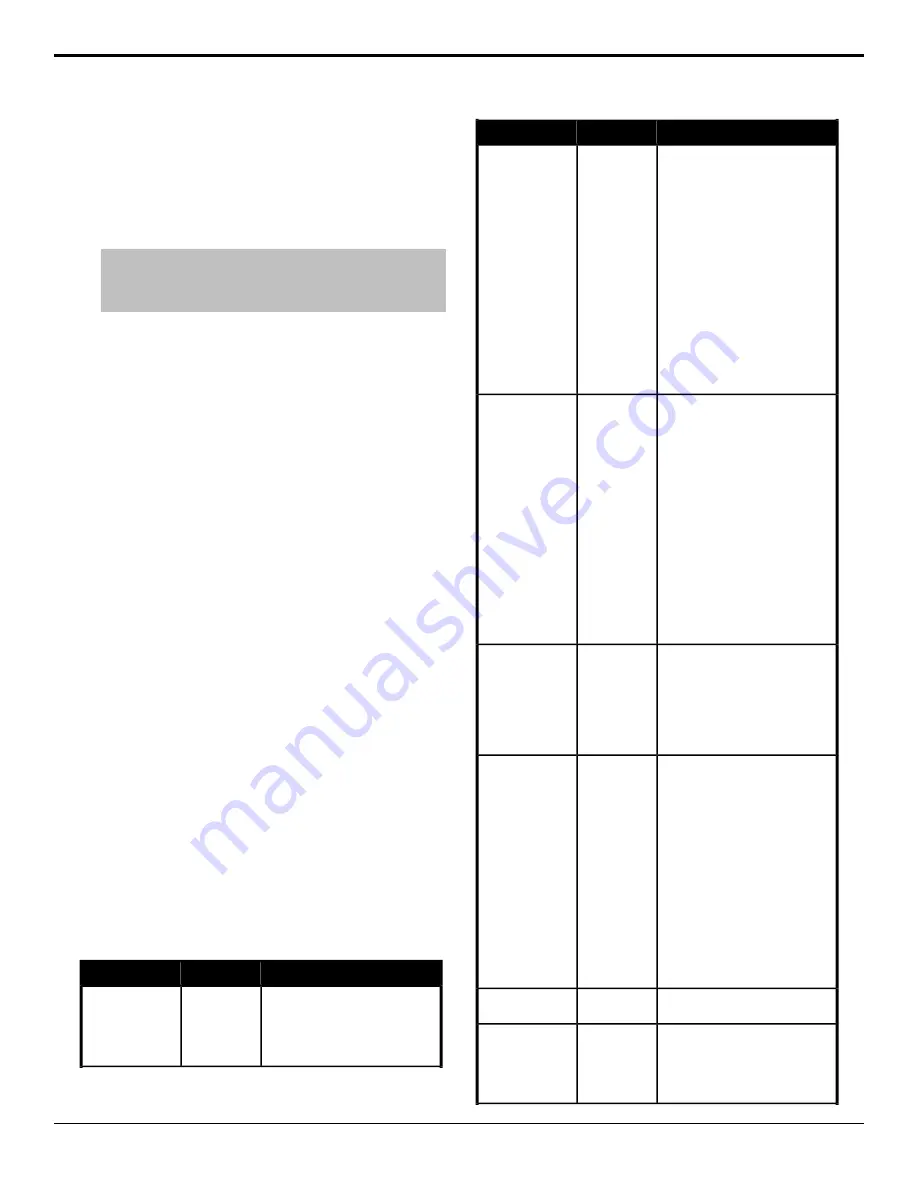
Custom Control Events
The Custom Control editor in DashBoard allows you to
add or edit events in custom controls.
Description
Location
Event
Select how the switcher will strip or
pass ancillary data.
Switcher
Installation
>
Ancillary Mode
Ancillary Data
Mode
1.
Click a
Value
button to select
how the switcher treats ancillary
data.
Description
Location
Event
Set the pan level for the selected
channel on the selected device.
Devices
>
Audio Mixer
Audio Mixer Pan
1.
Click
Audio Pan
.
2.
Click the
Audio Mixer
button
and select the device you want
to send the command to.
3.
Click the
Channel
button and
select the channel you want to
send the command to.
4.
Click the
Change Type
button
and select whether you want to
set (
Absolute
) or reset (
Reset
)
the parameter. Some selections
will not be available when you
reset the parameter.
5.
Enter the new pan level in the
Pan Left/Right (%)
field.
Set the level for the selected channel
on the selected device.
Devices
>
Audio Mixer
Audio Mixer
Volume
1.
Click
Audio Volume
.
2.
Click the
Audio Mixer
button
and select the device you want
to send the command to.
3.
Click the
Channel
button and
select the channel you want to
send the command to.
4.
Click the
Change Type
button
and select whether you want to
set (
Absolute
) or reset (
Reset
)
the parameter. Some selections
will not be available when you
reset the parameter.
5.
Enter the new audio level in the
Volume (%)
field.
Performs an auto transition on the
selected area.
Switcher
>
Transition
>
ME Trans
Action
Auto Trans
1.
Click the
ME
button and select
the area that you want to
perform the event on.
2.
Click the
Action
button and
select
Auto Trans
.
Select a source on the selected bus
for the selected area.
Switcher
>
Bus
Source Select
Bus Source Select
1.
Click the
ME
button and select
the area that you want to select
a bus on.
2.
Click the
Bus/Keyer
button and
select the bus that you want to
select a source on.
3.
If you selected a key bus, click
a
Bus
button to select whether
you are selecting a source for
the fill (
Video
) or the alpha
(
Alpha
) of the key.
4.
Click the
Source
button and
select the source that you want
on the selected bus.
Cancel all running custom controls.
Special
>
Cancel All
Cancel All CC
Cancel a running custom control.
Special
>
Cancel CC
Cancel CC
1.
Click the
Bank
button and select
the custom control bank you
want to cancel a custom control
on.
62
• Custom Controls — Carbonite Operation Manual (v13.0)


