


For a background transition you must select the
source you want to transition to on the preset bus.
3.
In the Transition Area, select the elements (
BKGD
,
KEY 1
,
KEY 2
,
KEY 3
,
KEY 4
) you want to
include in the next transition. To select multiple keys
and background, press and hold the first element,
and select the additional elements.
4.
Use the
Time
knob to set the length of the
background transition. Click
Trans Rate
and enter
the length of the background transition in the
ME
Rate
field, or the length of a key transition in the
Key X Rate
field.
5.
Select the type of transition (
DISS
(Dissolve or
WhiteFlash),
WIPE
,
DVE
,
MEDIA
) you want to
perform. Select the type of transition (
Dissolve
,
Wipe
,
DVE
,
Media
) you want to perform.
Note:
The USER button is not implemented at this time.
6.
Use the
RlClip
knob to select whether you want any
video server clips assigned to a source being taken
on-air to play with the transition (
On
), or not (
Off
).
7.
Perform the transition.
Tip:
You can preview the transition on the preview output
by pressing and holding the transition type button and
perform the Auto Trans or Fader transition. You cannot
preview the independent key-only transitions or a MiniME
™
transition.
•
Auto Transition
— press
AUTO TRANS
. The
transition is performed at the set transition rate
•
Cut
— press
CUT
•
Fader
— move the fader from one limit to the
other. The rate at which you push the fader
determines the rate of the transition.
If a pre-delay has been set, the switcher will apply
the pre-delay interval before performing the
transition.
To Override the Pre-Delay Setting
During the pre-delay time, you can override the pre-delay
count and cut the sources on-air immediately.
•
While the switcher is waiting for the pre-delay
countdown to complete, perform one of the following
•
Press the source button on the background bus
that is going-on air. The pre-delay countdown and
the transition are aborted and the source is cut to
air on the background bus.
•
Initiate a transition with the fader handle. The
pre-delay countdown is aborted and the transition
proceeds as you move the fader handle.
To Abort a Transition During the Pre-Delay
During the pre-delay time, you can abort the transition
completely.
•
While the switcher is waiting for the pre-delay
countdown to complete, perform one of the following
•
Press any source button on any bus other than the
source button on the background bus that is
going-on air.
•
Press the
BKGD
or
Key X
button in the next
transition area.
•
Press the
CUT
or
AUTO TRANS
button.
•
If a key is included in the transition, press one of
the dedicated key transition button.
•
Recall a memory. The pre-delay countdown and
transition are aborted and the memory register is
recalled.
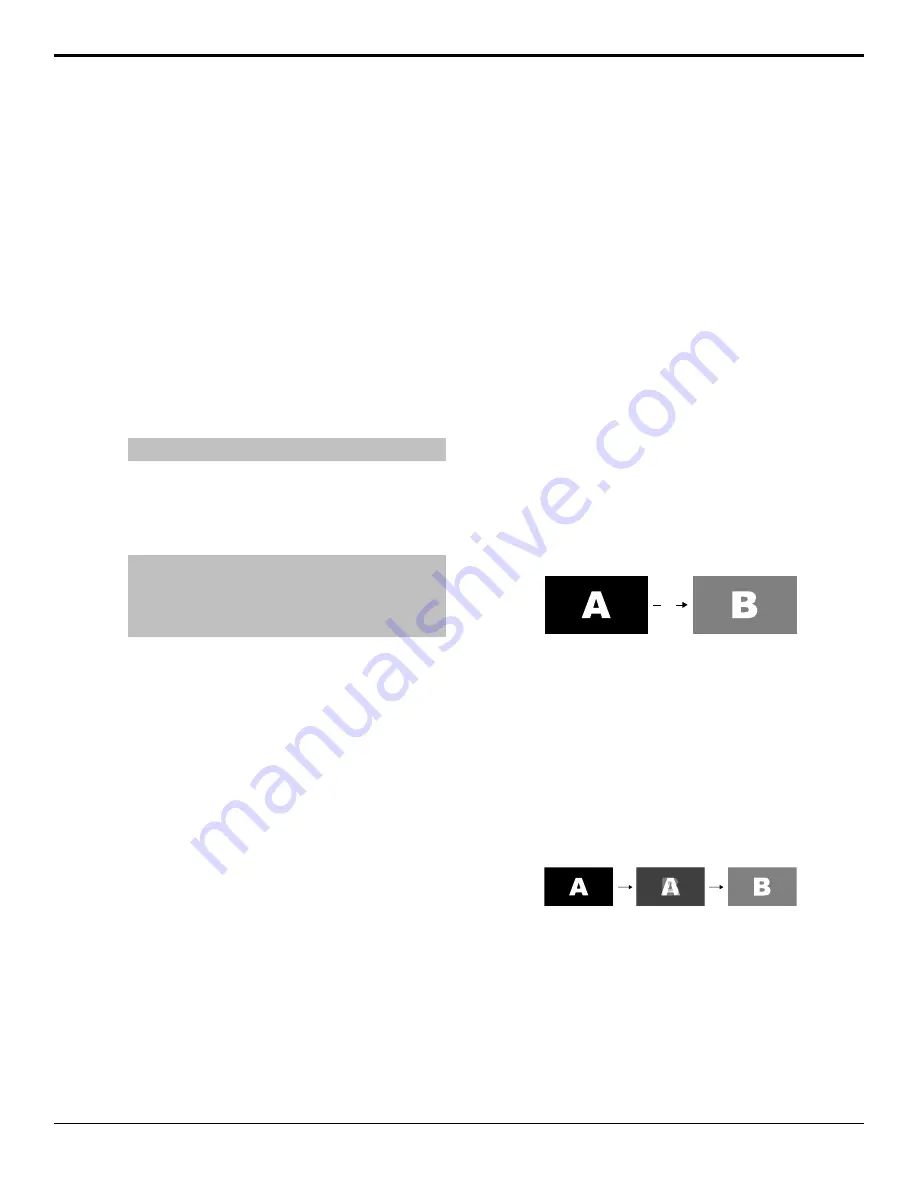
Cut Transitions
A Cut is an instantaneous transition between video
sources. Unlike all the other transition types, there are
no intermediate steps between the video source that is
on-air, and the video source you are transitioning to.
Cut
Figure 19: Example Cut Transition
A cut is performed either by selecting difference sources
on a background or key bus, or by pressing a
CUTCut
button.
Dissolve Transitions
A Dissolve is a gradual fade between video sources. For
a Background transition, the video signal on the
Background bus and the video signal on the Preset bus
are mixed together until the Preset bus video signal
completely replaces the Background bus video signal.
Figure 20: Example Dissolve Transition
To Set Up a Dissolve
A dissolve transition requires that you set a background
and key transition rate for the auto transition. A fader
transition does not use the transition rate.
1.
Press
DISS
. Click
Navigation Menu
>
Live
Assist
>
ME
>
Trans
>
Dissolve
.
Carbonite Operation Manual (v13.0) — Transitions •
27