RX610 Group
19. Watchdog Timer (WDT)
R01UH0032EJ0120 Rev.1.20
Page 607 of 1006
Feb 20, 2013
19.5.4
Switching between Watchdog Timer Mode and Interval Timer Mode
If the timer mode is switched from watchdog timer mode to interval timer mode while the watchdog timer is operating,
errors could occur in the operation. The watchdog timer must be stopped (by clearing the TME bit in TCSR to 0) before
switching the timer mode.
19.5.5
Internal Reset in Watchdog Timer Mode
This LSI is not reset internally if TCNT overflows while the RSTE bit in RSTCSR is cleared to 0 during watchdog time
mode operation, but TCNT and the TCSR of the watchdog timer are reset.
TCNT, TCSR, and RSTCSR cannot be written to while the WDTOVF# signal is low. Also note that a read of the WOVF
flag in RSTCSR is not recognized during this period. To clear the WOVF flag, therefore, read RSTCSR after the
WDTOVF# signal goes high, then write 0 to the WOVF flag.
19.5.6
System Reset by WDTOVF# Signal
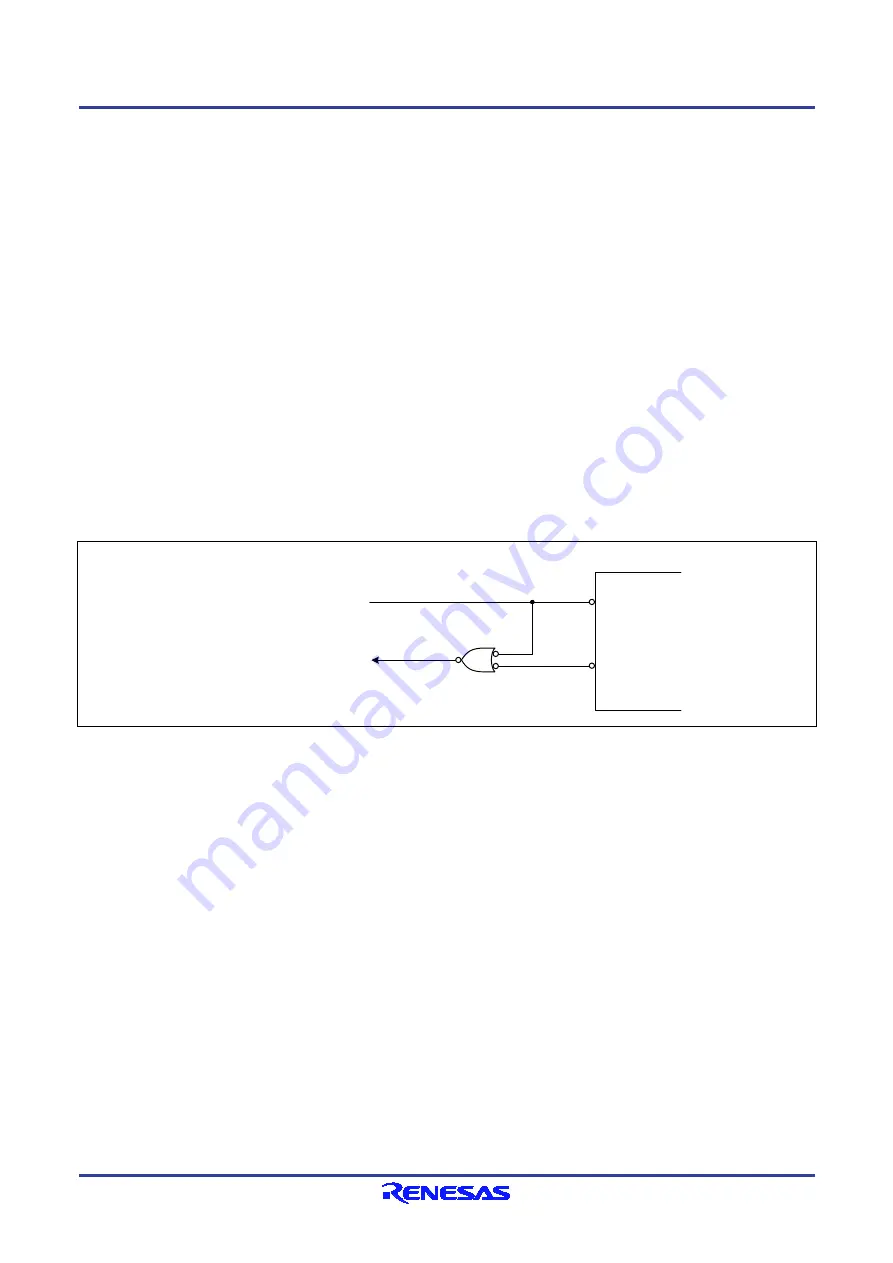
If the WDTOVF# signal is input to the RES# pin, this LSI will not be initialized correctly. Make sure that the
WDTOVF# signal is not input logically to the RES# pin. To reset the entire system by means of the WDTOVF# signal,
use a circuit like that shown in figure 19.7.
Reset input #
Reset signal # for entire system
This LSI
RES#
WDTOVF#
Figure 19.7 Circuit for System Reset by WDTOVF# Signal (Example)
19.5.7
Transition to Watchdog Timer Mode or Software Standby Mode
When the WDT operates in watchdog timer mode, a transition to software standby mode is not made even when the
WAIT instruction is executed when the software standby bit (SSBY in SBYCR) in the standby control register is set to 1.
Instead, a transition to sleep mode or all-module clock-stop mode is made.
To transit to software standby mode, the WAIT instruction must be executed after halting the watchdog timer (clearing
the TME bit in TCSR to 0).
When the WDT operates in interval timer mode, a transition to software standby mode is made through execution of the
WAIT instruction when the SSBY bit is set to 1. For details, see section 8, Low Power Consumption.


