8-2
BE1-BPR Calibration And Testing
CAL
FREQ
1
10.00
50
50 Hertz Calibration
CAL
FREQ
1
10.00
60
60 Hertz Calibration
CAL
FREQ
1
40.00
50
50 Hertz Calibration
CAL
FREQ
1
40.00
60
60 Hertz Calibration
Step 3.
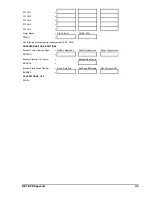
Select the low range calibration screen and verify that the power system frequency (shown under
the FREQ heading) is correct. Examples of low range, 50 hertz and 60 hertz calibration screens
for a relay with 5 ampere CTs are shown below. This information determines the sampling rate
and filter characteristics and must be set for the proper frequency (50 or 60 Hz) before calibrating
the relay.
Step 4.
Using Table 8-1 as a guide, apply the appropriate current value to the relay. Start the calibration
process by pressing the right arrow key until calibration begins. The relay will perform the required
calibration and verify that the ADC counts per ampere are within the acceptable accuracy range.
While the calibration is in progress, the display will show WORKING. If the calibration is
acceptable, the relay will respond with CAL OK.
Step 5.
This step applies only to enhanced model relays (high range capability). Select the high range
calibration screen. Examples of high range, 50 hertz and 60 hertz calibration screens for a relay
with 5 ampere CTs are shown below. Using Table 8-2 as a guide, apply the appropriate current
value to the relay. Start the calibration process by pressing the right arrow key until calibration
begins. The relay will perform the required calibration and verify that the ADC counts per ampere
are within the acceptable accuracy range. While the calibration is in progress, the display will show
WORKING. If the calibration is acceptable, the relay will respond with CAL OK.
Step 6.
Once the calibration is completed, the calibration data must be saved to nonvolatile memory by
pressing and holding the PROG key until the SAVE screen appears. Use the +/- key to select Y
and press the PROG key to save the calibration data.
OPERATIONAL TEST PROCEDURE
Preliminary Setup Procedure
Step 1.
Apply nominal power supply voltage to the relay PWR terminals.
Step 2.
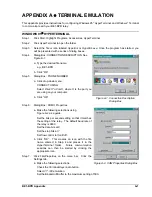
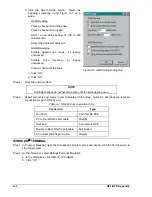
Connect a terminal or computer operating in terminal mode to the front (COM0) or rear (COM1)
serial port. Use the front panel right and down arrow buttons to select the communication settings
screen of the MAINTENANCE menu branch. Verify that the protocol shown is correct for the
terminal or computer connected. If it is incorrect, enter PROGRAM mode by pressing the PROG
key and change to the desired setting, using the EDIT,+/- and right arrow keys. When change is
complete, exit program mode by holding down the PROG key for two seconds, change the prompt
to Y by pressing the EDIT,+/- key, and then press the PROG key briefly.
Select Operational Logic
Step 1.
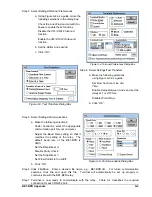
Select the logic scheme desired from the standard schemes available or define and select a new
scheme as required.
A. Selecting preprogrammed (pre-defined) scheme by entering the following commands:
>ACCESS=<password> or ACCESS=BPR if password not used.
>LOGIC=<name of preprogrammed scheme>
>SAVE
ARE YOU SURE (Y/N)?
- Y
RELAY OFF-LINE
Содержание BE1-BPR
Страница 1: ...Publication 9 2720 00 990 Revision E 12 98 INSTRUCTION MANUAL for BE1 BPR BREAKER PROTECTION RELAY...
Страница 31: ...BE1 BPR Application 2 17...
Страница 41: ...BE1 BPR Human Machine Interface 3 3 Figure 3 3 BE1 BPR Relay Horizontal Mount Front And Rear Views...
Страница 42: ...3 4 BE1 BPR Human Machine Interface Figure 3 4 BE1 BPR Relay Vertical Mount Front View...
Страница 43: ...BE1 BPR Human Machine Interface 3 5 Figure 3 5 BE1 BPR Relay Vertical Mount Rear View...
Страница 49: ...4 6 BE1 BPR Functional Description Figure 4 2 Enhanced BE1 BPR Menu Display Screens...
Страница 50: ...BE1 BPR Functional Description 4 7 Figure 4 3 Standard BE1 BPR Menu Display Screens...
Страница 94: ...5 4 BE1 BPR BESTlogic Figure 5 1 BESTlogic Function Blocks...
Страница 120: ...7 2 BE1 BPR Installation Figure 7 1 Overall Dimensions Figure 7 2 Cutout Dimensions Panel Mount...
Страница 121: ...BE1 BPR Installation 7 3 Figure 7 3 Overall Dimensions Vertical Mount...
Страница 122: ...7 4 BE1 BPR Installation Figure 7 4 Overall Dimensions Side View Vertical Mount...
Страница 123: ...BE1 BPR Installation 7 5 Figure 7 5 Panel Drilling Diagram Vertical Mount...

