background image

Programming 

Page 76 


ORB Operating Manual – Issue 1.0 

Tagging Parameters  

On the ORB desk, fixture parameters must be ‘tagged’ for them to 

be recorded when programming cues, submasters, palettes and 
UDK’s. 
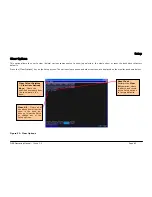
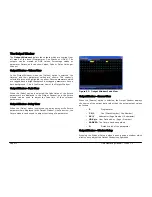
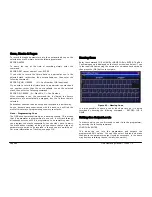
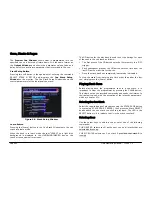
The tag status of each fixture parameter is indicated on the LCD 

screen and in the Output Window by it’s background colour as 
follows: dark background = untagged; bright background = tagged. 


Figure 56 - Output Window showing tagged channels 

If a parameter’s value is changed by a command, moving the 

control wheel or directly in the Output Window, it will be tagged 
automatically. 
You can also tag and untag fixture parameters manually by holding 
down CLEAR and moving a wheel.  

Smart Tags 

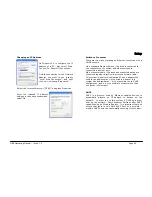
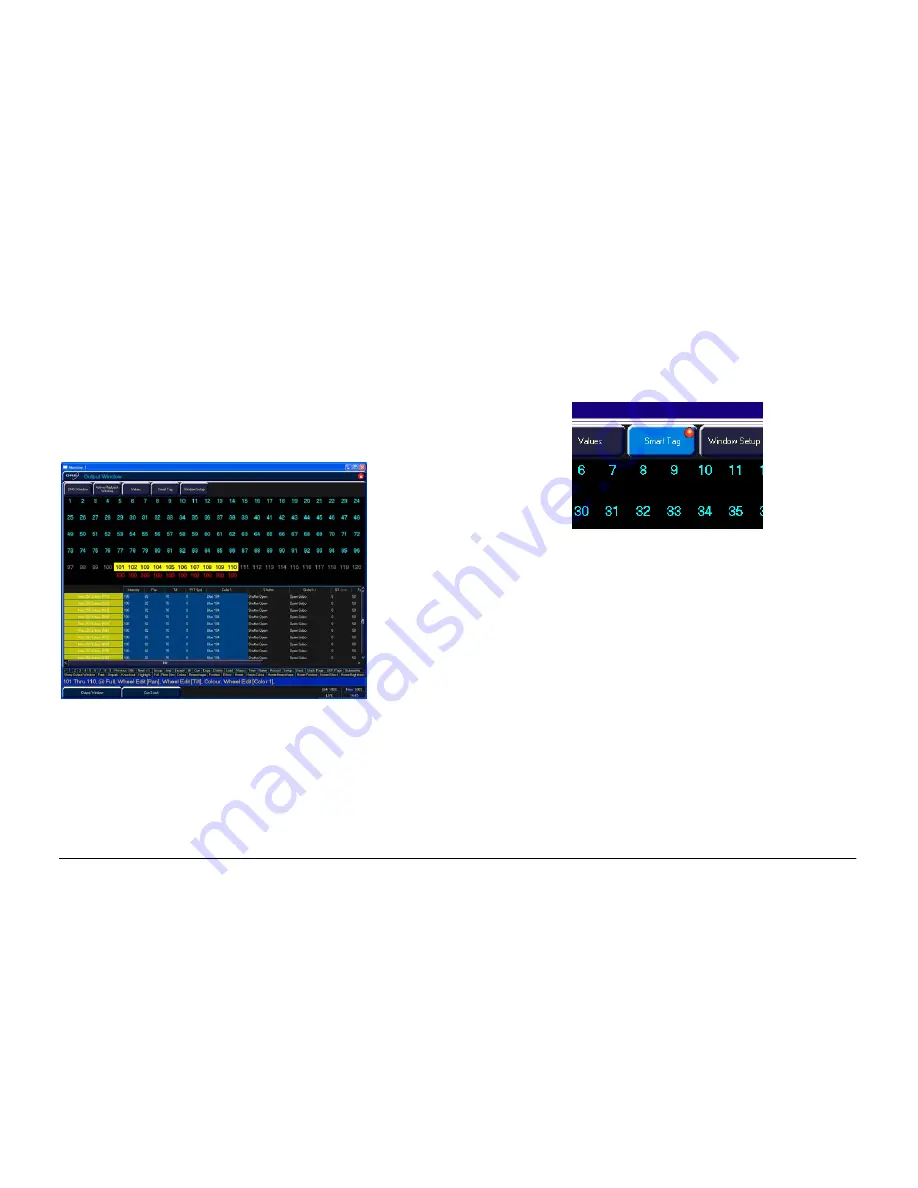
There is a [Smart Tag] button displayed in the Output Window and 

on the front panel of the desk: 


Figure 57 - Smart Tag button 

In normal desk operation, only those channels which are tagged in 
the programmer will be recorded into the cue, submaster, UDK or 

palette.  
Smart Tags remove the need for you to work out which channels 
should or shouldn't be tagged in a state.  As such, they can be used 

to build states using submasters and other playback elements. 
When the RECORD key is pressed the state on stage is what will be 

recorded, regardless of whether or not a dimmer channel or fixture 
parameter is tagged in the programmer. 
Put simply, with Smart Tags enabled, you no longer have to think 
about Tracking.  The desk will insert whatever tracking is required 

to make your show work - including ignoring fixtures whose 
intensity is set to 0% to enable Move on Dark to fully function. 
To  switch  on  Smart  Tags  –  click  on  the  [Smart  Tag]  button  in  the 

Output Window, or press the SMART TAG button on the front panel.  
Use Smart Tags in combination with Cue Only to create inserted 

cues that don't affect the rest of the cue stack, for example an 
added blackout in the middle of a scene.  

Summary of Contents for ORB

Page 1: ...ORB OPERATING MANUAL...

Page 2: ...with the limits for a Class A digital device pursuant to part 15 of the FCC rules These limits are designed to provide reasonable protection against harmful interference when the equipment is operated...

Page 3: ...rk 64 The Output Window 71 Programming 74 Tagging Parameters 76 Smart Tags 76 The Command Line 77 Basic Record Commands 77 Clear 77 Updating 78 Update Options Window 78 Groups 80 What are Groups 80 Au...

Page 4: ...Setup Window 105 Changing Submaster Page 106 Fade Times on Submasters 107 Editing Submasters 107 Previewing Submasters 107 Copying Submasters 107 Moving Submasters 107 Deleting Submasters 107 Effects...

Page 5: ...SMPTE 137 MIDI 137 Video Output 137 CAN Port 137 Ethernet 137 USB Ports 137 Keyboard Mouse 137 Touchscreens 137 External Storage Devices 137 AV Port 137 Desk Light 138 DMX Input 138 DMX Output 138 Ken...

Page 6: ...erge The ORB Lighting Desk The following section is a summary of the main functions of the ORB lighting desk Graphical Interface The desk operates a graphical interface which is provided by up to two...

Page 7: ...cues for use in any of the 1000 user programmable cue stacks Each cue can have a number name trigger a wait time auto cues and a set of delay and fade times It is possible to give each parameter of ea...

Page 8: ...are not forgotten and go into in a history list When a cue is released it loses it s places in the history whether it currently owns them or not The most recent owner in the history will then regain...

Page 9: ...isplays on the front panel of the ORB desk The front panel controls have been divided into the following sections Figure 1 Front Panel Controls Grand Master and Blackout Page 10 Playbacks Page 11 Keyp...

Page 10: ...the Grand Master fader Pressing the BLACKOUT key toggles between enabled and disabled The red LED in the BLACKOUT key flashes when blackout is enabled and BLK is displayed on the monitor screen The GR...

Page 11: ...for releasing cue stacks and activating cue stacks on the Master Playback These are detailed in later sections The currently active page is indicated on the LCD screen above each playback together wit...

Page 12: ...faders can be assigned as A B crossfade masters or as an intensity master and override fader for the stack Large GO and PAUSE keys mimic the functions of the Playback GO PAUSE keys The Release key can...

Page 13: ...quired channels TRACK allows you to record cues tracking forwards from that point UPDATE allows you to merge new information into existing data NAME is used to set a name on any programmed item RECORD...

Page 14: ...struction entered on the command line The EXCEPT key is used for removing items from a list The AND key is used for adding items to a list The syntax keys follow syntax and provide additional function...

Page 15: ...UDKs The UDK page can be changed by pressing the UDK PAGE button and entering the required number in syntax eg UDK PAGE 4 ENTER The current contents of the UDK are displayed on the LCD display togethe...

Page 16: ...e active monitor screen The Intensity wheel is used for adjusting the intensity of the currently selected fixture s The intensity level is displayed on the LCD screen above the wheel The trackball and...

Page 17: ...Up the Desk Before you start programming cues etc you will need to set up the desk The desk comes with a default patch of channels 1 to 96 assigned to DMX addresses 1 to 96 on DMX universe 1 as stand...

Page 18: ...ixture library stored on the desk you can import the fixture type see Setup chapter for full details Press the Next button to select the fixture Mode It is important that the mode set here matches the...

Page 19: ...fixture number to the fixtures The fixture number is the number you will refer to the fixture as within the desk software Enter the number and press Finish Figure 13 Patch Wizard Step 4 Quantity The P...

Page 20: ...he monitor screens when programming cues palettes UDKs etc The colour coding also helps to see what direction a channel has moved in The cue stack window shows the selected cue stack and all the cues...

Page 21: ...f fixtures 5 to 10 to N 5 THRU 10 EXCEPT 7 wheel This sets the intensity of channels 5 6 8 9 10 to the level on the wheel 5 THRU 10 FULL ENTER sets the intensity output of fixtures 5 to 10 to 100 Usin...

Page 22: ...the attribute buttons and control wheels can be used to adjust the parameter output levels as required Controlling Colour Beamshape and Position Parameters The colour beamshape and position parameters...

Page 23: ...e SELECT button illuminates to indicate that it is the active cue stack Recording a Cue To record a cue simply enter the command RECORD CUE n ENTER Where N is the number of the cue you wish to record...

Page 24: ...r as sometimes a manual fade is desirable Pressing the GO button will trigger the start of fades on all parameters but the intensity channels are mixed with the master fader To output the next memory...

Page 25: ...following cues If you choose to update with Track Forwards enabled remember to undo the change you made in one scene when you move to the next particularly if the next cue is a blackout Figure 16 Upd...

Page 26: ...ne when a palette is accessed Outputting Palettes The act of outputting a palette causes the selected fixtures to move to the value stored within that palette To apply or output a palette first select...

Page 27: ...the monitor The action of the UDK can be set to either Flash or Latch in the User Definable Keys Setup Window see UDK section of manual Page 100 for more information Groups As well as palettes the OR...

Page 28: ...t This setting is found in Desk Setup Inputs To record a submaster first set up the fixture outputs as required ensuring that the correct parameters are tagged To record the data to a submaster enter...

Page 29: ...ey to select the required device If the device does not appear straight away wait a few seconds and then click Refresh Type the show name in the Filename box using an external keyboard or the numeric...

Page 30: ...e Source Device key to select the required device A list of show files on the currently selected storage device appears on the touch screen Select the show file you wish to load using the cursor keys...

Page 31: ...exit Setup from any of the various Setup options close the screen that is currently displayed using the Close button in the top right hand corner of the screen Patch this allows you to configure whic...

Page 32: ...ing the patch on the desk as incorrectly entered data can result in the rig being unusable Adding Fixtures Once this information is collated you can use one of two methods to add fixtures onto the des...

Page 33: ...guide to creating User Fixture Types is also located on the CD Once a User Fixture Type has been obtained or created to load it into ORB you should press the User Fixture button in the Fixture Schedul...

Page 34: ...us configuration tools For information on addressing your fixtures please consult the user manual of the fixtures If a fixture is using a range of DMX addreses then no other fixture in the rig should...

Page 35: ...command n 3 101 ENTER If you are carrying out a lot of patching onto a specified DMX universe you can select it using the buttons above the patch data in the Patch Screen the currently selected unive...

Page 36: ...ew 1 THRU 5 Unpatch To unpatch an instance of a fixture from a specified universe Outputs or Channels view or all universes Fixtures view 1 address Unpatch To unpatch an instance of a fixture from a s...

Page 37: ...the default patch view and displays the DMX start address for each fixture for each DMX universe The 4 universes are displayed vertically with each fixture listed according to its outputs Figure 25 O...

Page 38: ...values is plenty however in more advanced control equipment 256 values is not enough so two channels are linked together to create a 16 bit channel These channels are paired together internally and p...

Page 39: ...ou through adding some fixtures Figure 28 Patch Wizard Step 1 Manufacturer Selection First the wizard allows you to select the fixture manufacturer Scroll down or use the cursor keys to select the req...

Page 40: ...address for the fixture If you have not yet set this on the fixtures themselves press the Next Address button and the desk will calculate a DMX address for you based on the existing patch information...

Page 41: ...l refer to the fixture as within the desk software It is recommended that you take some time thinking about numbering your fixtures Enter the number and press Finish The Patch Wizard is now complete a...

Page 42: ...e or a group of fixtures first select the fixture group by pressing the GROUP button repeatedly until the required group is displayed in the title bar All the fixtures in this group are now displayed...

Page 43: ...703 etc Notes Fixture Numbers If a fixture number is not globally unique ie another fixture exists with the same fixture number in a different type then a is displayed after the fixture number If you...

Page 44: ...will be inverted in the DMX outputs making all your fixtures move in the same direction relative to the wheels Swapping Pan and Tilt If a fixture is rigged on its side you may also wish to Swap the Pa...

Page 45: ...monitor screen with the current patch address in the DMX Address field Select the required Universe by clicking on the Universe button and selecting the universe from the drop down menu Enter the requ...

Page 46: ...eparate lines in the Edit Fixtures patch table There is an additional column Part which shows the part name of the multi part fixture and a Fixture Part button that selects which part of the fixture i...

Page 47: ...esent in the original fixture type are left unprogrammed Select the fixture s to be changed Go to the Type column in the window Select the Change button for the required fixture or the Change button i...

Page 48: ...th the stock colour names as supplied by the manufacturer Fixtures with CMY or RGB colour mixing The desk generates auto palettes for all of the standard colours listed above Beamshape Palettes The be...

Page 49: ...librate touch screens adjust desk lamp brightness Peripheral Adjust the sensitivity of the wheels on the desk Inputs Set up SMPTE and MIDI Timecode CAN Set Time Set Date Assign Remote Switches Submast...

Page 50: ...or Display 2 Enabled Yes or No Colour Scheme allows you to pick which colour scheme to use Screen Timeout Sets the time till the monitors and LCDs go into power save mode LCD Brightness Contrast Sets...

Page 51: ...yet working 3M Microtouch M150 3M Microtouch M170 ELO ET1746L LG L1730SF LG L1530SF iPure Solarism LM1731BT ELO touch most 3M Microtouch EX II series ITM eTurboTouch non eGalax compatible Gunze AHL61...

Page 52: ...Issue 1 0 Peripheral Press the Peripheral key on the monitor The various options are shown on the monitor Figure 42 Desk Setup Peripheral Wheel Sensitivity Adjusts the sensitivity of the control wheel...

Page 53: ...macro number as appropriate CAN Not yet implemented in software Set Date Press the Set Date key on the monitor The Set Date Window is displayed Enter the correct Day Month and Year in the fields provi...

Page 54: ...he Outputs key on the monitor The various options are shown on the monitor Figure 44 Desk Setup Outputs DMX Output 1 DMX Output 2 DMX Output 3 DMX Output 4 Each DMX Output Universe can be mapped to a...

Page 55: ...ged If the attribute is set to No then as soon as one parameter in that attribute is adjusted all the parameters in that attribute will be tagged automatically eg in a CMY fixture if Cyan is adjusted...

Page 56: ...t Times Intensity Fade Delay Separate times for channels fading Up and those fading Down Colour Fade Delay The times that colour channels use when programmed into cues or UDKs Beamshape Fade Delay The...

Page 57: ...ecode Default Timecode setting Master Fader Default Master Fader mode Trigger Options Trigger on Raise Default Trigger on Raise setting Trigger Level Default Level Move on Dark Options Move on Dark De...

Page 58: ...allows the user to change the lock code PIN for the desk The lock code PIN is a four digit number 0000 9999 The lock code can be entered via the numeric keypad on the front panel or external keyboard...

Page 59: ...drive Press the Files button on the monitor Press the Save Show button on the monitor The Save Show window is displayed Figure 48 Save Show Select the desired storage device by pressing the Destinatio...

Page 60: ...ce Device toggle box This will cycle through all the available devices so select the one you require Select the required show from the list of available shows displayed Select the Load Complete Show b...

Page 61: ...ure 50 Loading a user fixture All the fixture types contained in the selected UFT file are loaded and effectively added to the fixture library on the desk Selecting a user fixture type and setting the...

Page 62: ...Press the Files button Press the Update Fixture File button The desk searches for the update file on the memory stick Follow the instructions shown on the monitor to complete the update Desk Informat...

Page 63: ...ous clear options and other functions are displayed on the monitor as shown below Figure 52 Clear Options Clear Colour Palettes Clear User Defined Keys Clears the specified items only from the show da...

Page 64: ...dresses IP Addresses are a devices identity on an Ethernet network The address indicates where the device is located and in combination with the Subnet Mask indicates what the desk can see and vice ve...

Page 65: ...and other devices are connected to another port Via a crossover cable the desk and connected device are connected together directly via a crossed network cable This system is ideal for visualisation...

Page 66: ...me Art Net universe 0 however this is user definable Art Net enabled devices include Media Servers Moving Lights and also dedicated DMX output boxes such as the 1 Universe Ethernet Box by Cooper Contr...

Page 67: ...ich you ll recognise we use Zero 88 and choose a wireless channel If required security can be added Once settings have been changed click the Save Option and then the Reboot Router option to ensure th...

Page 68: ...uires a Zero 88 Light Converse USB dongle available from Zero 88 Once active the system allows bidirectional control of fixtures selection and patching via the Ethernet connection Capture CITP http ww...

Page 69: ...ocedure if you re using Release 21 you ll need the Zero 88 Consoles CFB file Run the Zero 88 WYSIWYG Driver installation tool Once the driver is installed run the tool Select the network interface you...

Page 70: ...o 88 The system can be output directly from the console via the Network options in Setup and can then be routed via a Wireless Access Point to Zero Wire DMX boxes which decode the signal to DMX for li...

Page 71: ...s the Show Output Window syntax key Values allows you to select between values fade delay and source views Window Setup allows you to customise the window to your requirements Fixture names Channel in...

Page 72: ...es of the fixture parameters are displayed in the Output Window and the fixture wheels can be used to adjust the fade time of their relevant parameters Output Window Delay View When the Delay option i...

Page 73: ...option is selected the fixture parameter values will be displayed as the parameter detail names eg Red Gobo 1 where they are defined in the fixture data If parameter details are not defined the window...

Page 74: ...or brightness parameter of the selected fixture s can be controlled by entering commands directly via the numeric keypad or by using the control wheel Intensity levels can be set for a complete group...

Page 75: ...eters for the fixture are assigned to the control wheels and are indicated on the LCD screen above the wheels If the fixture has more than three controllable parameters for the selected attribute pres...

Page 76: ...tion only those channels which are tagged in the programmer will be recorded into the cue submaster UDK or palette Smart Tags remove the need for you to work out which channels should or shouldn t be...

Page 77: ...r Y on page X By following this simple record logic you can program most simple items The syntax also follows through for palettes and groups RECORD COLOUR n ENTER Records the colour parameters to the...

Page 78: ...is grey When a source is selected the button is green In the case where an item cue palette submaster or UDK has been loaded into the programmer parameter values or times adjusted and the UPDATE key p...

Page 79: ...f the Clear Tagging button is inactive then the parameters will remain tagged after the update operation Attribute Selection Bar The Attribute Selection Bar indicates which parameters will be recorded...

Page 80: ...then press the Auto Menus button and select the Create Autogroups option then exit Setup Automatic Groups are referenced by Group Number and appear in the Group Window User Defined Groups In addition...

Page 81: ...s action before the command is executed Once deleted a group cannot be recovered but can be recreated manually if required Group Window The Group Window appears on Monitor 2 in the bottom right by def...

Page 82: ...alette simply replace the COLOUR part of the command with BEAM POSITION or EFFECTS respectively Hints on Recording Palettes If you wish to record attributes other than the default one for the type of...

Page 83: ...O p ENTER BEAM n COPY TO p ENTER POSITION n COPY TO p ENTER EFFECTS n COPY TO p ENTER As all palettes have the same data structure and may contain fixture parameter data from any combination of attrib...

Page 84: ...has it s own palette window To display one of the palette windows on the monitor hold down the SHIFT key and then press the appropriate attribute key POSITION COLOUR BEAM or EFFECTS The palette windo...

Page 85: ...2 3 is stack 2 cue 3 23 12 is stack 23 cue 12 Cues can be triggered by a number of different methods GO button automatically after a specified wait time Real Time SMPTE Time MIDI Time CD Time or macro...

Page 86: ...e Programming Cues The ORB desk operates primarily as a tracking console This means that if a parameter is programmed in one cue it will track through all subsequent cues until it is programmed to do...

Page 87: ...UR X BEAM Y POSITION Z ENTER Sets the intensity fade up and fade down times to U and D the colour fade times to X the beamshape fade times to Y and the position fade times to Z Fade Time Commands Edit...

Page 88: ...en the Cue Setup Window by clicking in the Comments column of the Cue Stack Window and set the Next memory to the required number Figure 65 Next Cue Adding Macros to Cues The desk provides a number of...

Page 89: ...ity times for the cue Colour Beamshape Position Fade The fade and delay times for each of the attributes only the last selected attribute is displayed Comments any special settings about the cue trigg...

Page 90: ...first press of the GO button sets the first memory to a GO trigger Each subsequent press of the GO button sets the time from the last GO as the wait time for the cue Once the stack has been completed...

Page 91: ...es To continue running the cue stack press the GO key Holding down SHIFT and pressing the PAUSE key will snap to the previous cue Playing Back Several Cue Stacks To play back more that one cue stack a...

Page 92: ...into the cue required setting any tags required at the output stage Moving Cues To Move a cue to another cue in the same cue stack or a different cue stack enter the following command s1 c1 MOVE TO s...

Page 93: ...is lit Naming Cue Stacks To assign a name to a cue stack enter either of the following commands SELECT STACK N NAME NAME SELECT STACK N ENTER NAME STACK SELECT BUTTON Type in the required name using...

Page 94: ...General button in the Cue Stack Setup Window The various options are described below Timecode Mode Select the Timecode field Use the left or right arrow keys or the soft key on the touch screen to sel...

Page 95: ...Cue Stack Setup Window A Blank Cue is the same as the first programmed cue in the cue stack but with all the fixture intensity parameters set to zero A blank cue is referred to as Cue 0 zero Master Fa...

Page 96: ...e chase runs automatically at the defined Speed Bass Each step is triggered by a bass beat on the audio input on the desk Manual Each step is triggered by pressing the GO button on the front panel Bea...

Page 97: ...e chase will run after being triggered When Shots is set to zero the chase runs continuously When Shots is set to a value between 1 and 255 the chase runs the specified number of times and then stops...

Page 98: ...on dark kicks in Fade Time The time with which ORB fades the attributes that move on dark Pages The ORB desk provides 100 pages of playbacks each page containing 10 playbacks Loading a Page onto the...

Page 99: ...rammed and name if defined A playback page can be selected by clicking on the soft button with the mouse or by selecting it using the cursor keys and pressing ENTER or by entering the command PAGE N E...

Page 100: ...ntering the following command NAME UDK your name ENTER Type in the required name using the external keyboard and then press ENTER to complete Note that only channel data UDKs can be named all the othe...

Page 101: ...ks Mix Mode The intensity channels in the data are mixed either HTP or LTP Release If the Release option is set to Yes then the fixtures will be released when the UDK is released and the intensity bri...

Page 102: ...UDK The palette assigned to the UDK is applied to the selected fixtures when the UDK is pressed Macro UDK The Macro UDK is used to run the user defined macro assigned to the UDK To assign a user defin...

Page 103: ...load the contents of the UDK into the programmer adjust the programmed channel levels and times as required and then save the data back into the original UDK by pressing the UPDATE key Note This funct...

Page 104: ...is important to check these settings are set correctly before commencing work on submasters The Submasters Window To display the Submasters Window on one of the monitor displays hold down the SHIFT ke...

Page 105: ...Select the Playback Mode option Select SUBMASTER Press OK Now the playback will act as a submaster The Submaster Setup Window To display the Submaster Setup Window on the monitor type the syntax SUB n...

Page 106: ...nother LTP command from elsewhere on the console or by holding down the RELEASE key and pressing the submaster flash button Submaster Controls Submaster Controls allows you to force a parameter to fol...

Page 107: ...ow see Page 78 for full details Previewing Submasters It is possible to preview the contents of a submaster on the monitor To do this enter the syntax VIEW SUB n ENTER Copying Submasters A submaster c...

Page 108: ...on the monitor hold down the SHIFT key and then press the EFFECTS key The Effects Palette Window contains a soft button for each of the 1000 effects palettes Each soft button contains the following i...

Page 109: ...k correctly For these effects the size parameter is set to 100 as the default Apart from the effects specified above the default values of the effect parameters for the standard effects are Speed 25 S...

Page 110: ...dow and then record this as a new effect palette Enter the following command RECORD EFFECTS n ENTER If you wish to record other attributes eg Colour these should be selected on the Record Options Wind...

Page 111: ...one of the following commands EFFECTS n MOVE TO p ENTER When an effect is moved to a new location any cues that referenced the original effect palette will now reference the new location of the palett...

Page 112: ...to Cue C in cue stack S does NOT trigger the cue Mx Triggers User Macro x Don t Move on Dark Macros These macros are used to prevent parameters moving on dark for a particular cue DM Don t Move on dar...

Page 113: ...while the macro is being recorded and reverts back to it s normal live blind indication on completion of the macro recording Naming a Macro Each macro can have its own name associated with it To name...

Page 114: ...ameters using automatic macros The Macros are stored within the fixture library and allow control of fixture parameters such as Lamp On Lamp Off Reset etc without needing to find the relevant DMX valu...

Page 115: ...on the bottom row turn red and are no longer available All parameters of all fixtures will be recorded Pressing Snapshot again will return the data selection and attribute selection buttons to their...

Page 116: ...CUE 5 CUE 6 CUE 7 CUE 8 CUE 9 CUE 10 Red Green Blue Red Red Red Red Red Green Green Green Green Blue Track Both The edited cue affects both earlier and later cues The change is tracked back to the las...

Page 117: ...dicates which parameters will be recorded for each of the different attributes Intensity Position Colour Beamshape and Effects Pressing each of the soft buttons on the touch screen cycles round the th...

Page 118: ...e is displayed on the LCD screen above the wheels To change the editing mode hold down SETUP and press the relevant attribute Figure 84 Set Colour Wheel Editing Mode The different wheel editing modes...

Page 119: ...ber The value of the middle selected fixture will be locked Example Fan Middle Mode Fixture 3 locked Fixture Parameter Fixture 1 Fixture 2 Fixture 3 Fixture 4 Fixture 5 Original Value 50 50 50 50 50 N...

Page 120: ...ssing lamps and fixtures is provided on the desk The function works as follows Select the fixture s required Hold down the SHIFT key and press the FULL key If the selected fixture s intensity level is...

Page 121: ...outputs back to the previous recorded output state The LED in the key is lit Pressing the TRY CUE key again plays back the new look back over the corresponding times default or recorded times dependin...

Page 122: ...fects Copying Fixture Data You can copy fixture data from a programmed cue or from another fixture in the programmer The data for all fixture parameters can be copied or just those for a particular at...

Page 123: ...Other Features ORB Operating Manual Issue 1 0 Page 123 Remote This is a placeholder for some information about the remote...

Page 124: ...resize and delete windows as required A window displayed on a monitor can be full size half size or quarter size and can be displayed in a number of different positions as illustrated below 1 Full Sc...

Page 125: ...r monitor display or touch screen SIZE Resizes the selected active window by cycling through the display options SELECT Selects a window by cycling through the windows on the monitor displays Mouse Op...

Page 126: ...w The contents of a programmed cue can be seen by displaying the Preview Cue Window on the monitor Click on the Cue Details soft key in the Cue Stack Window or enter the following command VIEW S C ENT...

Page 127: ...sition Palette or Preview Effects Palette on the monitor by entering the following command VIEW attribute N ENTER attribute COLOUR BEAM POSITION or EFFECTS The Preview Palette Windows are the same for...

Page 128: ...e displaying the fixture name user fixture number Manufacturer and Fixture Type The Previous and Next buttons can be used to view the groups in sequence Figure 88 Preview Group Window Preview UDK Wind...

Page 129: ...The Active Playback Window is displayed on the monitor by pressing the Active Playback Window soft key in the Output Window This window shows all the currently active playbacks Page Number Playback Nu...

Page 130: ...EW n ENTER A popup will ask you to choose whether you want to Record All windows or just the visible ones Select the Record All or Record Visible option as required If the selected view contains a rec...

Page 131: ...rt Forum which can be accessed via the Zero 88 website Zero 88 consoles have a long history of user inspired development If you have any questions on the operation of the desk bug reports or a suggest...

Page 132: ...ation can be stored on a CD Chase A complete cue stack can be turned into a chase A chase is a series of cues which are played back automatically A Chase has a number of modifiers which determine how...

Page 133: ...ameter or combination of parameters all found within the same unit for example a Mac 500 or a Parcan Flash Pressing the flash button results in a temporary increase in brightness of the output The int...

Page 134: ...schedule which shows what fixtures are assigned and what DMX output addresses they are patched to Palette Programmed fixture data normally of a single Attribute which is used in programming Cues subm...

Page 135: ...Time MIDI Time or CD Time Try Cue A function that allows you to see the transition from a previous state to the current state before recording the data into a cue UDK User Defined Key The bank of butt...

Page 136: ...rown Live Hot Blue Neutral Green Yellow Earth The supply cord must be protected to a maximum current of 10A If in doubt consult a qualified electrician Audio The desk has three audio ports on the rear...

Page 137: ...CAN or ChilliNet messages Ethernet The desk is fitted with an RJ45 Ethernet port and is capable of supporting various Ethernet protocols USB Ports Four external USB ports are fitted on the desk One lo...

Page 138: ...ment 1 3 DMX Drive True 1 4 Not Connected 5 Not Connected DMX Output Four DMX universes each consisting of 5 pin XLR isolated with voltage protection and data output indicator Data on channels 1 512 o...

Page 139: ...ot change when you adjust it via a cue submaster UDK or the programmer check The GRAND MASTER fader is at full The BLACKOUT button is off Do you have the desk in Blind mode press BLIND to exit If the...

Page 140: ...lways check that you are running the latest software version and that all slave processor firmware is up to date check in the Desk Information screen anything highlighted in RED is out of date Basic M...

Page 141: ...a parameter CLEAR attribute Fan a parameter SHIFT move wheel Change Fan mode SETUP COLOUR Shifted Wheel Mode select OK Patching Add Fixture SETUP PATCH PATCH WIZARD follow wizard Edit Fixture Patch S...

Page 142: ...number normally 1 Record a Macro REC MACRO enter macro number ENTER perform task MACRO Play a Macro MACRO enter macro no ENTER Link a Macro to a Cue select cue highlight Comments cell ENTER MACROS en...

Page 143: ...M3 Tour Wash M4 ACME iColor 3000 3ch iColor 3000 4ch iMove 250 Magic Gobo Rover Spot Knight Spot Queen Full Spot Queen Split Super Scimitar Supermodel Winner ADB Warp M Warp M Scroller ADLITE Intellit...

Page 144: ...tion Imagination Insignia Intimidator Kinta Lazer Scan LED Par 200B Legend 150R Legend 250RX Legend 2000 8bit Legend 2000 16bit Legend 3000 8bit Legend 3000 16bit Legend 5000 8bit Legend 5000 16bit Le...

Page 145: ...Goldenscan 1 Goldenscan 2 Goldenscan 3 Goldenscan 3 Exp Goldenscan 4 Goldenscan HPE Miniscan Miniscan 150 Miniscan 300 Miniscan HP3 8 Miniscan HP3 16 Miniscan HPE Pinscan Point Point In Point MH 8bit...

Page 146: ...Super Cyc TM DX Prism COLOR KINETICS ColorBlaze 48 M1 ColorBlaze 48 M2 ColorBlaze 48 M4 ColorBlaze 48 MA ColorBlaze 72 M1 ColorBlaze 72 M2 ColorBlaze 72 M3 ColorBlaze 72 M4 ColorBlaze 72 M6 ColorBlaze...

Page 147: ...evolution EUROLITE LED ML 56 LED Par LED Par 64 LED Par 64 UV LED RGB Mix RGB Par C B Mode RGB Par Col Mode RGB Par RGB Mode SuperStrobe TB 5 TC 5 TC 150 TC 200 TC 250 TC 300 TF 5 TG 5 TMH 155 TR 5 TS...

Page 148: ...it Miracle PCC 1200 PCC 250 CMY PCC 250 Pro PHS 200 PHS 250 Pro PHS 260 PHS 700 8 bit PHS 700 16 bit PHS 710 PHW 250 16 Bit PS D 200PR 8 PS D 200PR 16 PSC 575 PSC 1200 PSX 575 RT 150 RT 240 SC 240 SC...

Page 149: ...nz HIGH END SYSTEMS Catalyst DL 1 Catalyst DL 1 Eye Catalyst Pro 3 2 Color Command Color Command Dim Color Merge Color Power Color Pro Color Pro Enhanced Cyberlight Mode 1 Cyberlight Mode 2 Cyberlight...

Page 150: ...ryScanP3 VaryscanSpec Plus VScan 3 250MSD 6 VScan 3 250MSD 8 Winner II JEM AF 1 AF 2 Glaciator Hot 2000 Roadie ZR 22 DMX ZR 24 7 KINOFLO Koloris LAMPO Columbus 650 Columbus MSR 400RG Domingo Gemini Gh...

Page 151: ...Mode 4 MAC 2000 Perf 8 MAC 2000 Perf 16 MAC 2000 Prof 8 MAC 2000 Prof 16 MAC 2000 Wash 8 MAC 2000 Wash 16 Mac III Basic Mac III Extended Mac TW1 Basic Mac TW1 Enhanced Magnum Mania EFX500 M1 Mania EFX...

Page 152: ...re 3 Chan Spectre MX90 Super Blitzer NOVA LIGHT High Ground OCEAN OPTICS SeaChanger CTC SeaChanger Dimmer SeaChanger Green SeaChanger Magenta OSIRIS Isis 575 Spot Isis 575 Wash Neftis 575 Orus 1200 Sp...

Page 153: ...5EAT M1 ColorSpot575EAT M2 ColorSpot575EAT M3 ColorSpot575EAT M4 ColorSpot700EAT M1 ColorSpot700EAT M2 ColorSpot1200AT M1 ColorSpot1200AT M2 ColorSpot2500EATM1 ColorSpot2500EATM2 ColorSpot2500EATM3 Co...

Page 154: ...Flexo CDM 150 M4 HyperColor 575 Infinity Club 1200 Infinity Live 1200 InfinityMSZ1200 10 InfinityMSZ1200 12 InfinityMSZ1200 14 InfinitySL1200 10 InfinitySL1200 12 Mask Color Zoom Miniscan 2001 MSD Mov...

Page 155: ...6 CityBeam 7 CityColor 6 CityColor 7 CityColor 300 CityColor 400 Crown CS1 CS1 Scroller CS4 minus dimmers Excess 700 8bit Excess 700 16bit Excess 1200 16bit Giant 8 Bit Giant 16 bit Giant Color 8 Gia...

Page 156: ...4 VL5 Arc Mode 5 VL5 Arc Mode 6 VL5 Arc Mode 7 VL5 Arc Mode 8 VL5 Arc Mode 9 VL5 Arc Mode 10 VL5 Wash Mode 1 VL5 Wash Mode 2 VL5 Wash Mode 3 VL5 Wash Mode 4 VL5 Wash Mode 5 VL5 Wash Mode 6 VL5 Wash M...

Page 157: ...roplet Stat HSI C Droplet Stat RGB Droplet Stat RGB C YING WEI D RGB Spot Wash 1200 M1 Spot Wash 1200 M2 Spot Wash 1200 M3 ZAP TECHNOLOGY BigLite 4 5 ZOOM Par 64 LED Showlight Pro Stage Colour CB Stag...

Page 158: ...ut Key 10 Blank Cue 95 Blind 13 Blind Mode 126 Block Cue Stack 95 Both Track 116 Bounce Chase Direction 96 bpm Chase Speed 96 CAN 53 CAN Port 137 Capture 68 CD Timecode 94 Channel Data UDK 100 Chase 9...

Page 159: ...3 Submasters 107 UDK 103 Desk Information 62 Desk Light 138 Desk Setup 49 Behaviour 55 Cue Stack Defaults 57 Default Times 56 Inputs 53 Lock Functions 58 Outputs 54 Peripherals 52 Submaster Defaults 5...

Page 160: ...Knockout 120 Light Converse 68 Load 13 Cues 86 Palettes 83 Submasters 107 UDK 103 Loading Shows 60 Lock Functions 58 LTP 95 Macro UDK 102 Macro Window 112 Macros 112 Clearing 63 Copying a Macro 113 De...

Page 161: ...0 Highlight 121 Home Function 122 Intensity Parameters 74 Knockout Function 120 Output Window 71 Park Function 120 Position Parameters 75 Record Options Window 115 Rem Dim Function 120 Selecting Fixtu...

Page 162: ...screen Calibration 50 support 51 Track 13 Backward 116 Both 116 Cue Only 116 Forward 116 Trackball 16 126 137 Tracking 24 Smart Tags 76 Trigger 87 Try Cue 13 121 UDK Setup Window 100 Flash Mode 101 Mi...

Page 163: ...est software visit the ORB website at www orbdesk com Cooper Controls t a Zero 88 Usk House Llantarnam Park Cwmbran NP44 3HD Tel 44 0 1633 838088 Fax 44 0 1633 867880 email sales zero88 com Web www ze...

Reviews: