


Advanced
Programming
ORB Operating Manual – Issue 1.0
Page 121
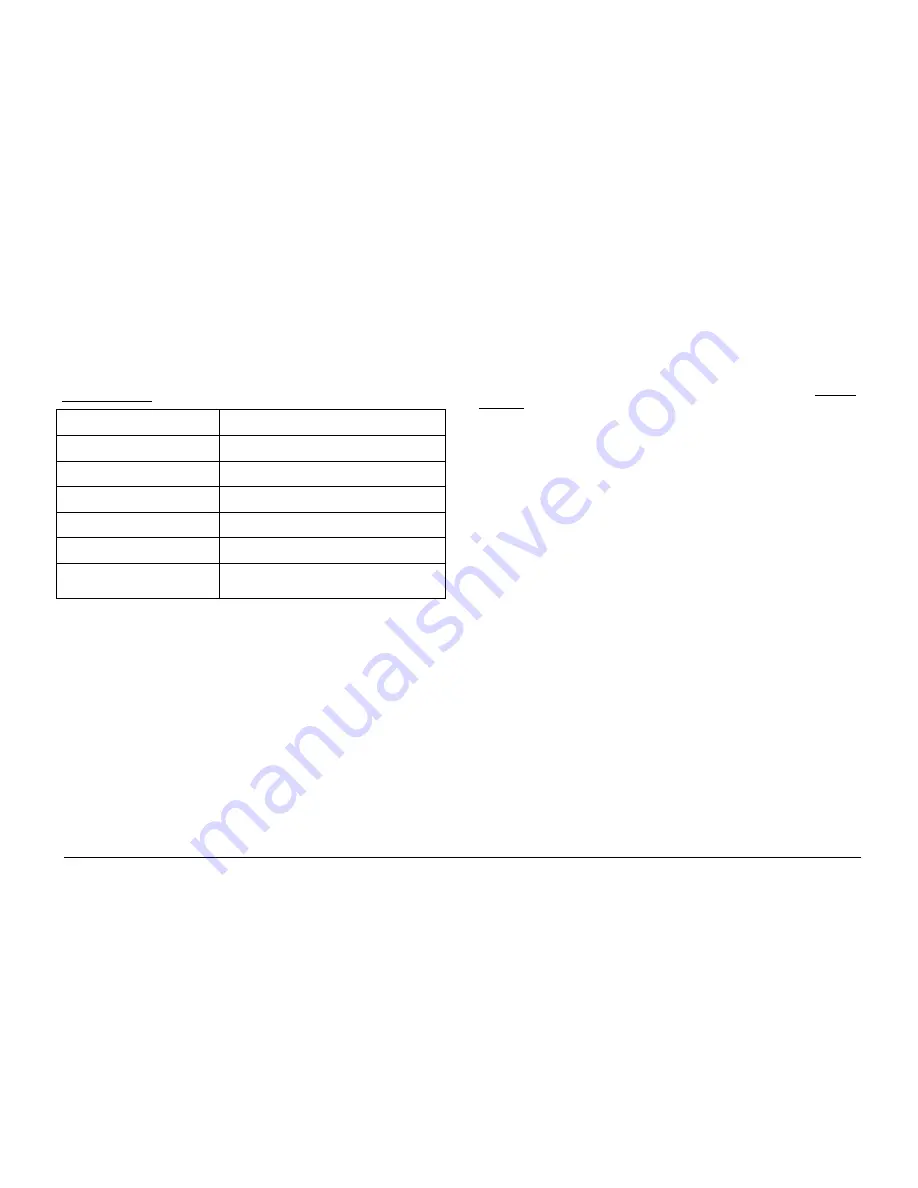
Fade Time Commands
The following commands can be used to set the fade times for the
selected fixtures in the programmer:
TIME X ENTER
Sets the fade times for all fixture parameters to X
seconds
TIME U/D ENTER
Sets the intensity fade up and fade down times to U
and D seconds respectively
TIME X DELAY Y ENTER
Sets the fade time for all parameters to X and the
delay to Y
TIME COLOUR X ENTER
Sets the fade times for all colour parameters to X
seconds
TIME BEAM X ENTER
Sets the fade times for all beamshape parameters to X
seconds
TIME POSITION X ENTER
Sets the fade times for all position parameters to X
seconds.
TIME U/D COLOUR X BEAM Y
POSITION Z ENTER
Sets the intensity fade up and fade down times to U
and D, the colour fade times to X, the beamshape fade
times to Y and the position fade times to Z.
Try Cue Function
Whenever a cue is recorded or loaded into the programmer, the
current state of the outputs is stored as a reference.
If you change the scene in the programmer, pressing the TRY CUE
key once will take the outputs back to the previous recorded output
state. The LED in the key is lit.
Pressing the TRY CUE key again plays back the new look back over
the corresponding times (default or recorded times depending on
what data was in the programmer). While the outputs are fading
the LED in the TRY CUE key flashes, and when the fade is complete
the LED goes out. This gives a great way of previewing the timing
on cues prior to programming them into a cue. Try Cue can be
used as many times as required before the scene is finally
programmed.
Highlight Function
The Highlight function provides a quick method of locating a fixture
(or fixtures) and then allowing the position to be adjusted without
tagging any of the other parameters. This can be particularly useful
when creating position palettes (see page 82).
Select the required fixture(s) and then press the SHIFT and HOME
keys. This will set all the outputs of the currently selected fixtures,
except for Pan and Tilt to their home values (defined in Edit
Fixtures).
While a fixture is highlighted only the Pan and Tilt parameters can
be edited using the wheels. Adjust the pan and Tilt values as
required, and then press SHIFT and HOME again to un-highlight the
selected fixture(s). The other fixture parameters will return to their
previous output level.
Summary of Contents for ORB
Page 1: ...ORB OPERATING MANUAL...


