


Authentication
WorkCentre 7425/7428/7435
System Administrator Guide
63
Configuring Authentication
Preparations:
1. Ensure that the printer is on and connected to the network.
2. Ensure that the TCP/IP and HTTP protocols are configured on the printer, and you can access
CentreWare Internet Services. For more information see
CentreWare Internet Services
on page 23.
3. Ensure that the Authentication Server to be used is functional on your network. Refer to your
manufacturer’s documentation for instructions to complete this task.
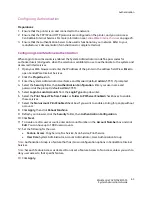
Configuring Local Machine Authentication
When Login to Local Accounts is enabled, the System Administrator can define pass codes for
authorized users (and guests, when the selection is available) to use to authenticate to the system and
access restricted services.
1. Open your Web browser and enter the IP address of the printer in the address field. Press
Enter
to
open CentreWare Internet Services.
2. Click the
Properties
tab.
3. Enter the system administrator User Name and Password (default
admin
,
1111
) if prompted.
4. Select the
Security
folder, then
Authentication Configuration
. Enter your user name and
password at the prompt (default:
admin
,
1111
).
5. Select
Login to Local Accounts
from the
Login Type
drop down list.
6. Select the
Print Stored File from Folder
, or
Folder to PC/Server Enabled
check boxes to enable
these services.
7. Select the
Non-account Print Enabled
check box if you want to enable printing for people without
accounts.
8. Click
Apply
, then click
Reboot Machine
.
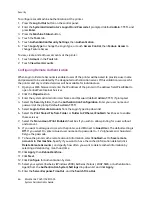
9. Refresh your browser, click the
Security
folder, then
Authentication Configuration
.
10. Click
Next
.
11. To create or edit a user account, enter an Account Number in the
Account Number
box and click
Edit
. You can have up to 1000 user accounts.
12. Set the following for the user.
•
Feature Access
: Copy Service, Fax Service, Scan Service, Print Service
•
User Role
: System Administrator, Account Administrator, User, Authorization Group
Note:
Authorization Group is a feature that has its own configuration options in CentreWare Internet
Services.
Note:
Set each Feature Access as desired. Do not set a Feature Access to No Access, unless you wish to
deny user access to that specific feature.
13. Click
Apply
.
Summary of Contents for WORKCENTRE 7428
Page 8: ...WorkCentre 7425 7428 7435 System Administrator Guide 8...
Page 9: ...9 1 General Information This chapter includes Resources on page 10...
Page 40: ...Administrative Tools WorkCentre 7425 7428 7435 System Administrator Guide 40...
Page 168: ...Scanning and Faxing WorkCentre 7425 7428 7435 System Administrator Guide 168...
Page 208: ...Troubleshooting WorkCentre 7425 7428 7435 System Administrator Guide 208...