70
3 Printing
3.
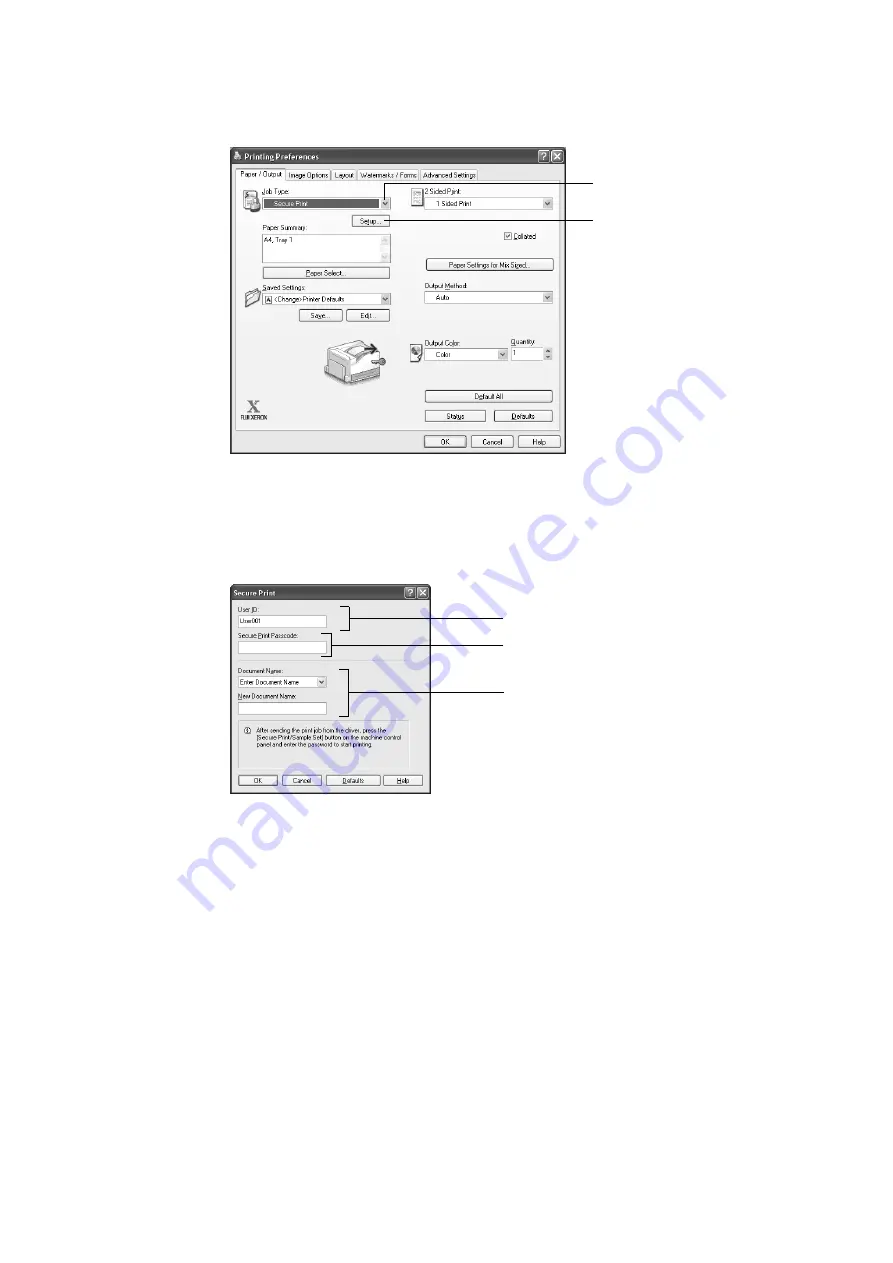
The [Paper/Output] tab appears.
From [Job Type], select [Secure Print].
4.
Click [Setup].
The [Secure Print] dialog box appears.
5.
Enter your user ID into [User ID].
The user ID can be up to 8 single-byte alphanumeric characters.
6.
If a password is assigned to the job, enter the password into [Secure Print Passcode].
The password can be up to 12 single-byte numeric characters.
7.
For [Document Name], select [Enter Document Name] or [Use Existing Name].
If you selected [Enter Document Name], name the document by entering up to 12
single-byte characters into [New Document Name].
If you selected [Use Existing Name], the document name will be the name of the
document to be printed. If the printer cannot identify the name of the document, the
date and time that the document will be printed is used for the name.
8.
Click [OK].
9.
On the [Paper/ Output] tab, click [OK].
10. Click [Print] on the [Print] dialog box to start printing.
This will store the document in the printer.
3
4
5
7
6
Summary of Contents for DocuPrint C2255
Page 1: ...DocuPrint C2255 User Guide ...
Page 176: ...176 6 Troubleshooting 2 Remove the jammed paper 3 Gently close cover C ...
Page 210: ...210 7 Maintenance 12 Close the front cover ...
Page 266: ...266 7 Maintenance 7 Rotate the lever to the right to lock it 8 Close the front cover ...
Page 313: ...Index 313 WSD 26 129 X XeroxStdAccounting 147 XPS 113 XPS file 309 ...


