A.8 Installing the Parallel Port
291
4.
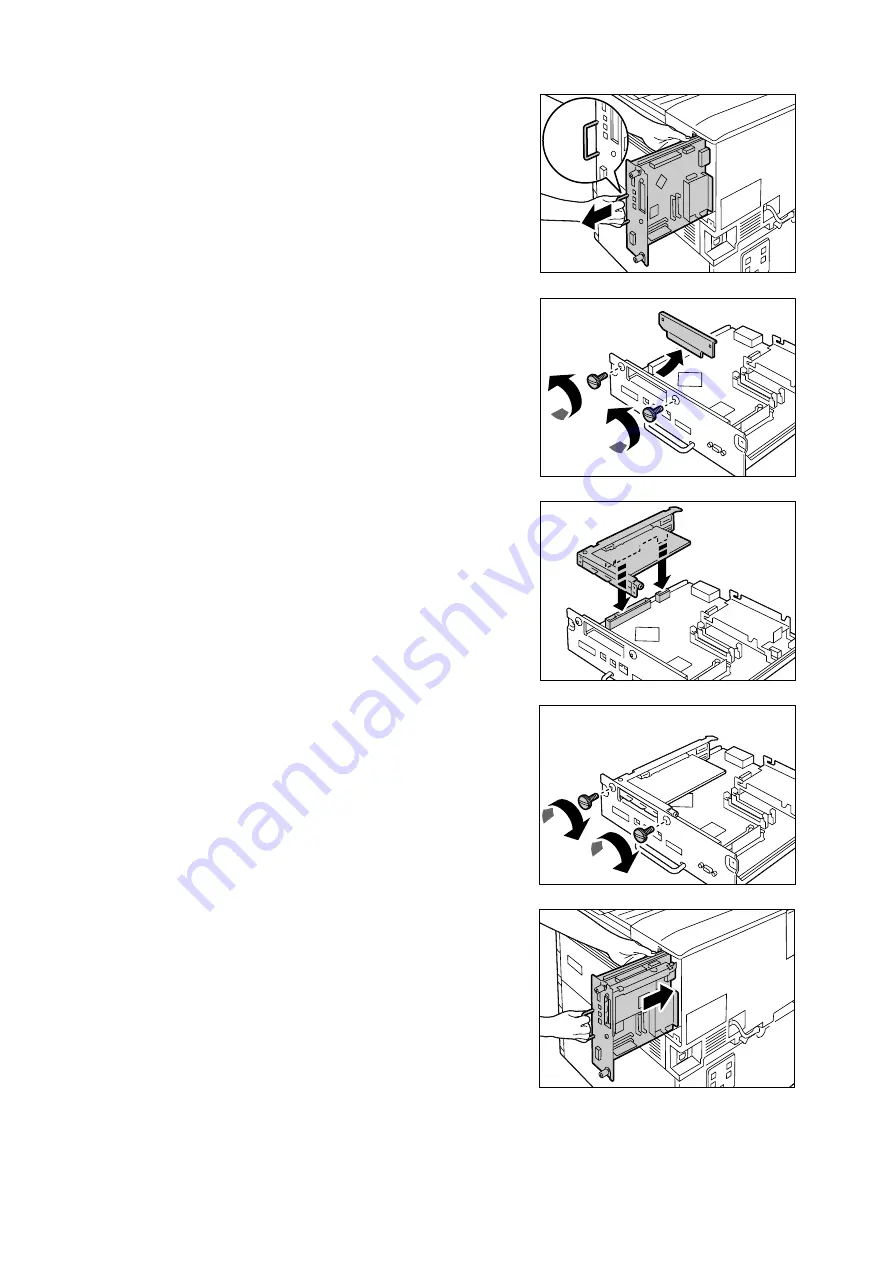
Pull out the handle on the control board and
then carefully pull the control board out of
the printer. Place the control board on a
table top or some other flat surface.
Important
• When pulling out the control board, hold it with both
hands so you do not drop it.
5.
Remove the two screws on the control
board and then remove the dummy plate.
Note
• Note that you will need the screws you remove here in
step 7 of this procedure.
6.
Aligning the Parallel Port (with frame) with
the control board connectors, insert the
Parallel Port from above into the
connectors.
7.
Use the screws you removed in step 5 to
secure the Parallel Port to the front plate of
the control board.
8.
Reinsert the control board back into the
printer. Holding its handle, slide the control
board back into the printer.
Summary of Contents for DocuPrint C2255
Page 1: ...DocuPrint C2255 User Guide ...
Page 176: ...176 6 Troubleshooting 2 Remove the jammed paper 3 Gently close cover C ...
Page 210: ...210 7 Maintenance 12 Close the front cover ...
Page 266: ...266 7 Maintenance 7 Rotate the lever to the right to lock it 8 Close the front cover ...
Page 313: ...Index 313 WSD 26 129 X XeroxStdAccounting 147 XPS 113 XPS file 309 ...


