00000000000000000
00000000000000000
00000000000000000
00000000000000000
00000000000000000
00000000000000000
00000000000000000
00000000000000000
00000000000000000
00000000000000000
00000000000000000
00000000000000000
00000000000000000
00000000000000000
00000000000000000
00000000000000000
00000000000000000
00000000000000000
00000000000000000
00000000000000000
00000000000000000
2
4
3
1
Plunger
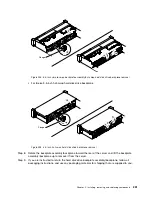
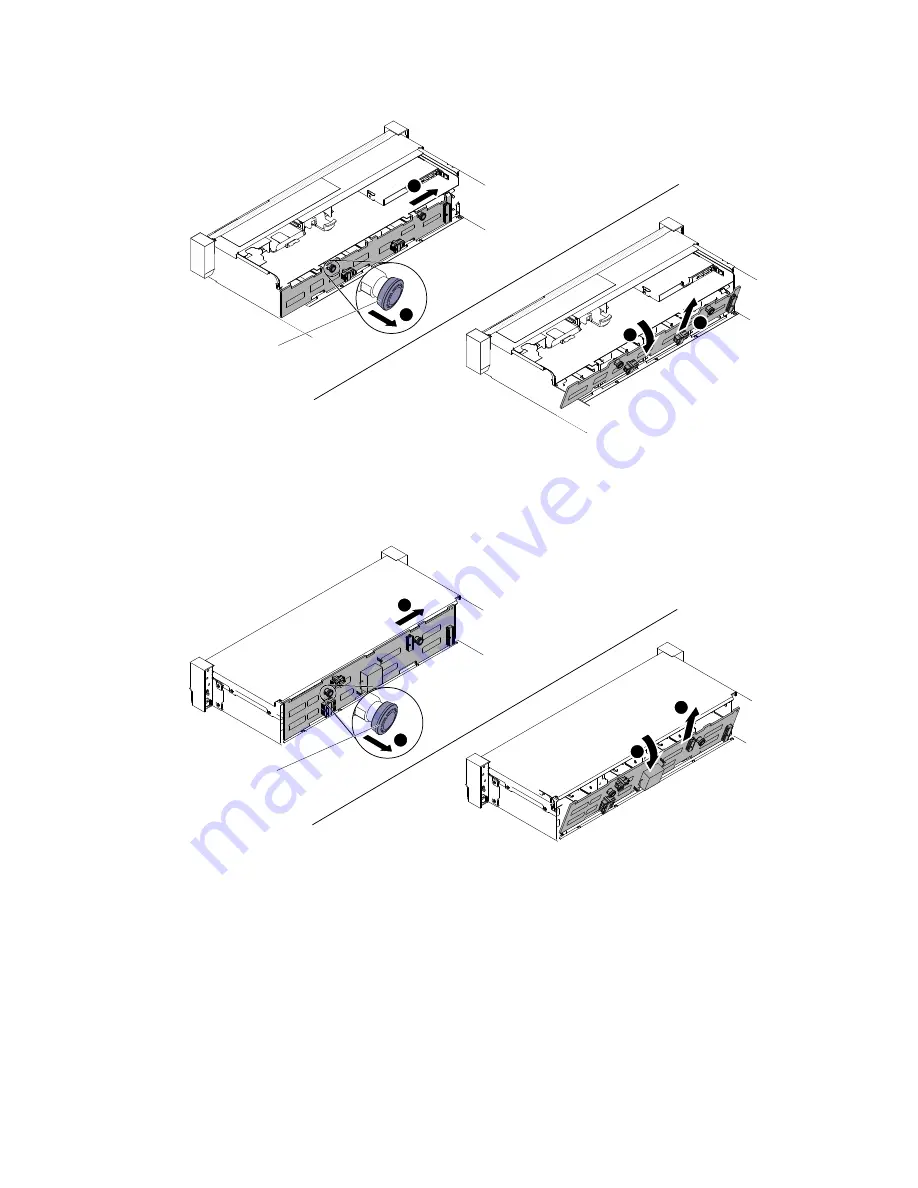
Figure 204. 3.5-inch simple-swap backplate assembly/hot-swap hard disk drive backplane removal
• For twelve 3.5-inch hot-swap hard disk drive backplane
2
3
4
1
Plunger
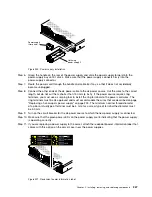
Figure 205. 3.5-inch hot-swap hard disk drive backplane removal
Step 8.
Rotate the backplate assembly/backplane toward the rear of the server and lift the backplate
assembly/backplane up to remove it from the server.
Step 9.
If you are instructed to return the hard disk drive backplate assembly/backplane, follow all
packaging instructions, and use any packaging materials for shipping that are supplied to you.
Installing, removing, and replacing components
251
Summary of Contents for x3650 M5
Page 1: ...Lenovo System x3650 M5 Installation and Service Guide Machine Type 8871 ...
Page 47: ...Figure 35 System board switches jumpers and buttons Chapter 1 The System x3650 M5 server 35 ...
Page 60: ...48 Lenovo System x3650 M5 Installation and Service Guide ...
Page 80: ...68 Lenovo System x3650 M5 Installation and Service Guide ...
Page 124: ...112 Lenovo System x3650 M5 Installation and Service Guide ...
Page 146: ...134 Lenovo System x3650 M5 Installation and Service Guide ...
Page 1322: ...1310 Lenovo System x3650 M5 Installation and Service Guide ...
Page 1330: ...Taiwan BSMI RoHS declaration 1318 Lenovo System x3650 M5 Installation and Service Guide ...
Page 1339: ......
Page 1340: ......

