1
3
2
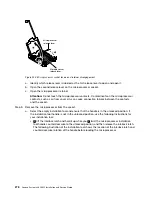
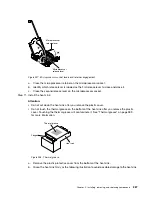
Microprocessor
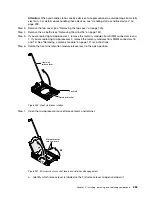
release lever
Microprocessor
release lever
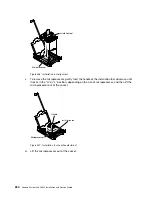
Figure 243. Microprocessor socket levers and retainer disengagement
a.
Identify which release lever is labeled as the first release lever to open and open it.
b.
Open the second release lever on the microprocessor socket.
c.
Open the microprocessor retainer.
Attention:
Do not touch the microprocessor contacts. Contaminants on the microprocessor
contacts, such as oil from your skin, can cause connection failures between the contacts
and the socket.
Step 9.
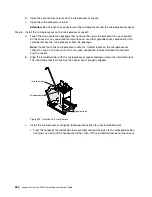
Remove the microprocessor from the socket.
a.
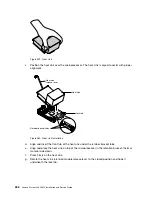
Select the empty installation tool and ensure that the handle is in the unlocked position. If
the installation tool handle is not in the unlocked position, use the following instructions for
your installation tool:
•
1
lift the interlock latch and hold it up while you
2
twist the microprocessor installation
tool handle counterclockwise to the unlocked position, and then release the interlock latch.
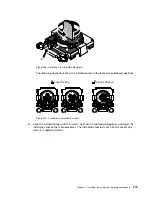
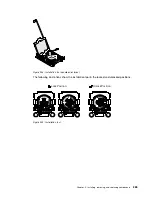
The following illustration of the installation tool shows the location of the interlock latch and
counterclockwise rotation of the handle before loading the microprocessor.
278
Lenovo System x3650 M5 Installation and Service Guide
Summary of Contents for x3650 M5
Page 1: ...Lenovo System x3650 M5 Installation and Service Guide Machine Type 8871 ...
Page 47: ...Figure 35 System board switches jumpers and buttons Chapter 1 The System x3650 M5 server 35 ...
Page 60: ...48 Lenovo System x3650 M5 Installation and Service Guide ...
Page 80: ...68 Lenovo System x3650 M5 Installation and Service Guide ...
Page 124: ...112 Lenovo System x3650 M5 Installation and Service Guide ...
Page 146: ...134 Lenovo System x3650 M5 Installation and Service Guide ...
Page 1322: ...1310 Lenovo System x3650 M5 Installation and Service Guide ...
Page 1330: ...Taiwan BSMI RoHS declaration 1318 Lenovo System x3650 M5 Installation and Service Guide ...
Page 1339: ......
Page 1340: ......

