Class 1 Laser Product
Laser Klasse 1
Laser Klass 1
Luokan 1 Laserlaite
Appareil A Laser de Classe 1
`
Step 6.
Touch the static-protective package that contains the new optical drive to any unpainted
metal surface on the server; then, remove the optical drive from the package and place it on
a static-protective surface.
Step 7.
Follow the instructions that come with the drive to set any jumpers or switches.
Step 8.
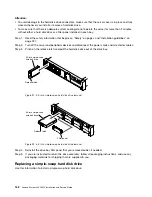
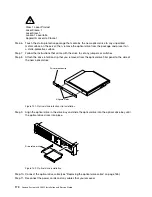
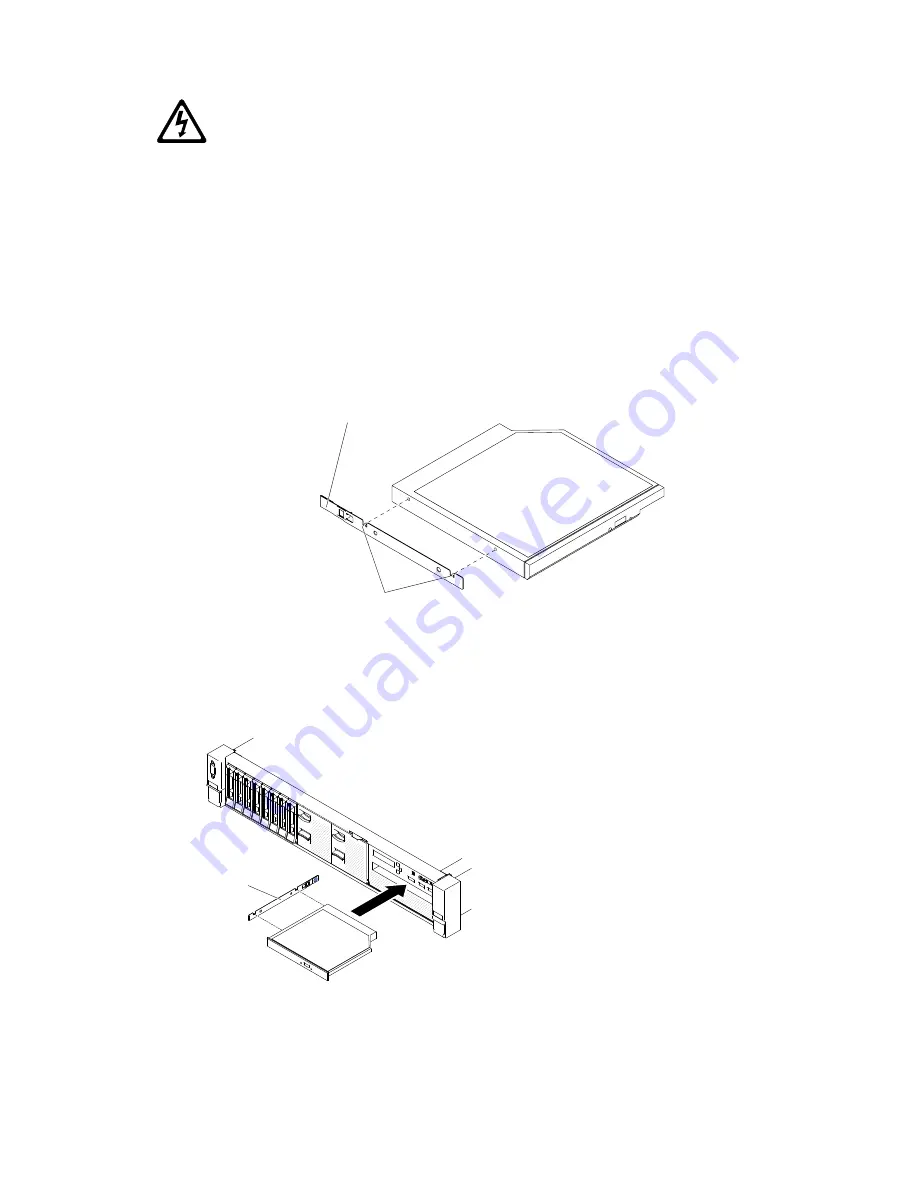
Attach the drive retention clip that you removed from the optical drive filler panel to the side of
the new optical drive.
Drive retention clip
Alignment pins
Figure 101. Optical drive retention clip installation
Step 9.
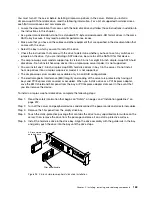
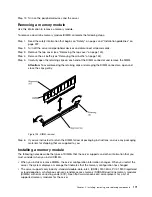
Align the optical drive in the drive bay and slide the optical drive into the optical drive bay until
the optical drive clicks into place.
00
00
00
00
00
00
00
00
00
00
00
00
000000
000000
000000
000000
000000
Drive retainer clip
Figure 102. Optical drive installation
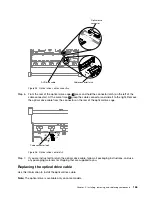
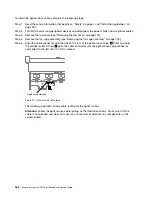
Step 10. Connect the optical drive cable (see “Replacing the optical drive cable” on page 165).
Step 11. Reconnect the power cords and any cables that you removed.
170
Lenovo System x3650 M5 Installation and Service Guide
Summary of Contents for x3650 M5
Page 1: ...Lenovo System x3650 M5 Installation and Service Guide Machine Type 8871 ...
Page 47: ...Figure 35 System board switches jumpers and buttons Chapter 1 The System x3650 M5 server 35 ...
Page 60: ...48 Lenovo System x3650 M5 Installation and Service Guide ...
Page 80: ...68 Lenovo System x3650 M5 Installation and Service Guide ...
Page 124: ...112 Lenovo System x3650 M5 Installation and Service Guide ...
Page 146: ...134 Lenovo System x3650 M5 Installation and Service Guide ...
Page 1322: ...1310 Lenovo System x3650 M5 Installation and Service Guide ...
Page 1330: ...Taiwan BSMI RoHS declaration 1318 Lenovo System x3650 M5 Installation and Service Guide ...
Page 1339: ......
Page 1340: ......

