Chapter
4:
Getting
Started (The Standard Template)
Your First Mix
102/ 380
V1.0/1
Eclipse User Guide
Labels
So far we have used the default labelling provided by the
Templ1
file. However, it is simple and easy to change these 4-
character labels as follows:
1.
Press
SEL
on the input channel you wish to label.
2.
Then press [
F3
] on the console keyboard.
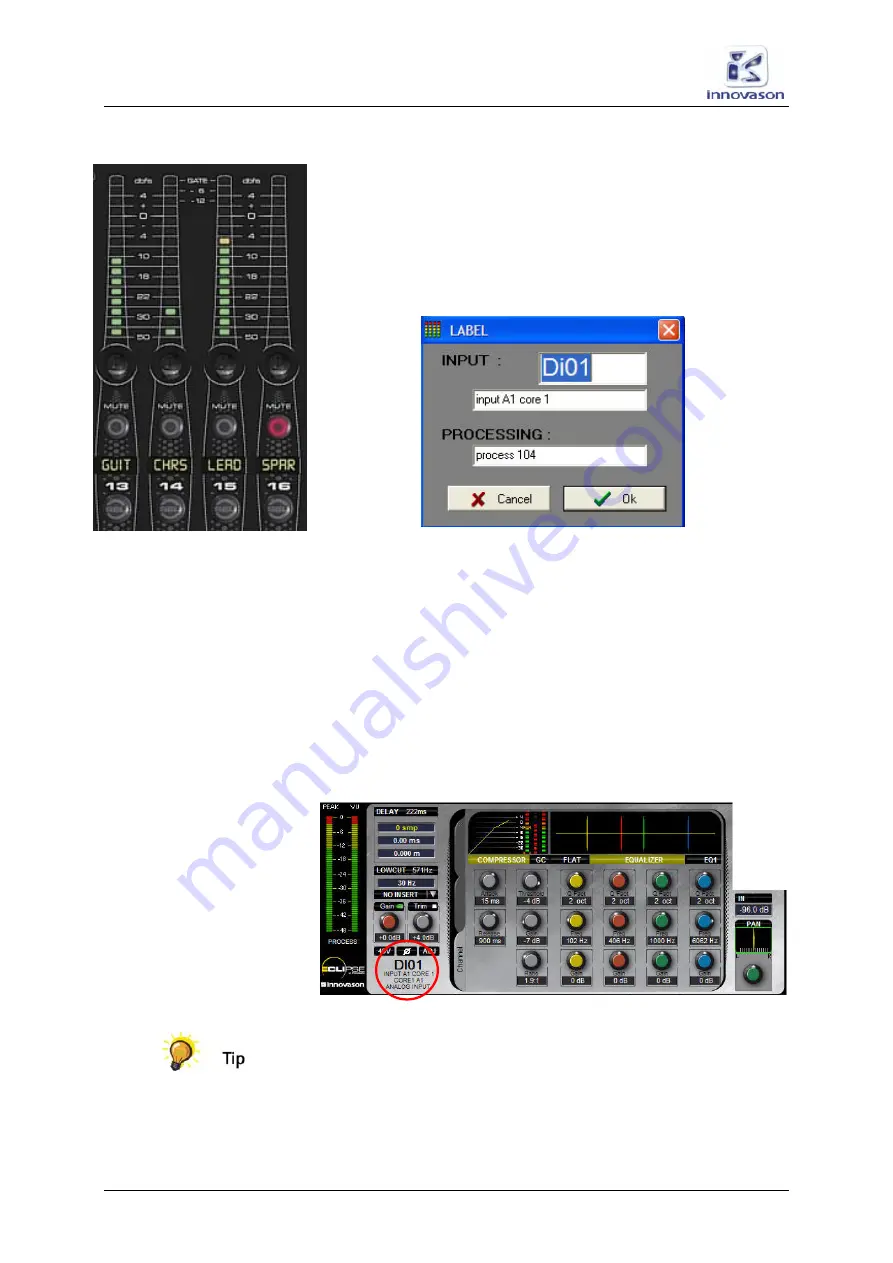
The INPUT LABEL window appears:
3.
In the
INPUT
field, enter a new 4-character label from
the keyboard.
4.
Below you can enter a longer alias (up to 16 characters)
which is tied to the source Label and will appear on the
Main Mix display.
5.
In the PROCESSING field, you can also enter an alias
for the processing channel. This appears below the Peak
and VU metering on the Main Mix display.
6.
Confirm by pressing
OK
.
The Label appears on the Fader strip, or Smart Panel
controller, and on the Main Mix display:
You can label a range of Faders or Smart Panel strips by
selecting [
ALT
] + [
F3
]; each time you press
OK
, the next strip is
selected.
For more details on Labels, see Page 176.


