www.hygiena.com
80
Step 7: Load samples into the system
The next step is to load the samples into the system. This can be done by using the "Get Box" functionality of
the PLC maintenance panel (see Chapter 12 of the user manual)
Step 8: Trigger the camera
If the samples are loaded into the system, the camera can be triggered to capture an image of the samples.
This can be done by pressing the "Trigger" button.
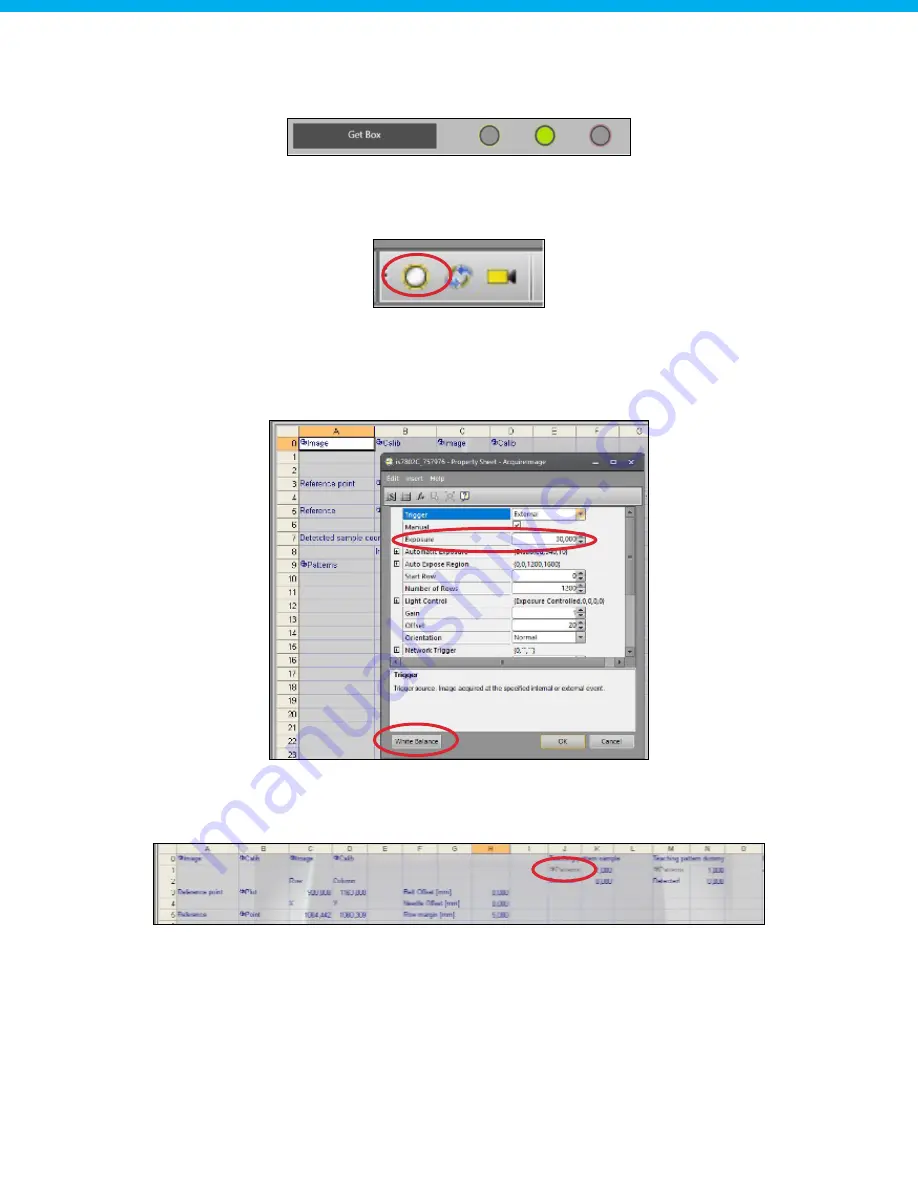
Step 9: Optimize exposure settings
The exposure settings of the image can be set by double clicking on cell "A0" containing the image. If the
image is too dark, the exposure can be set higher. If the image is too light, the exposure can be lowered. The
default exposure is set to 30 milliseconds. The "White Balance" button can be pressed to balance out the
image, removing unrealistic color casts.
Step 10: Teach pattern to detect
Double click on the teaching pattern for the sample (cell "J1") to open the pattern teaching menu. Hide the
spreadsheet to have a better view of the captured image, the pattern teaching menu will stay open.


