158
Program description: Trainer system
Wireless HoTT system
The
mx-16
HoTT Trainer system can also be operated
by wireless means. In this case the Teacher transmitter
is “connected” to a Pupil transmitter as described in the
following section. However, the trainer model must first
be bound to the PUPIL transmitter. This configuration is
possible between transmitters which feature the “BIND:”
option in the “
Trainer
” menu.
Preparations for Trainer mode operations
Teacher transmitter
The trainer model
must
be programmed
completely
,
i. e. with all its functions including trims and any mixer
functions, in a model memory of the HoTT Teacher
transmitter.
This means that it must be possible to
control the trainer model fully, without restriction, by
the Teacher transmitter. However, the preparations
are concluded by binding the training model to the
Pupil transmitter; you will find a detailed description
of the binding procedure on pages 80 and 88.
Pupil transmitter
If you are using an “
mc
” or “
mx
” series transmitter,
it is best to set up a free model memory in the Pupil
transmitter with the required model type (“Fixed-wing”
or “Helicopter”). Assign the model name “Pupil” to the
memory, and set up the stick mode (Mode 1 … 4) and
“Throttle min. forward / back” to suit the pupil’s prefer-
ence. All the other settings should be left at the appropri-
ate default values. If you select the “Helicopter” model
type, the throttle / collective pitch direction and idle trim
must also be set accordingly on the Pupil transmitter. All
other functions, including mixer and coupling functions,
are carried out by the Teacher transmitter, which trans-
mits them to the receiver in the model.
When assigning the control functions the usual conven-
tions should be observed:
Channel Function
1
Throttle / Collective pitch
2
Aileron / Roll
3
Elevator / Pitch-axis
4
Rudder / Tail rotor
If you wish to transfer further control functions to the
Pupil transmitter, i.e. in addition to the functions of the
two dual-axis stick units (1 … 4), then you will need to
assign transmitter controls to those
inputs
which cor-
respond to the
function or transmitter control inputs 5
… 8
, as selected in the Teacher transmitter’s “Trainer”
menu; this has to be carried out in the Pupil transmitter’s
“
Transmitter control settings
” menu.
Important:
If you should forget to assign a transmitter control
at the Pupil end, the servo or servos concerned
will remain at their centre position when control is
transferred to the Pupil transmitter.
Preparing the Teacher and Pupil transmitters
Once you have bound the trainer model to the Pupil
transmitter, the Teacher transmitter should also be
switched on. Now use the arrow buttons or the left or
right-hand touch-key to leaf through on both transmitters
to the “
Trainer
” menu point in the multi-function menu:
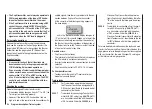
servo set.
D/R expo
wing mixer
contr set.
phase trim
free mixer
servo disp
basic sett
fail-safe
telemetry
info disp
teach/pupi
servo set.
D/R expo
free mixer
contr set.
heli mixer
swashp.mix
servo disp
basic sett
fail-safe
telemetry
teach/pupi
info disp
Touch the central
SET
button of the right-hand touch-key
to open the following menu point:
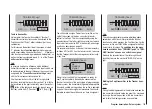
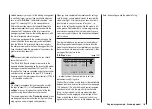
TRAINER/Pupil
–P
T
2 3 4 5 6 7 8
BIND:
SW: –––
1
N/A
The illustration above shows the initial state of this
menu: no transmitter controls have been released to the
Pupil ( ), and no switches have been assigned (SW: ---
bottom right and -S on left of illustration).
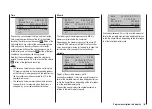
Pupil transmitter
Use the arrow buttons of the left or right-hand touch-key
to move the marker / cursor to the input field marked
“Bind”. If a switch is displayed adjacent to “SW” on the
right, then it is essential to erase this: see the following
illustration:
Summary of Contents for mx-12 Hott
Page 1: ...Programming Manual 33116 mx 16 HoTT 3 en mx 16...
Page 35: ...35 For your notes...
Page 49: ...49 For your notes...
Page 55: ...55 For your notes...
Page 59: ...59 For your notes...
Page 63: ...63 For your notes...
Page 69: ...69 For your notes...
Page 91: ...91 For your notes...
Page 101: ...101 For your notes...
Page 123: ...123 For your notes...
Page 181: ...181 For your notes...
Page 193: ...193 For your notes...


