79
Program description: base settings - fixed-wing model
switches assigned to phase 3 or 4 is also closed, or
phase 3, if the switches assigned to phases 3 and 4
are closed.
As a result you may wish to take the inherent phase
•
priorities into account when assigning names to the
flight phases; see below.
At the servo end the transition does not occur
•
“abruptly”, but with a fixed transition period of about
one second.
Programming
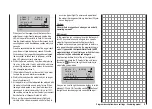
When you select “phase 2”, “phase 3” or “phase 4” using
the arrow buttons
of the left or right-hand touch-
key, the “Name” field for that flight phase is already
framed.
If the default name does not seem appropriate, touch
the central
SET
button of the right-hand touch-key, and
the current setting is shown highlighted. Now use the
arrow buttons of the right-hand touch-key to select an
appropriate name from those available. Touch the
SET
button to conclude the input process.
Now press the
button of the left or right-hand touch-
key to move to the right-hand column at the bottom of
the screen, indicated by the switch symbol
, and
briefly touch the central
SET
button. You can now assign
a switch to the phase as described on page 57. We
recommend one of the two three-position switches SW
4/5 or SW 6/7, in each case starting from the centre
toggle position.
For more information on flight phase programming
please refer to page 106, in the section entitled “
Phase
trim
”.
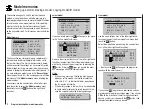
Receiver output
For maximum flexibility in terms of receiver socket
assignment, the
mx-16
HoTT software provides the
means to swap over the servo outputs 1 to max. 8;
this is carried out on the second page of the “Receiver
output” sub-menu.
10:01
2
phase 2
phase 3
phase 4
takeoff
landing
speed
–––
timer
7
6
receiv out
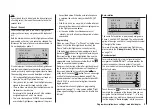
Touch the central
SET
button of the right-hand touch-key
to move to the next page of the display. Here you can
assign the “control channels” for servos 1 … 8 to any
receiver output you wish to use. However, please note
that the display in “
Servo display
” - which you can ac-
cess from virtually any menu position by simultaneously
touching the
and
buttons of the left-hand touch-
key - refers exclusively to the “
control channels
”, i. e. the
outputs are NOT swapped over.
S
S
S
S
1
2
3
4
1
2
3
4
output
S
5
5
output
output
output
output
Use the arrow buttons
of the left or right-hand
touch-key to select the servo / output combination you
wish to change, then touch the central
SET
button of the
right-hand touch-key. Now you can assign the desired
servo (S) to the selected output using the right-hand
arrow buttons, and confirm your choice with
SET
… or
alternatively touch the
or
buttons of the right-
hand touch-key (
CLEAR
) simultaneously to revert to the
default sequence.
Please note that any subsequent changes to servo
settings, such as servo travel, Dual Rate / Expo, mixers
etc.,
must be carried out according to the original
(default) receiver socket sequence.
Note:
It is also possible to distribute the control functions
amongst as many receivers as you wish, using the
channel-mapping function in the
mx-16
HoTT’s inte-
gral Telemetry menu, or even to assign the same control
function to multiple receiver outputs. For example, you
might wish to actuate each aileron with two servos in-
stead of just one, etc. However, we strongly recommend
that you use only one of the two options, as a combina-
tion will soon lead to confusion.
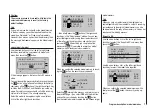
rx bind
Graupner|SJ
HoTT receivers have to be “instructed” to
communicate exclusively with a particular model (i. e.
model memory) of a
Graupner|SJ
HoTT transmitter. This
process is known as “binding”, and is only necessary
once for each new combination of receiver and model. It
can be repeated at any time.
Important note:
When carrying out the binding procedure, please
ensure that the transmitter aerial is always an
adequate distance from the receiver aerials: keeping
the aerials about 1 m apart is safe in this respect.
Otherwise you risk a failed connection to the down-
link channel, and consequent malfunctions.
Summary of Contents for mx-12 Hott
Page 1: ...Programming Manual 33116 mx 16 HoTT 3 en mx 16...
Page 35: ...35 For your notes...
Page 49: ...49 For your notes...
Page 55: ...55 For your notes...
Page 59: ...59 For your notes...
Page 63: ...63 For your notes...
Page 69: ...69 For your notes...
Page 91: ...91 For your notes...
Page 101: ...101 For your notes...
Page 123: ...123 For your notes...
Page 181: ...181 For your notes...
Page 193: ...193 For your notes...

