20
Description of transmitter
Description of transmitter
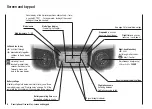
Front of transmitter
Aerial with folding / rotating base
Rotary proportional control CTRL 7
3-position switch SW 4/5
2-position momentary
switch SW 1
Rotary proportional
control CTRL 6
Left-hand stick
Trim
ON / OFF switch
Left-hand touch-button
LCD screen
Right-hand touch-button
Trim
Right-hand stick
2-position switch SW 3
Carry handle
Neckstrap lug
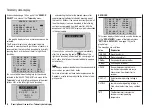
Attaching the transmitter neckstrap
You will find a strap lug mounted in the centre of the
front face of the
mx-16
HoTT transmitter, as shown in
the drawing on the right. This lug is positioned in such a
way that the transmitter is perfectly balanced even when
suspended from a neckstrap.
Order No.
1121
Neckstrap, 20 mm wide
Order No.
70
Neckstrap, 30 mm wide
3-position switch SW 6/7
Rotary proportional control CTRL 8
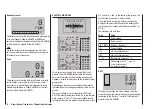
Important note:
In the transmitter’s standard form any servos connected
to the receiver can initially only be operated using the
dual-axis sticks. For maximum flexibility, all the other
transmitter controls (CTRL 6 ... 8, SW 1 ... 9) are “free”
in software terms, and can be assigned to any channels
you like, enabling you to set up the system to suit your
personal preference or the requirements of a particular
model. This is carried out in the “
contr set.
” menu, as
described on pages 94 (fixed-wing models) and 96
(model helicopters).
2-position switch SW 2
2-position switch SW 8
2-position switch SW 9
Central Status LED
Summary of Contents for mx-12 Hott
Page 1: ...Programming Manual 33116 mx 16 HoTT 3 en mx 16...
Page 35: ...35 For your notes...
Page 49: ...49 For your notes...
Page 55: ...55 For your notes...
Page 59: ...59 For your notes...
Page 63: ...63 For your notes...
Page 69: ...69 For your notes...
Page 91: ...91 For your notes...
Page 101: ...101 For your notes...
Page 123: ...123 For your notes...
Page 181: ...181 For your notes...
Page 193: ...193 For your notes...


