160
Program description: Trainer system
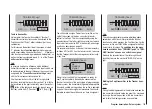
First initiate the “BINDING” process at the Pupil trans-
mitter by briefly pressing the central
SET
button of the
right-hand four-way button …
–P
T
2 3 4 5 6 7 8
BIND:
SW: –––
1
BINDING
TRAINER/Pupil
… and immediately afterwards that of the Teacher
transmitter:
T
1 2 3 4 5 6 7 8
BIND:
SW: 9
P
BINDING
TRAINER/Teach
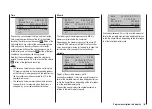
As soon as this process is concluded, both screens dis-
play “ON” instead of the flashing message “BINDING”:
T
1 2 3 4 5 6 7 8
BIND:
ON
SW: 9
P
TRAINER/Teach
–P
T
2 3 4 5 6 7 8
BIND:
ON
SW: –––
1
TRAINER/Pupil
This concludes the binding process, and you can return
to the basic display of both transmitters, and start trainer
mode operations - once you have checked the operation
of all the functions.
However, if neither transmitter, or only one of the trans-
mitters, displays “ON”, indicating that the binding proce-
dure has failed, try changing the relative position of the
two transmitters, and repeat the whole procedure.
Important note:
It is essential to check that all functions are trans-
ferred correctly to the prepared model BEFORE
initiating Trainer mode operations.
During …
Trainer mode operations
… it is no problem for the Teacher and Pupil to stand
a little way apart. However, you should never exceed a
distance of 50 m (this is known as the call range), and
no other persons should stand between the Teacher and
Pupil, as this could reduce the effective range.
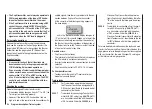
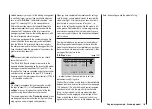
In this mode of operation the basic display of the Teach-
er transmitter looks like this …
GRAUBELE
#01
2:22h
stop
flt
«normal »
0:00
0:00
5.5V
5.2V
HoTT
P
RFC–Teach
… and that of the Pupil transmitter typically like this:
GRAUBELE
#09
1:11h
stop
flt
0:00
0:00
4.9
V
HoTT
RFC-Pupil
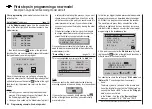
If it should occur that the link between the Teacher and
Pupil transmitters is lost during Trainer mode operations,
note that the Teacher transmitter automatically assumes
control of the model.
In this situation, if the Trainer change-over switch is in
the “Pupil” position, then the central LED on the Teacher
transmitter starts to flash blue / red for the duration of
the signal loss, and the transmitter emits audible warn-
ing signals. At the same time “RFC-” flashes in the basic
display, and the following warning is displayed:
no
student
signal
However, if only “RFC-” flashes in the basic transmitter
display, and - relatively quiet - audible signals are heard
…
Summary of Contents for mx-12 Hott
Page 1: ...Programming Manual 33116 mx 16 HoTT 3 en mx 16...
Page 35: ...35 For your notes...
Page 49: ...49 For your notes...
Page 55: ...55 For your notes...
Page 59: ...59 For your notes...
Page 63: ...63 For your notes...
Page 69: ...69 For your notes...
Page 91: ...91 For your notes...
Page 101: ...101 For your notes...
Page 123: ...123 For your notes...
Page 181: ...181 For your notes...
Page 193: ...193 For your notes...


