GE M
EDICAL
S
YSTEMS
D
IRECTION
FK091075, R
EVISION
04
V
IVID
3N P
RO
/E
XPERT
S
ERVICE
M
ANUAL
Chapter 8 Replacement Procedures
8-99
8-6-6
Up/Down Handle Replacement Procedure
NOTE:
This section describes two removal procedures (for both the old [plastic] and new-type [metal] handles)
and one installation procedure (for the new-type handle), as follows:
-
Removal of the old-type (plastic) Up/Down Handle - see
Up/Down Handle Removal -
Procedure 1
, below.
-
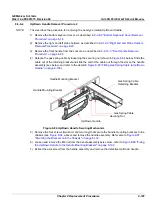
Removal of the new-type (metal) Up/Down Handle with support - see
8-6-6-4 "Up/Down Handle Removal Procedure 2" on page 8-101
.
-
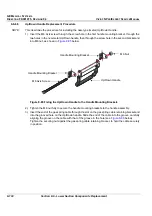
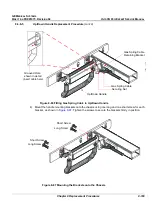
Installation of the Up/Down Handle with support - see
8-6-6-5 "Up/Down Handle Replacement
Procedure" on page 8-102
.
8-6-6-1
Tools
Use the appropriate the Phillips-type screw drivers, as indicated in the up/down handle removal
procedure.
8-6-6-2
Preparation
Shut down the Vivid 3N Pro/Expert
ultrasound unit, as described in
Chapter 3 -
Installation
.
8-6-6-3
Up/Down Handle Removal - Procedure 1
NOTE:
This describes the procedure for removing the old-type (plastic) Up/Down Handle.
1) Raise the control console to its
maximum
height. Remove the bottom keyboard cover, as described
in
8-2-8-3 "Bottom Keyboard Cover Removal Procedure" on page 8-14
.
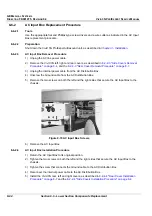
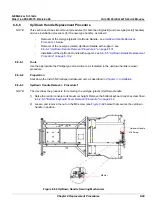
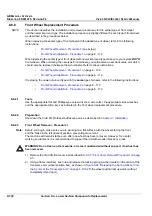
2) Loosen and remove the nut on the M6 screw (see
Figure 8-82
below) that secures the up/down
handle in position.
Figure 8-82 Up/Down Handle Securing Mechanism
Up/down Handle
M6 Screw
M6 Nut

