GE M
EDICAL
S
YSTEMS
D
IRECTION
FK091075, R
EVISION
04
V
IVID
3N P
RO
/E
XPERT
S
ERVICE
M
ANUAL
8-4
Section 8-2 - Cover Replacement Procedures
8-2-2
Side Covers Replacement Procedures
8-2-2-1
Tools
Use the appropriate Phillips-type screw drivers, as indicated in the side cover replacement procedures.
8-2-2-2
Preparations
Shut down the Vivid 3N Pro/Expert ultrasound unit, as described in
Chapter 3 -
Installation
.
8-2-2-3
Side Covers Removal Procedure
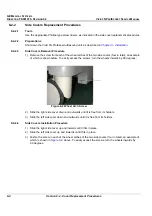
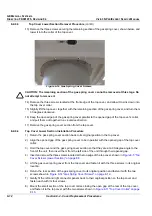
1) Remove the screw from each of the wheel arches of the two side covers (four in total), an example
of which is shown below. To easily access the screws, turn the wheels inwards by 90 degrees.
Figure 8-2 Wheel Arch Screw
2) Slide the
right
side cover down and outwards until it is free from its holders.
3) Slide the
left
side cover down and outwards until it is free from its holders.
8-2-2-4
Side Covers Installation Procedure
1) Slide the
right
side cover up and inwards until it fits in place.
2) Slide the
left
side cover up and inwards until it fits in place.
3) Fasten the screw in each of the wheel arches of the two side covers (four in total), an example of
which is shown in
Figure 8-2
, above. To easily access the screws, turn the wheels inwards by
90 degrees.


