GE
D
IRECTION
5573152-100, R
EV
. 2
LOGIQ E9 S
ERVICE
M
ANUAL
Chapter 8 Replacement procedures
8 - 87
8-6-2 Monitor assembly replacement (cont’d)
NOTE:
New labels have been added to the LCD rear cover to meet the IEC 60601-1 compliance
requirements. When replacing the LCD Monitor on a LOGIQ E9 console, make sure that if the
LCD back cover labels are on the console, the labels are on the replacement FRU. This will
ensure there is no confusion between the labels on the console and the labels described in the
User and Service Documentation.
8-6-2-1
LCD Monitor removal - R3.x and earlier
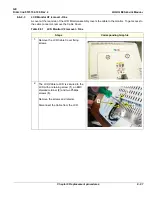
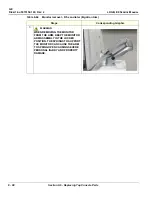
A cover at the rear side of the LCD Monitor assembly covers the two cables to the monitor. To get
access to the cable connectors, remove the Cable Cover.
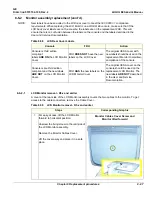
Table 8-58 LCD Rear Cover Labels
Console
FRU
Action
Console is third edition
compliant:
labels
ARE ON
the LCD Monitor
Cover
FRU
DOES NOT
have the new
labels on the LCD Cover.
The original VESA cover with
new labels should be used on the
replacement Monitor to maintain
compliance of the console.
Console is pre-third edition
compliant and the new labels
ARE NOT
on the LCD Monitor
Cover.
FRU
HAS
the new labels on the
LCD Monitor Cover.
The original VESA cover on the
console should be used on the
replacement LCD Monitor. The
new labels
ARE NOT
described
in the User and Service
Documentation.
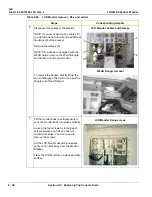
Table 8-59 LCD Monitor removal - R3.x and earlier
Steps
Corresponding Graphic
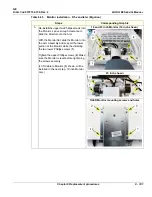
1.
For easy access, tilt the LCD Monitor
forward to horizontal position.
Unscrew the fixing screw on the rear side of
the LCD Monitor assembly.
Remove the Monitor Cables Cover.
Lift the cover away and place it in a safe
place.
Monitor Cables Cover Screw and
Monitor tilted forward
Summary of Contents for LOGIQ E9
Page 2: ......
Page 11: ...GE DIRECTION 5573152 100 REV 2 LOGIQ E9 SERVICE MANUAL xi ZH CN KO ...
Page 753: ......
Page 754: ......

