15 Maintenance
432
Ma
int
ena
nc
e
15
Executing Auto Gradation Adjustment
The machine automatically adjusts gradation when the density or color reproducibility
in copies and prints has deteriorated. Gradation can be adjusted for each screen type.
The machine offers the following three screen types:
z
Copy Job
z
Print Job 1
z
Print Job 2
For details on the above screen types, refer to "Auto Gradation Adjustment" (P.276)
Important •
Because the auto gradation adjustment uses the Tray 5 (Bypass), load plain paper in the
Tray 5 (Bypass). Any other types of paper are not available. For more information, refer to
"Paper Size/Type" (P.271).
Note
•
It is recommended that you perform adjustments for all the screen types. After one screen
type is adjusted, specify another screen type and repeat the adjustment procedure.
•
If color gradation is not compensated despite the periodic execution of auto gradation
adjustment, contact our Customer Support Center.
•
The auto gradation adjustment does not execute when [Text] or [Map] is selected for
[Original Type] in the [Image Quality] tab for copying. Before performing auto gradation
adjustment, make sure that [Copy Defaults] in the System Administration mode is set as
follows:
Lighten/Darken: Normal, Color Shift: Normal, Saturation: Normal, Color Balance: 0.
After finishing the auto gradation adjustment, change the settings of [Copy Defaults] if
necessary. For information about the [Copy Defaults], refer to "Copy Defaults" (P.287).
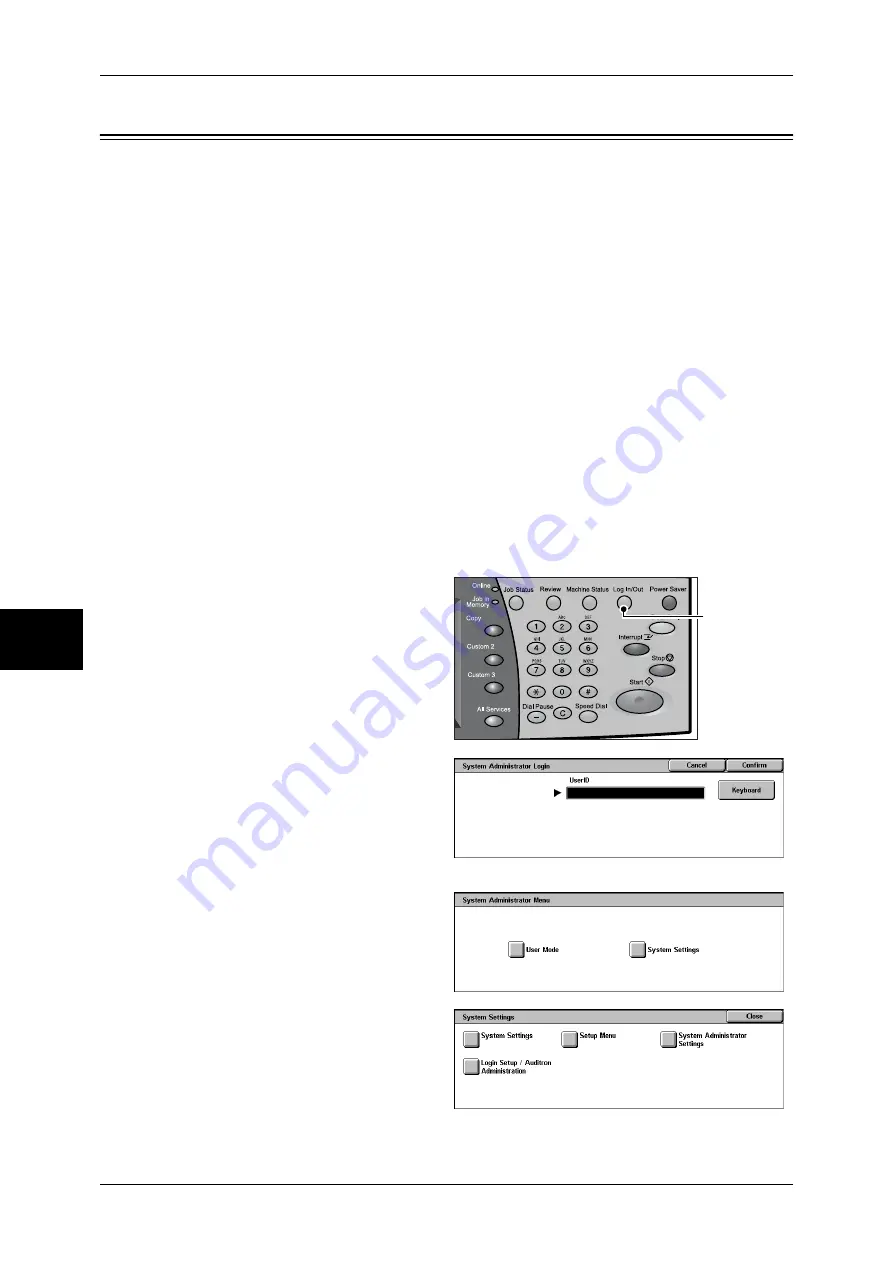
1
Press the <Log In/Out> button.
Note
•
Auto gradation adjustment
can also be performed
through the menu screen.
Clicking [Auto Gradation
Adjustment] on the menu
screen displays the screen
shown in step 9.
2
Enter the user ID with the numeric
keypad, and select [Confirm].
Note
•
The default user ID is "11111".
When using the
Authentication feature, a
password is required. The
default password is “x-admin”.
3
Select [System Settings].
4
Select [System Settings].
<Log In/Out>
button
Summary of Contents for DOCUCENTRE-II C3000
Page 1: ...DocuCentre II C3000 User Guide...
Page 44: ......
Page 126: ...4 Fax 124 Fax 4 1 Select Stamp 2 Select On Off No stamp is added On A stamp is added...
Page 198: ......
Page 412: ......
Page 438: ......
Page 524: ......
Page 582: ......
Page 583: ...18 Glossary This chapter contains a list of terms used in this guide z Glossary 582...
Page 602: ......


