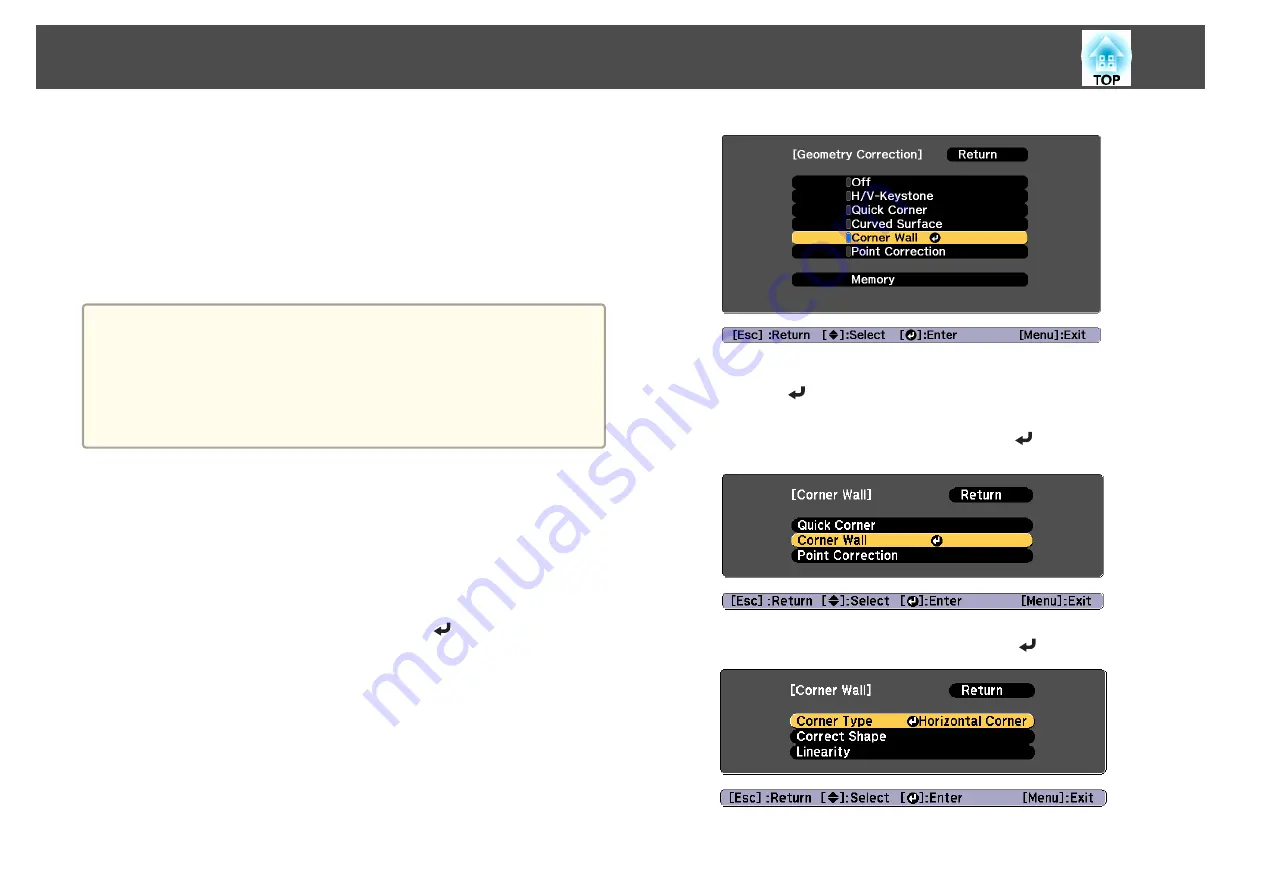
Corner Wall
This allows you to correct distortion that occurs when projecting on a
surface with right angles, such as a square pillar or the corner of a room,
and adjust the amount of expansion and contraction.
Face the projector directly opposing the screen with the lens position
moved to the home position.
s
"Adjusting the Position of the Projected Image (Lens Shift)"
a
•
Project onto a surface with a right angle.
•
If a large amount of adjustment is performed, the focus may not be
uniform even after making adjustments.
•
If
4K Enhancement
is enabled, a message is displayed. Select
Yes
to
disable
4K Enhancement
.
s
Image
-
Image Enhancement
-
4K Enhancement
Use the following to check the adjustment range for the image.
s
a
Press the [Menu] button while projecting.
b
Select
Geometry Correction
from
Settings
.
c
Select
Corner Wall
, and then press the [
] button.
"If this setting is changed, the image may be distorted." is displayed,
press the [
] button again.
d
Select
Corner Wall
, and then press the [
] button.
e
Select
Corner Type
, and then press the [
] button.
Adjusting Projected Images
62
Summary of Contents for EB-L25000U
Page 1: ...User s Guide ...
Page 13: ...Introduction This chapter explains the names for each part ...
Page 49: ...Basic Usage This chapter explains how to project and adjust images ...
Page 114: ...Security Functions 114 ...
Page 115: ...Configuration Menu This chapter explains how to use the Configuration menu and its functions ...
Page 186: ...m To complete the adjustment press the Menu button Image Maintenance 186 ...
Page 187: ...Appendix ...


