EPSON AcuLaser C8500
Revision C
Chapter 6
Maintenance
6-15
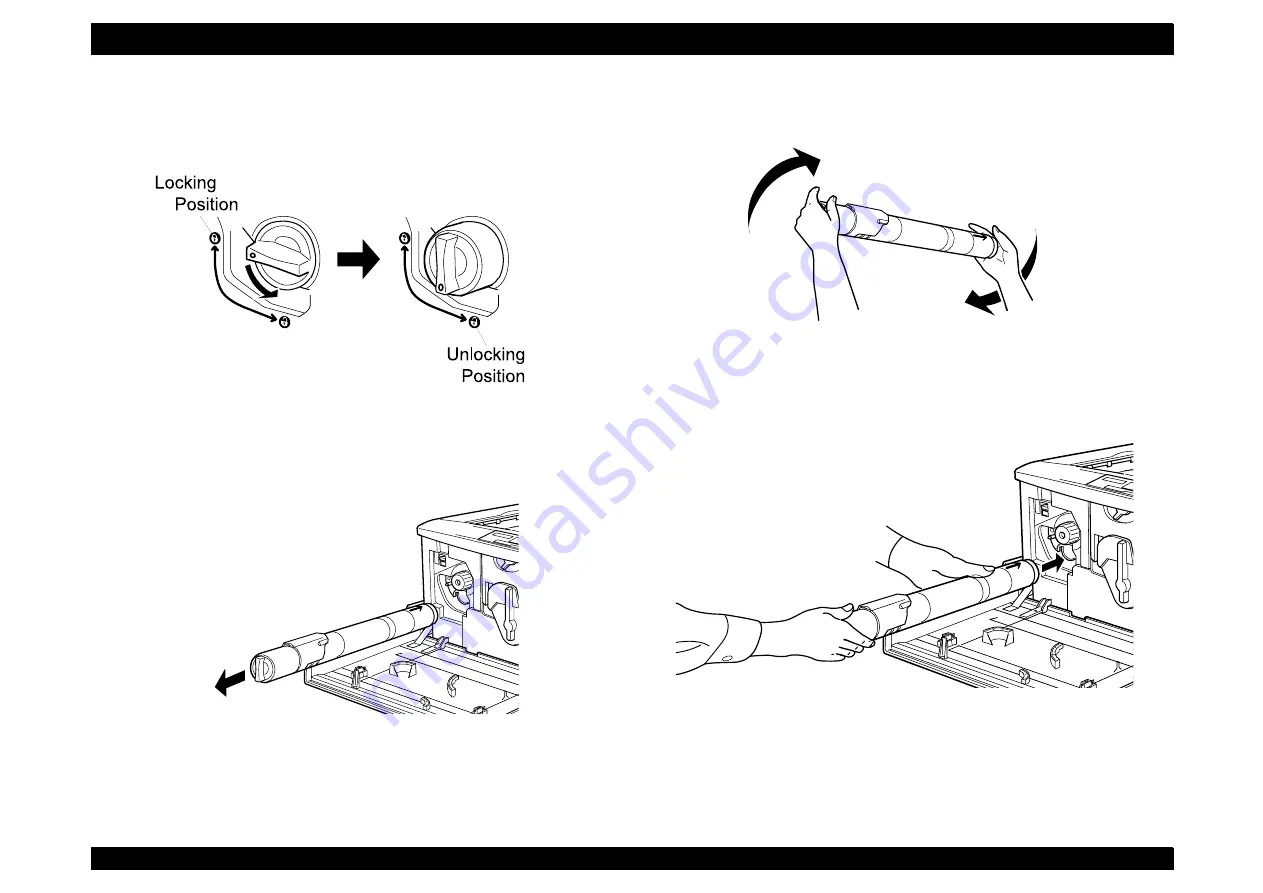
4. Remove the cartridge following the steps below:
1) Turn the cartridge knob counterclockwise 90 degrees so that the
z
symbol on the knob is aligned with the unlocking symbol.
Figure 6-6. TONER CARTRIDGE Replacement 2
2) Pull the cartridge horizontally out of the slot.
Figure 6-7. TONER CARTRIDGE Replacement 3
NOTE: Put the cartridge in a plastic bag and dispose of it as
inflammable.
5. Hold a new TONER CARTRIDGE by the right and left ends and
gently shake it up and down to distribute toner evenly.
Figure 6-8. TONER CARTRIDGE Replacement 4
6. Reinsert the cartridge following the steps below:
1) Hold the cartridge the orange arrow side up. Insert it all the way
into the cartridge slot until the cartridge end hits the slot end.
Figure 6-9. TONER CARTRIDGE Replacement 5
Summary of Contents for AcuLaser C8500
Page 12: ......
Page 21: ...C H A P T E R 1 PRODUCTDESCRIPTIONS ...
Page 78: ...C H A P T E R 2 OPERATINGPRINCIPLES ...
Page 108: ...EPSON AcuLaser C8500 Revision C Operating Principles 2 31 Figure 2 38 Xerographics II ...
Page 110: ...EPSON AcuLaser C8500 Revision C Operating Principles 2 33 Figure 2 39 Development ...
Page 118: ...EPSON AcuLaser C8500 Revision C Operating Principles 2 41 Figure 2 45 Drive ...
Page 120: ...EPSON AcuLaser C8500 Revision C Operating Principles 2 43 Figure 2 46 Electrical ...
Page 153: ...C H A P T E R 3 DISASSEMBLY ASSEMBLY ADJUSTMENT ...
Page 269: ...C H A P T E R 4 DIAGNOSTICS ...
Page 353: ...C H A P T E R 5 TROUBLESHOOTING ...
Page 480: ...C H A P T E R 6 MAINTENANCE ...
Page 503: ...C H A P T E R 7 APPENDIX ...
Page 564: ......
Page 565: ......
Page 566: ......
Page 567: ......
Page 568: ......
Page 569: ......
Page 570: ......


