Customizing Answering Schedule Tables
General Tab
Chapter 3: Programming
NT System Guide
109
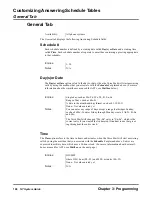
The Mailbox
The Mailbox option refers to the mailbox where the Voice Mail directs a call on the day/date and at
time you selected in the two options above. While you can program an AST to direct a call to any of
the mailbox types described below, an AST often points to a Call Routing Mailbox.
Call Routing Mailbox
DAT
Each Call Routing Mailbox is assigned a Dial Action Table (DAT) that tells the Automated
Attendant how to handle the digits dialed during an inbound call. How a call is routed
depends on the key dialed by the caller (0
–
9, *, #) from a Touch Tone telephone.
Welcome Message
Each Call Routing Mailbox may also contain either a recorded Welcome Message (described
here) or a recorded separate Instruction Menu (described below).
The Welcome Message now consists of both a greeting to callers and a list of their call-routing
options (Instruction Menu). You can choose one of the following ways to set up the Welcome
Message in your Voice Mail system:
Q
use the default Welcome Message
Q
record your own Welcome Message
Q
use no Welcome Message.
Use the Default Welcome Message
If you are using the default Welcome Message, outside callers will first hear a greeting, Thank
you for calling. They will then hear this Instruction Menu: If you are calling from a Touch
Tone phone, please dial the extension number you wish to reach or dial 0 for assistance. If
you are calling from a rotary dial phone, please stay on the line for assistance.
Record Your Own Welcome Message
You can personalize the recorded greeting of your company’s Welcome Message to say:
Thank you for calling (name of your company). Or you can personalize the greeting for
workweek mornings to say: Good morning. Thank you for calling the XYZ company.
You can also personalize the Instruction Menu, so that it matches the various departments in
your company. The Instruction Menu is a list of call-routing options that tells callers who
reach the Automated Attendant how to route their calls from the dialpad keys to their intended
destinations. Callers hear options such as: Press 1 for Sales. Press 2 for Accounting. Press 3
for Marketing... If you know the extension number of the person you are trying to reach,
you may dial it at any time. These are options that you have already programmed in the Dial
Action Table assigned to the Call Routing Mailbox you are using.
You need to record an Instruction Menu for each Dial Action Table that you are using. If you
program two different Dial Action Tables, for example, you will need to record two different
Instruction Menus.
When recording each Instruction Menu, you will need to enter the number of the Call Routing
Mailbox associated with the Dial Action Table. Therefore, if Call Routing Mailboxes 600 and
601 both use Dial Action Table 1, you can record a menu for Call Routing Mailbox 600 and
then copy it to Call Routing Mailbox 601. No need to record the same Instruction Menu twice.
A caller who presses one of the keys listed above will reach a Call Routing Mailbox. There the
Voice Mail will play the Welcome Message. From the mailbox, a caller can press one of these
keys to perform the programmed Key Action, such as transferring the call to an extension.
(For more information about Key Actions, see Key Action on page 131 of the Customizing
Dial Action Tables section.)
Use No Welcome Message
Instead of using either the default Welcome Message or recording your own, you may prefer to
use no Welcome Message at all. In this case, outside callers will hear no greeting or list of call-
routing instructions after they dial into your Voice Mail system.
Содержание NVM-NT
Страница 28: ...Table of Contents Chapter 5 Maintenance xxvi NT System Guide ...
Страница 129: ...Installing SMDI Chapter 3 Programming NT System Guide 101 SMDI Installation Installing SMDI SMDI Not used ...
Страница 130: ...Installing SMDI 102 NT System Guide Chapter 3 Programming ...
Страница 132: ...Viewing Installation Settings Installation Settings Dialog Box 104 NT System Guide Chapter 3 Programming ...
Страница 146: ...Customizing Caller I D Tables General Tab 118 NT System Guide Chapter 3 Programming ...
Страница 156: ...Customizing Callout Options Optional Tab 128 NT System Guide Chapter 3 Programming ...
Страница 178: ...Customizing Dial Action Tables Example of a Dial Action Table 150 NT System Guide Chapter 3 Programming ...
Страница 182: ...Customizing Distribution Lists General Tab 154 NT System Guide Chapter 3 Programming ...
Страница 194: ...Customizing Fax On Demand Current Fax Port Dialog Box 166 NT System Guide Chapter 3 Programming ...
Страница 338: ...Customizing Port Options General Tab 310 NT System Guide Chapter 3 Programming ...
Страница 358: ...Customizing System Options Timers Tab 330 NT System Guide Chapter 3 Programming ...
Страница 362: ...Customizing System Options Timers Tab 334 NT System Guide Chapter 3 Programming ...
Страница 367: ...Customizing Tenant Options General Tab Chapter 3 Programming NT System Guide 339 ...
Страница 396: ...Viewing and Printing Reports System Options Report 368 NT System Guide Chapter 3 Programming ...
Страница 400: ...Performing a Local Backup Backup Dialog Box 372 NT System Guide Chapter 3 Programming ...
Страница 412: ...Adjusting Data Transmission Protocol Com Port Selection 2 of 2 Dialog Box 384 NT System Guide Chapter 3 Programming ...
Страница 440: ...Using Port Activities 412 NT System Guide Chapter 3 Programming ...
Страница 454: ...Using Message Status Message Status Dialog Box 426 NT System Guide Chapter 3 Programming ...
Страница 474: ...Using the Options on the System Administration Menu Deleting Security Codes 446 NT System Guide Chapter 3 Programming ...

