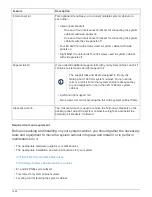
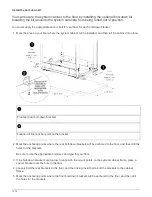

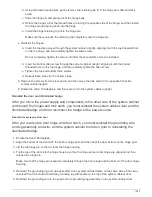


The replacement PDU must be supported by your system cabinet and must provide sufficient power to the
installed equipment.
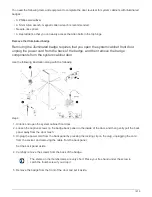
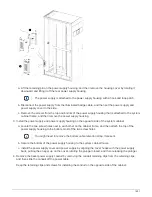
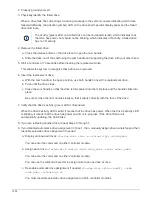
1. Turn off the circuit breakers on the target PDU, and then unplug the old PDU from the AC power source.
2. Ground yourself to the system cabinet, and then unplug the power cords from each of the system
components and from the PDU.
3. Remove the screws from the PDU frame, bottom screw first.
Ensure that you support the PDU with one hand while you remove the last screw from the
top of the PDU. This prevents the PDU from dropping or falling toward you after the screw is
removed.
4. Remove the old PDU from the system cabinet.
Make sure that you keep track of the mounting screws so that you can reuse them when installing the
replacement PDU.
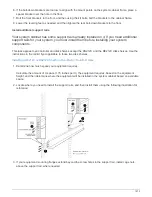
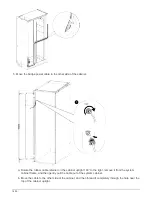
5. Remove the brackets from the old PDU, and then install them on the back of the replacement PDU.
6. While supporting the replacement PDU, align the slot on the mounting bracket of the PDU with the top
holes of the frame on the inside of the system cabinet, and then secure the PDU to the system cabinet
frame using the mounting screws from the old PDU.
7. Secure the bottom of the PDU to the system cabinet frame, and then tighten all of the mounting screws.
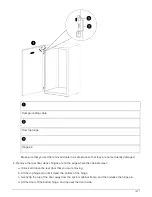
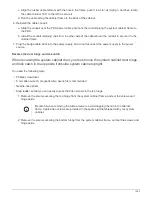
8. Verify that all of the power switches or circuit breakers are in the Off position.
If the circuit breakers are not in the Off position, push a small screwdriver or straightened paper clip into the
slot to the right of the Off label to trip the circuit breaker and turn off the circuit.
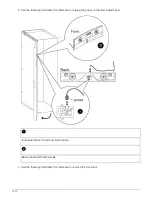
9. Plug the system power cords into the PDU, plugging each component into the PDU outlet directly across
from the component.
A best practice is to distribute the total load across the PDU branches, making each branch
load as equal as possible.
10. Lock each component power cable plug in place with the cable retainer clip above it by sliding the curved
edge of the cable retainer clip over the plug shoulder.
11. Plug the PDU power cord into the AC power source.
12. Turn on the PDU power switches or PDU circuit breakers.
For PDU circuit breakers, the button is on when it is flush with the PDU frame.
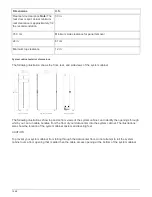
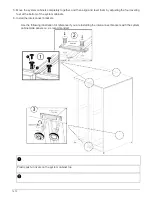
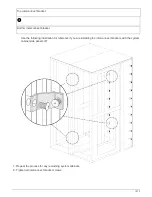
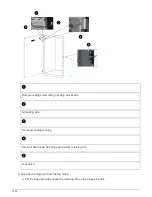
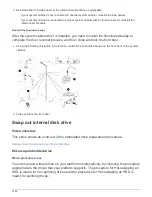
Reverse cabinet front door
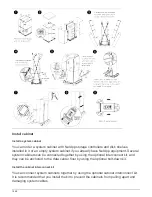
Reverse the system cabinet front door
You can change the direction the front door opens by removing the illuminated badge,
door, top hinge, and related hardware, and then installing them on the opposite side of
the front of the system cabinet frame.
1478
Содержание AFF A700
Страница 4: ...AFF and FAS System Documentation 1...
Страница 208: ...3 Close the controller module cover and tighten the thumbscrew 205...
Страница 248: ...2 Close the controller module cover and tighten the thumbscrew 245...
Страница 308: ...Power supply Cam handle release latch Power and Fault LEDs Cam handle 305...
Страница 381: ...Power supply Cam handle release latch Power and Fault LEDs Cam handle 378...
Страница 437: ...1 Locate the DIMMs on your controller module 434...
Страница 601: ...Cabling SAS shelves in FAS9000 AFF A700 and ASA AFF A700 ONTAP 9 8 and later Cabling SAS storage ONTAP 9 8 and later 598...
Страница 605: ...602...
Страница 1117: ...3 Close the controller module cover and tighten the thumbscrew 1114...
Страница 1157: ...2 Close the controller module cover and tighten the thumbscrew 1154...
Страница 1228: ...Power supply Cam handle release latch Power and Fault LEDs Cam handle 1225...
Страница 1300: ...Power supply Cam handle release latch Power and Fault LEDs Cam handle 1297...
Страница 1462: ...Installing SuperRail to round hole four post rack 1459...
Страница 1602: ...1599...
Страница 1630: ...1627...
Страница 1634: ...Orange ring on horizontal bracket Cable chain 1631...
Страница 1637: ...b Raise the drive handle to vertical c Use the handle to lift the drive from the drive drawer 1634...
Страница 1643: ...Callout Cable chain Connector Connects to Left Vertical Midplane Left Horizontal Drive drawer 1640...
Страница 1645: ...Guide rail 1642...
Страница 1648: ...Tab that you press to release the fan module handle 5 Use the fan module handle to pull the fan module out of the shelf 1645...
Страница 1669: ...Attention LED light on 1666...


