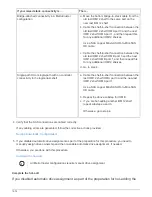
• Your system must have less than the maximum number of drives supported, by at least the number of
drives capable of being installed in the IOM12 shelves you are hot-adding.
You cannot have exceeded the maximum number of drives supported for your system after hot-adding
IOM12 shelves.
• Your system cannot have any SAS cabling error messages.
You must correct any cabling errors using the corrective actions provided by the error messages.
NetApp Downloads: Config Advisor
• You must have ordered and received the IOM12 shelves and appropriate number and types of SAS copper
cables.
IOM12 shelves use mini-SAS HD connectors. IOM6 shelves use QSFP connectors.
Requirements for a hot-add in bridge-attached MetroCluster configurations
If you are hot-adding IOM12 shelves to a stack of IOM6 shelves that is attached using a
pair of ATTO FibreBridge bridges in a MetroCluster configuration, the system must meet
certain requirements.
• If bridge SAS ports are available in the current configuration, you should add the IOM12 shelves as a
separate stack.
Use all bridge ports before mixing IOM12 and IOM6 modules in a stack.
• Your system and version of ONTAP must support a mix of IOM6 shelves and IOM12 shelves in the same
stack (a mixed stack).
You can verify support by using one of the following methods:
◦
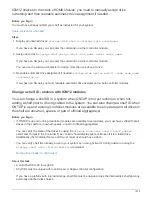
Enter the
run local sysconfig
command at the admin prompt of either controller.
If the SAS2/SAS3 Mixed Stack Support field does not appear in the output or has a value of none, then
your system does not support mixed stacks.
If anything else appears in the SAS2/SAS3 Mixed Stack Support field, such as all or bridge-attached,
then your system does support mixed stacks.
◦
Go to Hardware Universe and navigate to your platform information.
• The configuration must meet all requirements in the MetroCluster Installation and Configuration Guides.
Installing and Configuring a Stretch MetroCluster Configuration
Installing and Configuring a fabric-attached MetroCluster Configuration
• The stack of IOM6 shelves, to which you are hot-adding an IOM12 shelf, must be cabled with SAS copper
1560
Содержание AFF A700
Страница 4: ...AFF and FAS System Documentation 1...
Страница 208: ...3 Close the controller module cover and tighten the thumbscrew 205...
Страница 248: ...2 Close the controller module cover and tighten the thumbscrew 245...
Страница 308: ...Power supply Cam handle release latch Power and Fault LEDs Cam handle 305...
Страница 381: ...Power supply Cam handle release latch Power and Fault LEDs Cam handle 378...
Страница 437: ...1 Locate the DIMMs on your controller module 434...
Страница 601: ...Cabling SAS shelves in FAS9000 AFF A700 and ASA AFF A700 ONTAP 9 8 and later Cabling SAS storage ONTAP 9 8 and later 598...
Страница 605: ...602...
Страница 1117: ...3 Close the controller module cover and tighten the thumbscrew 1114...
Страница 1157: ...2 Close the controller module cover and tighten the thumbscrew 1154...
Страница 1228: ...Power supply Cam handle release latch Power and Fault LEDs Cam handle 1225...
Страница 1300: ...Power supply Cam handle release latch Power and Fault LEDs Cam handle 1297...
Страница 1462: ...Installing SuperRail to round hole four post rack 1459...
Страница 1602: ...1599...
Страница 1630: ...1627...
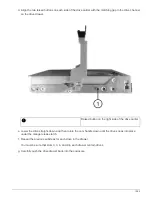
Страница 1634: ...Orange ring on horizontal bracket Cable chain 1631...
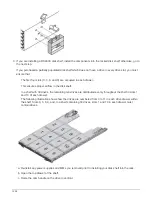
Страница 1637: ...b Raise the drive handle to vertical c Use the handle to lift the drive from the drive drawer 1634...
Страница 1643: ...Callout Cable chain Connector Connects to Left Vertical Midplane Left Horizontal Drive drawer 1640...
Страница 1645: ...Guide rail 1642...
Страница 1648: ...Tab that you press to release the fan module handle 5 Use the fan module handle to pull the fan module out of the shelf 1645...
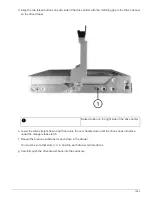
Страница 1669: ...Attention LED light on 1666...

