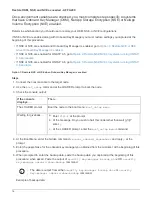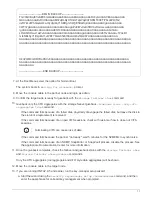
--------------------------BEGIN BACKUP--------------------------
TmV0QXBwIEtleSBCbG9iAAEAAAAEAAAAcAEAAAbyAAAAACEAAAAAAAAA
QAAAAAAAAABvOlH0AAAAAMh7qDLRyH1DBz12piVdy9ATSFMT0C0TlYFss4PDjTaV
dzRYkLd1PhQLxAWJwOIyqSr8qY1SEBgm1IWgE5DLRqkiAAAAAAAAACgAAAAAAAAA
3WTh7gAAAAAAAAAAAAAAAAIAAAAAAAgAZJEIWvdeHr5RCwAAAAAAAAAA
IgAAAAAAAAAoAAAAAAAAAEOTcR0AAAAAAAAAAAAAAAACAAAAAAAJAGr3tJA/
LR1aWvAAAAAAAAAAACQAAAAAAAAAgAAAAAAAAACdhTcvAAAAAJ1PXeBf
ml4NBsSyV1B4jc4A7cvWEFY6lLG6hc6tbKLAHZuvfQ4rIbYAAAAAAAAAAAAAAAAA
AAAAAAAAAAAAAAAAAAAAAAAAAAAAAAAAAAAAAAAAAAAAAAAAAAAAAAAAAAAAAAAA
AAAAAAAAAAAAAAAAAAAAAAAAAAAAAAAAAAAAAAAAAAAAAAAAAAAAAAAAAAAAAAAA
.
.
.
.
H4nPQM0nrDRYRa9SCv8AAAAAAAAAAAAAAAAAAAAAAAAAAAAAAAAAAAAAAAAAAAAA
AAAAAAAAAAAAAAAAAAAAAAAAAAAAAAAAAAAAAAAAAAAAAAAAAAAAAAAAAAAAAAAA
AAAAAAAA
---------------------------END BACKUP---------------------------
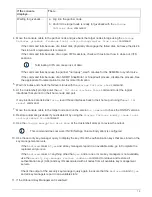
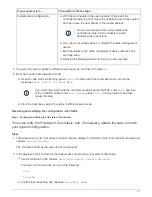
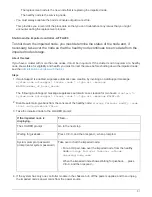
7. At the Boot Menu select the option for Normal Boot.
The system boots to
Waiting for giveback…
prompt.
8. Move the console cable to the partner node and login as admin.
9. Confirm the target node is ready for giveback with the
storage failover show
command.
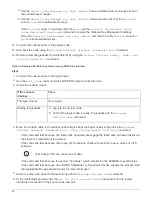
10. Giveback only the CFO aggregates with the storage failover giveback
-fromnode local -only-cfo
-aggregates true
command.
◦
If the command fails because of a failed disk, physically dis-engage the failed disk, but leave the disk in
the slot until a replacement is received.
◦
If the command fails because of an open CIFS sessions, check with customer how to close out CIFS
sessions.
Terminating CIFS can cause loss of data.
◦
If the command fails because the partner "not ready", wait 5 minutes for the NVMEMs to synchronize.
◦
If the command fails because of an NDMP, SnapMirror, or SnapVault process, disable the process. See
the appropriate Documentation Center for more information.
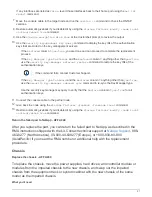
11. Once the giveback completes, check the failover and giveback status with the
storage failover show
and
storage failover show-giveback
commands.
Only the CFO aggregates (root aggregate and CFO style data aggregates) will be shown.
12. Move the console cable to the target node.
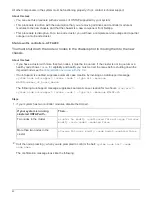
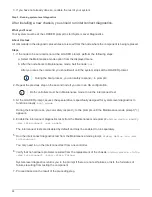
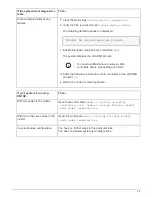
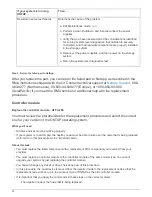
13. If you are running ONTAP 9.5 and earlier, run the key-manager setup wizard:
a. Start the wizard using the
security key-manager setup -nodenodename
command, and then
enter the passphrase for onboard key management when prompted.
17
Содержание AFF A700
Страница 4: ...AFF and FAS System Documentation 1...
Страница 208: ...3 Close the controller module cover and tighten the thumbscrew 205...
Страница 248: ...2 Close the controller module cover and tighten the thumbscrew 245...
Страница 308: ...Power supply Cam handle release latch Power and Fault LEDs Cam handle 305...
Страница 381: ...Power supply Cam handle release latch Power and Fault LEDs Cam handle 378...
Страница 437: ...1 Locate the DIMMs on your controller module 434...
Страница 601: ...Cabling SAS shelves in FAS9000 AFF A700 and ASA AFF A700 ONTAP 9 8 and later Cabling SAS storage ONTAP 9 8 and later 598...
Страница 605: ...602...
Страница 1117: ...3 Close the controller module cover and tighten the thumbscrew 1114...
Страница 1157: ...2 Close the controller module cover and tighten the thumbscrew 1154...
Страница 1228: ...Power supply Cam handle release latch Power and Fault LEDs Cam handle 1225...
Страница 1300: ...Power supply Cam handle release latch Power and Fault LEDs Cam handle 1297...
Страница 1462: ...Installing SuperRail to round hole four post rack 1459...
Страница 1602: ...1599...
Страница 1630: ...1627...
Страница 1634: ...Orange ring on horizontal bracket Cable chain 1631...
Страница 1637: ...b Raise the drive handle to vertical c Use the handle to lift the drive from the drive drawer 1634...
Страница 1643: ...Callout Cable chain Connector Connects to Left Vertical Midplane Left Horizontal Drive drawer 1640...
Страница 1645: ...Guide rail 1642...
Страница 1648: ...Tab that you press to release the fan module handle 5 Use the fan module handle to pull the fan module out of the shelf 1645...
Страница 1669: ...Attention LED light on 1666...


