Chapter 7---Troubleshooting
7-2
Model 250 Service Manual
Left/Right Orientation:
When referring to the left or right in this chapter, it is
with reference to standing at the rear of the projector, facing the screen
.
Connectors on subassemblies and PCBs have tabs that must be released first
before pulling on the connector. The proper procedure is to push slightly IN on
the connector, then squeeze the tab, then pull the connector out.
7.2 LEDs
Backpanel LEDs
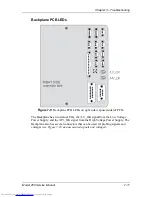
This section covers the various terminals, detectors, and LEDs visible from the
rear and left side of the projector with the rear projector cover and rear panel
removed.
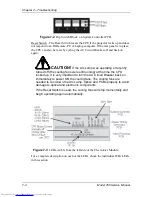
Operation Status LED - This LED indicates the status of the projector. When the
LED is illuminated green, the projector is operating normally. When the LED is
illuminated orange, the projector is in standby mode, which means that the
projector has AC power but has not yet received a POWER ON command. If the
LED is illuminated flashing red, the projector has experienced an error and will
display an error code (see Table 7-1 and Table 7-2).
Service Mode Switch - The Service Mode Switch is used when updating software
to the CPU. The projector must POWERED OFF and the AC Circuit Breaker
must be cycled off. The Service Mode Switch is pushed while turning the AC
Circuit Breaker ON. This starts the projector in the Service Mode. The Software
Update section (see Software Updating, section 8.1) contains the full procedure
for updating CPU software.
Terminal In - The Terminal In is a RS232 port used to communicate with the
projector or Import/Export setup data using a PC or Laptop computer, a switching
device such as a Crestron Control Switcher, or the optional Tethered Technician
Remote Control.
Содержание 250
Страница 16: ...Chapter 2 System Description Model 250 Service Manual 2 9 ...
Страница 43: ...Chapter 4 Optical 4 10 Model 250 Service Manual Figure 4 6 Optical Path ...
Страница 55: ...Chapter 5 Optical 3 4 22 Model 100 Service Manual ...
Страница 85: ...Chapter 5 Electronics 5 30 Model 250 Service Manual Figure 5 19 Convergence Deflection PCB I O Diagram ...
Страница 86: ...Chapter 5 Electronics Model 250 Service Manual 5 31 Figure 5 20 Convergence Deflection PCB I O Diagram ...
Страница 91: ...Chapter 5 Electronics 5 36 Model 250 Service Manual Figure 5 22 Scan Reversal PCB I O Diagram ...
Страница 100: ...Chapter 5 Electronics Model 250 Service Manual 5 45 Figure 5 26 Video Amplifier PCB I O Diagram ...
Страница 131: ...Chapter 5 Electronics 5 76 Model 250 Service Manual Figure 5 44 Backplane Diagram right side ...
Страница 132: ...Chapter 5 Electronics Model 250 Service Manual 5 77 ...
Страница 138: ...Chapter 6 Miscellaneous Items 6 6 Model 250 Service Manual ...
Страница 166: ...Chapter 7 Troubleshooting 7 28 Model 250 Service Manual Figure 7 19 Backplane Diagram right side ...
Страница 167: ...Chapter 7 Troubleshooting Model 250 Service Manual 7 29 ...
Страница 181: ...Chapter 8 Software and Protocol 8 14 Model 250 Service Manual ...
Страница 185: ...Chapter 9 Parts List 9 4 Model 250 Service Manual ...


