Chapter 5---Electronics
Model 250 Service Manual
5-55
5.
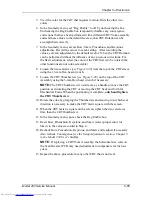
View the color for the CRT that requires rotation. Hide the other two
colors.
6.
In the Geometry menu, set “Reg Enable” to off by unchecking the box.
Unchecking the Reg Enable box temporarily disables any convergence
corrections that have been performed with a different CRT/Yoke assembly
and sets these values to the default levels so that CRT Rotation can be
accomplished correctly.
7.
In the Geometry menu, access Bow, Skew, Pincushion, and Keystone
adjustments. Record the values for each setting. After recording the
values, set each adjustment to the default level of 128 so the CRT Rotation
can be performed without the influence of any previous corrections. For
the Skew adjustment, select the color of the CRT that is to be rotated (the
other functions are not color-selectable).
8.
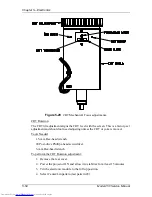
Loosen the two setscrews (see Figure 5-29) near the top of the CRT sleeve
using the 1.5-mm Hex-head wrench.
9.
Loosen the CRT Thumbscrew (see Figure 5-29) on the top of the CRT
Assembly using the 3-mm Hex-head wrench if necessary.
NOTE:
The CRT Thumbscrew is used more as a handle to move the CRT
position as in rotating the CRT or moving the CRT back and forth for
Mechanical Focus. When the positioning is complete, only hand tighten
the CRT Thumbscrew.
10.
Rotate the yoke by grasping the Thumbscrew and moving it in whichever
direction is necessary to make the CRT raster square with the screen.
11.
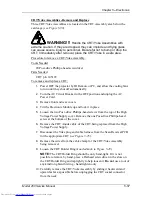
When the CRT raster is square on the screen, tighten the two setscrews
first, then the CRT thumbscrew.
12.
In the Geometry menu, put a check the Reg Enable box.
13.
Reset Bow, Pincushion, Keystone, and Skew (select proper color for
Skew) to the values recorded in Step 4.
14.
Recheck Bow, Pincushion, Keystone, and Skew and readjust if necessary.
Also recheck Convergence (see the Setup Adjustments section, Chapter 5
in the Model 250 User’s
Guide).
NOTE:
If replacing a CRT/Yoke Assembly, the horizontal size coils on
the Scan Reversal PCB may need adjustment to compensate for the new
yokes.
15.
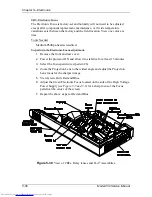
Repeat the above procedure for any other CRT that is not level.
Содержание 250
Страница 16: ...Chapter 2 System Description Model 250 Service Manual 2 9 ...
Страница 43: ...Chapter 4 Optical 4 10 Model 250 Service Manual Figure 4 6 Optical Path ...
Страница 55: ...Chapter 5 Optical 3 4 22 Model 100 Service Manual ...
Страница 85: ...Chapter 5 Electronics 5 30 Model 250 Service Manual Figure 5 19 Convergence Deflection PCB I O Diagram ...
Страница 86: ...Chapter 5 Electronics Model 250 Service Manual 5 31 Figure 5 20 Convergence Deflection PCB I O Diagram ...
Страница 91: ...Chapter 5 Electronics 5 36 Model 250 Service Manual Figure 5 22 Scan Reversal PCB I O Diagram ...
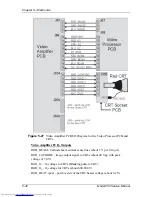
Страница 100: ...Chapter 5 Electronics Model 250 Service Manual 5 45 Figure 5 26 Video Amplifier PCB I O Diagram ...
Страница 131: ...Chapter 5 Electronics 5 76 Model 250 Service Manual Figure 5 44 Backplane Diagram right side ...
Страница 132: ...Chapter 5 Electronics Model 250 Service Manual 5 77 ...
Страница 138: ...Chapter 6 Miscellaneous Items 6 6 Model 250 Service Manual ...
Страница 166: ...Chapter 7 Troubleshooting 7 28 Model 250 Service Manual Figure 7 19 Backplane Diagram right side ...
Страница 167: ...Chapter 7 Troubleshooting Model 250 Service Manual 7 29 ...
Страница 181: ...Chapter 8 Software and Protocol 8 14 Model 250 Service Manual ...
Страница 185: ...Chapter 9 Parts List 9 4 Model 250 Service Manual ...

