Shenzhen Hpmont Technology Co., Ltd.
Chapter 5 Operation Instructions
HD3N Series User Manual V1.1
- 37 -
Chapter 5
Operation Instructions
•
Only when the terminal cover of HD3N has been fitted can you switch on AC power source. Do not remove the
cover after power is switched on.
•
Ensure the motor and the mechnical device are in the use application before HD3N starts.
•
Keep away from HD3N if the auto-restart function is enabled at power outage.
•
To change the main control PCBA, correctly set the parameters before operating.
•
Do not check or detect the signal during HD3N running.
•
Do not randomly change parameter setting of HD3N.
•
Please thoroughly complete all control debugging and testing, make all adjustments and conduct a full safety
assessment before switching the run command source of HD3N.
•
Do not touch the energy-depletion braking resistor due to the high temperature.
5.1
Function Description
Note:
In the following sections, you may encounter control, running and status of HD3N description many times.
Please read this section. It will help you to correctly understand and use the functions to be discussed.
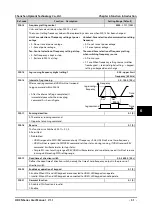
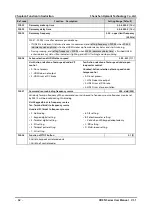
Frequency setting channel
The final setting frequency of HD3N is set by main frequency setting channel (F00.10) and aux
frequency setting channel (F19.00) (calculated by (F19.01). When aux setting channel = main setting
channel (except analogue setting), main setting channel set the frequency.
Main frequency setting channel (F00.10)
Aux frequency setting channel (F19.00)
Note
/
0: No channel
0: Keypad; F00.13 sets the initial value
1: Keypad; F19.03 sets the initial value
Press
,
of keypad
to set
1: Terminal; F00.13 sets the initial value
2: Terminal; F19.03 sets the initial value
Use UP/DN terminal to set
2: SCI; initial value: 0
3: SCI; initial value: 0
3: Analogue
4: Analogue
4: Pulse
5: Pulse
F15.05 set DI6 = 53
/
6: PID output
6 - 7: AI1 - AI2
7 - 8: AI1 - AI2
10: Potentionmeter on keypad
11: Potentionmeter on keypad
Danger
Warning
5

