Description of the System
3.4 Concept
of
Operation
The control center is the console with the hard keys, the digipots, the flip switches, the keyboard (with
shortcut functions) and the trackball.
The console controls frequently used functions, e.g., Freeze/Run, change of modes, etc.
Additional functions are controlled via the navigation wheel.
DIGIPOTS, FLIP SWITCHES and TRACKBALL
Activated functions are easily controlled by these controls. By rotating resp. switching they deliver
digital pulses and can be selected by program call-up. They are displayed in the status area by their
location, their function, and their actual value of setting.
Trackball Menu Navigation
Pressing this key causes allocation of the trackball functions.
The current trackball functionality is shown in the status area of the trackball.
If this key is illuminated: The trackball is consequently assigned to select the menu items in the
menu area on the left side of the screen.
Pressing the left or right trackball key
[
Set
]
starts selected menu function.
If this key is “grayed”:
The trackball is assigned to modifications of the image, Cine / Loop,
measurements, changing the ROI, etc.
NAVIGATION WHEEL and corresponding KEYBOARD-SHORTCUT FUNCTIONS
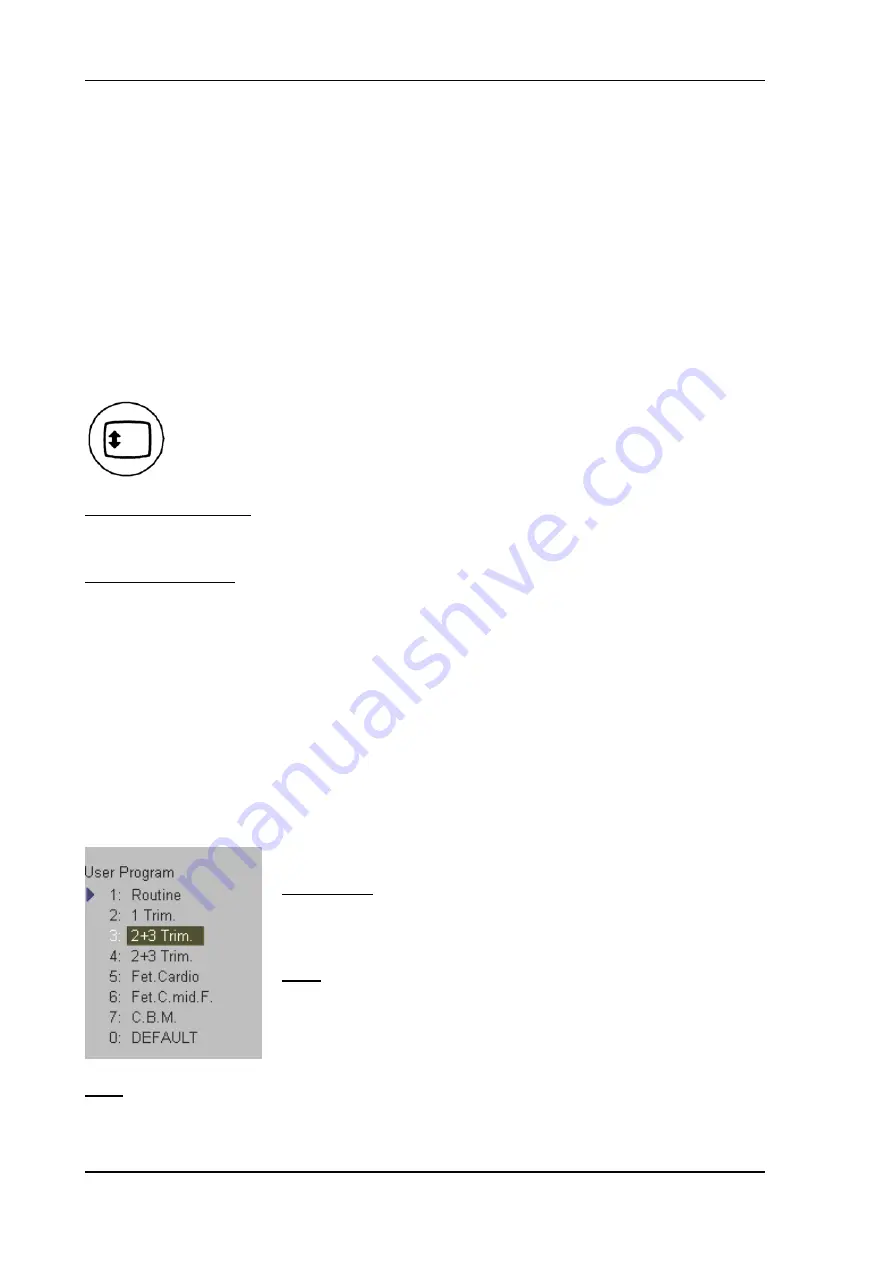
The available menus are shown in the menu area on the left side of the screen.
The current menu selection is highlighted.
Roll the navigation wheel and the blue arrow moves to another selection. Press the navigation wheel to
select the desired item.
The corresponding keyboard shortcuts (1, 2,3, F2, F5, E, H, etc.) are shown to the right of the actual
function.
For Example:
If you press the shortcut key
[
3
]
on the keyboard, the User Program
“2 + 3 Trim”
starts automatically.
Note:
It provides the same function as when you roll the navigation
wheel and move the blue arrow to an item and then press the
navigation wheel.
Note:
If
the
[
Trackball Menu Navigation
]
key is illuminated, the trackball is consequently assigned
to select the menu items in the menu area on the left side of the screen.
Pressing the left or right trackball key
[
Set
]
starts selected menu function.
Voluson® 730Pro - Basic User Manual
3-8
105831 Rev. 0
Содержание Voluson 730Pro
Страница 1: ... B BA AS SI IC C U US SE ER R M MA AN NU UA AL L GE Medical Systems Kretztechnik GmbH Co OHG ...
Страница 4: ...This page intentionally left blank Voluson 730Pro Operation Manual i 2 105831 Rev 0 ...
Страница 22: ...CONTENTS This page intentionally left blank Voluson 730Pro Basic User Manual 18 CONTENTS 105831 Rev 0 ...
Страница 23: ...General 1 General 1 2 Voluson 730Pro Basic User Manual 105831 Rev 0 1 1 ...
Страница 44: ...Safety This page intentionally left blank Voluson 730Pro Basic User Manual 2 20 105831 Rev 0 ...
Страница 112: ...2D Mode This page intentionally left blank Voluson 730Pro Basic User Manual 5 22 105831 Rev 0 ...
Страница 172: ...PD Mode This page intentionally left blank Voluson 730Pro Basic User Manual 9 14 105831 Rev 0 ...
Страница 262: ...Volume Mode This page intentionally left blank Voluson 730Pro Basic User Manual 11 78 105831 Rev 0 ...
Страница 290: ...Basic Measurements This page intentionally left blank Voluson 730Pro Basic User Manual 13 16 105831 Rev 0 ...
Страница 411: ...Biopsy Setup 19 Biopsy Setup 19 2 19 1 To Program a Biopsy Line 19 3 Voluson 730Pro Basic User Manual 105831 Rev 0 19 1 ...
Страница 414: ...Biopsy Setup This page intentionally left blank Voluson 730Pro Basic User Manual 19 4 105831 Rev 0 ...
Страница 442: ...Probes and Biopsy This page intentionally left blank Voluson 730Pro Basic User Manual 20 28 105831 Rev 0 ...
Страница 446: ...Connections 21 2 1 Main Module Voluson 730Pro Basic User Manual 21 4 105831 Rev 0 ...
Страница 458: ...Connections 21 2 11 ECG preamplifier MAN Connection Voluson 730Pro Basic User Manual 21 16 105831 Rev 0 ...


