


CHAPTER 2 INSTALLATION AND BASIC OPERATION
2-12
<For
Mac
®
OS 8.6 to 9.2 Users (HL-5150D, HL-5170DN Users)>
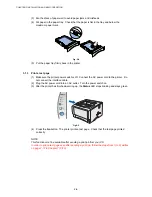
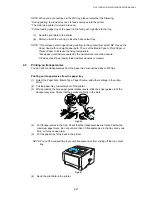
(1) Make sure the printer power switch is on.
(2) Connect the USB interface cable to your Macintosh, and then connect it to the printer.
NOTE: Do not connect the USB cable to the keyboard USB Port or a non-powered USB Hub.
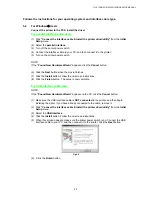
(3) Click
Connect the Interface cable & Install the driver/utility
from the
Initial Setup
menu.
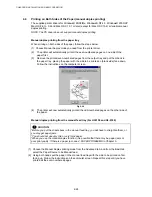
(4) Click the
Install
button, and follow the on-screen instructions.
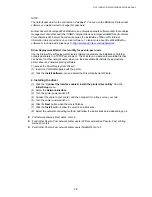
(5) Open the
Macintosh HD
icon.
(6) For Mac OS 8.6 to 9.04 Users: Open the
Apple Extras
folder. Open the
Apple Laser
Writer Software
folder.
For Mac OS 9.1 to 9.2 Users: Open the
Applications
(Mac OS 9) folder. Open the
Utilities
folder.
(7) Open the
Desktop Printer Utility
icon.
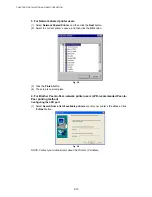
(8) Select
Printer (USB)
, and then click the
OK
button.
(9) Click the
Change……
button in the
PostScript Printer Description (PPD) file
. Select
Brother HL-5150D series/HL-5170DN series
, and then click the
Select
button.
(10) Click the
Change…..
button in the
USB Printer Selection
. Select
HL-5150D series/HL-
5170DN series
, and then click the
OK
button.
(11) Click the
Create….
button.
(12) Enter your printer name (HL-5150D series/HL-5170DN series), and then click the
Save
button.
(13) Select
Quit
from the
File
menu.
(14) The setup is now complete.
<Setting your printer as the Default Printer>
(1) Click the
HL-5150D series/HL-5170DN series
icon on the Desktop.
(2) Select
Set Default Printer
from the
Printing
menu.
(3) The setup is now complete.
<For
Mac
®
OS X 10.1 to 10.2 Users >
(1) Click
Connect the interface cable & Install the driver/utility
from the
Initial Setup
menu.
(2) Make sure the printer power switch is on.
(3) Connect the USB Interface cable to your Macintosh, and then connect it to the printer.
NOTE: Do not connect the USB cable to the keyboard USB Port or a non-powered USB
Hub.
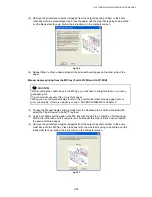
(4) Click
the
Install
button, and follow the on-screen instructions.
(5) Select
Applications
from the
Go
menu.
(6) Open
the
Utilities
folder.
(7) Open
the
Print Center
icon.
(8) Click
the
Add Printer….
Button.
(9) Select
USB.
(10) Select the appropriate printer, and then click the
Add
button.
(11) Select
Quit Printer Center
from the
Printer Center
menu.
(12) The setup is now complete.
Содержание HL-5130
Страница 114: ...HL 5130 5140 5150D 5150DN Service Manual 4 13 24 Remove the paper rear guide Fig 4 20 Paper tray Paper rear guide 2 1 1 ...
Страница 271: ...APPENDIX A 9 Appendix 9 Engine PCB Circuit Diagram 1 2 NAME CODE B512153CIR 1 2 LJ923001 A 9 ...
Страница 272: ...APPENDIX A 10 Appendix 10 Engine PCB Circuit Diagram 2 2 NAME CODE B512153CIR 2 2 LJ923001 A 10 ...
Страница 273: ...APPENDIX A 11 Appendix 11 Low voltage Power Supply PCB Circuit Diagram 120V NAME Low voltage PS Circuit 120V A 11 ...
Страница 274: ...APPENDIX A 12 Appendix 12 Low voltage Power Supply PCB Circuit Diagram 230V NAME Low voltage PS Circuit 230V A 12 ...
Страница 275: ...APPENDIX A 13 Appendix 13 High voltage Power Supply PCB Circuit Diagram NAME High voltage PS Circuit A 13 ...


