


CHAPTER 6 TROUBLESHOOTING
6-36
NOTE:
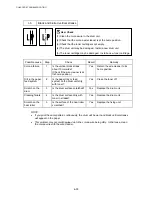
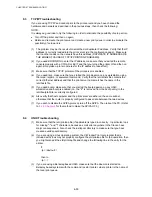
Clean the drum unit as follows:
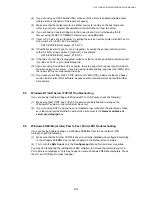
(1) Remove the toner cartridge from the drum unit. Place the printing samples in front of the
drum unit, and find the exact position of the image defect.
Fig. 6-11
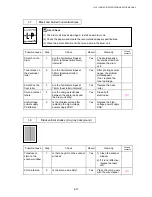
(2) Turn the drum gear by hand while looking at the surface of the photosensitive drum.
Fig. 6-12
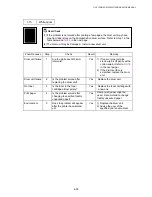
(3) Wipe the surface of the photosensitive drum with a cotton swab until the dust or paper
powder on the surface comes off.
Fig. 6-13
!
CAUTION:
•
Do not wipe the surface of the photosensitive drum with something sharp. (ball-point pen
etc.)
•
Use cleaning liquid which is a 50-50 mixture of ethyl alcohol and pure water.
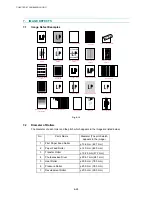
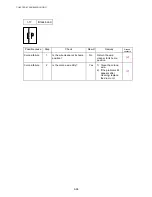
Position of smudge on
the drum
94mm interval
Printing sample
Drum unit
Photosensitive drum
Photosensitive drum
Содержание HL-5130
Страница 114: ...HL 5130 5140 5150D 5150DN Service Manual 4 13 24 Remove the paper rear guide Fig 4 20 Paper tray Paper rear guide 2 1 1 ...
Страница 271: ...APPENDIX A 9 Appendix 9 Engine PCB Circuit Diagram 1 2 NAME CODE B512153CIR 1 2 LJ923001 A 9 ...
Страница 272: ...APPENDIX A 10 Appendix 10 Engine PCB Circuit Diagram 2 2 NAME CODE B512153CIR 2 2 LJ923001 A 10 ...
Страница 273: ...APPENDIX A 11 Appendix 11 Low voltage Power Supply PCB Circuit Diagram 120V NAME Low voltage PS Circuit 120V A 11 ...
Страница 274: ...APPENDIX A 12 Appendix 12 Low voltage Power Supply PCB Circuit Diagram 230V NAME Low voltage PS Circuit 230V A 12 ...
Страница 275: ...APPENDIX A 13 Appendix 13 High voltage Power Supply PCB Circuit Diagram NAME High voltage PS Circuit A 13 ...


